[Full Guide] How to Connect iPhone to PC Wiredly and Wirelessly?
Connecting iPhone to your PC brings you a lot of convenience and possibilities. Once this connection is established, you can freely transfer photos, sync music, and back up important data to your computer. You can even easily manage iPhone files on your computer and keep them synchronized across platforms.
This guide explores four ways to connect iPhone to PC and provides step-by-step instructions to simplify your experience. Whether you want a wired or wireless connection, this guide can meet your needs. Choose the method you prefer to complete the connection, and then make full use of the device's functions to ensure efficient data management and accessibility.
Way 1: How to Connect iPhone to Computer with USB Cable
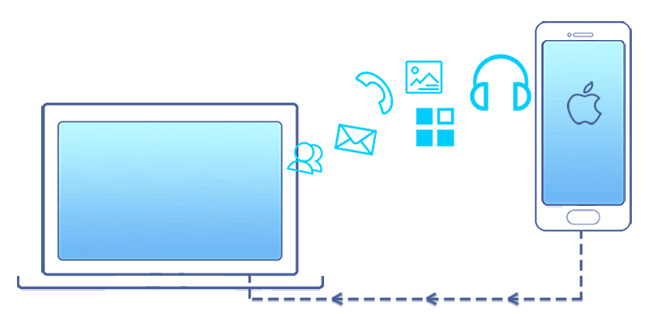
The easiest and most direct way to connect iPhone to computer is to use a USB cable, requiring no iTunes or third-party software. It allows for easy access and transfer of photos and videos from your iPhone to your PC. However, this method has limitations; it does not support transferring music to your computer or adding ringtones to your iPhone. Make sure you have a USB cable that came with your device. Then you can follow the steps below.
- Take out the USB cable, plug the large end into the PC and the small end into iPhone.
- Once the connection is enabled, and the computer detects your iPhone, you will get a tip on your device.
- Unlock your iPhone, and you will see the message "Allow this device to access photos and videos?", tap on "Allow".
- Turn to your computer, click on "This PC" and you can see your iPhone under Devices and drives section.
- Double-click the iPhone to open the internal storage, and then, you can copy photos and videos from your iPhone to this computer.
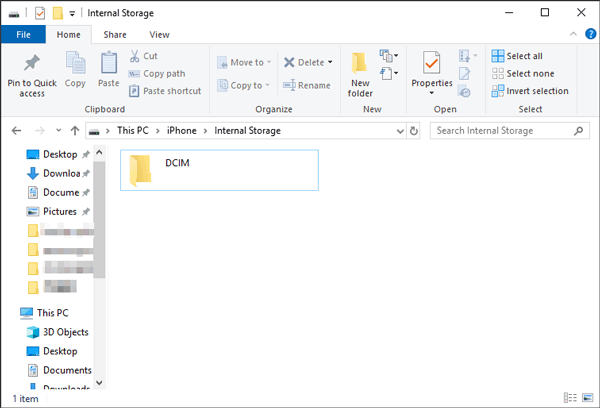
By the way, if it is the first time your iPhone connects to the computer, you may need to install the USB driver firstly. But don't worry, Windows will automatically complete the driver installing process for you.
Way 2: How to Connect iPhone to PC with iTunes
The official method for connecting your iPhone to a computer and syncing data is through iTunes. You can use iTunes to either sync all of your iPhone's data and settings to a PC for backup, or to sync specific files like books, ringtones, movies, music, and images from your PC to your iPhone. You can connect iPhone to PC using iTunes wirelessly or via USB. Here are the steps you might follow.
How to connect iPhone to computer with USB:
- Link your iPhone to a computer with an original USB cable.
- While connecting, iTunes might be launched automatically. Please make sure that the latest version of iTunes is installed. Go to "Help" > "Check for Update" on iTunes and update the iTunes if necessary.
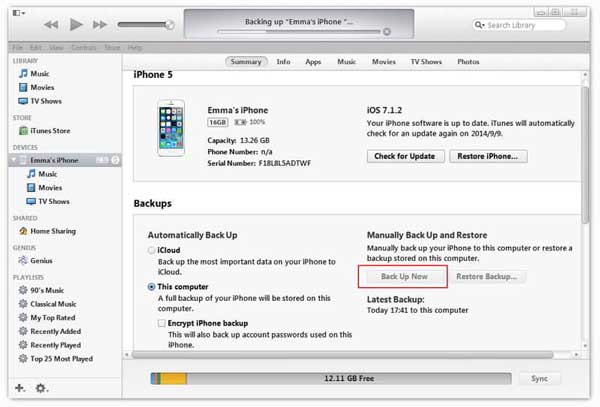
- Click the iPhone icon on the iTunes interface.
- Click "Back Up Now" to create a local iPhone backup on your computer, then select contents to sync.
- Hit "Apply" and "Sync" to begin the syncing process, and wait for a while till the process ends.
Actually, by the time you can find the iPhone icon on the iTunes interface, you have already successfully connected your iPhone to the computer, and you might start to manage your iPhone here on iTunes. Next, this guide will take the file backup as an example to manage files on iTunes after connecting.
You can also click "Option" > "Automatically sync when this iPhone is connected" to sync whenever you connect your iPhone to your computer.
How to connect iPhone to laptop wirelessly:
You could also connect your iPhone to a computer with WiFi. You can refer to the following steps to achieve that.
- Connect your iPhone to a computer with an original USB cable.
- Run iTunes on your computer.
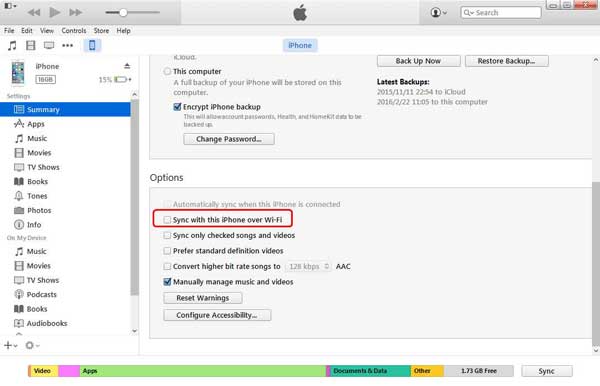
- Click the iPhone icon on the iTunes interface, then scroll to the "Options" button and check "Sync with this iPhone over Wi-Fi" in the right panel. Then, click the "Apply" option to start the syncing process.
- Wait for a while to finish syncing for changes to be applied on your iPhone and then disconnect your iPhone from the computer.
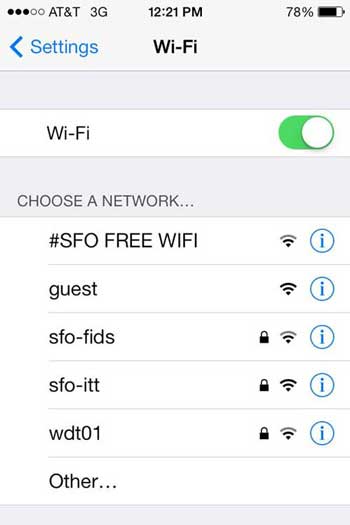
- Go for your iPhone's "Settings" and tap "Wi-Fi" > "Wi-Fi Network". And please ensure that your iPhone and the computer are connected to the same WiFi network.
- Click "Settings" on the left top of the screen, and scroll down to tap "General" > "iTunes Wi-Fi Sync". And please ensure that iTunes is running on your computer now.
- Tap on "Sync Now" and your iPhone will sync wirelessly with your PC via WiFi. (How to Fix iPhone Not Showing Up in iTunes)
Way 3: How to Connect iPhone to PC Wirelessly
Want to transfer data from iPhone to computer but don't have a USB cord on hand? You can require cloud-based file-sharing solutions. Now, we will show you how to link iPhone to computer using iCloud and other third-party apps like Dropbox. Here we set iCloud as an example, to show you how you can access your iPhone files on PC and sync data across different devices.
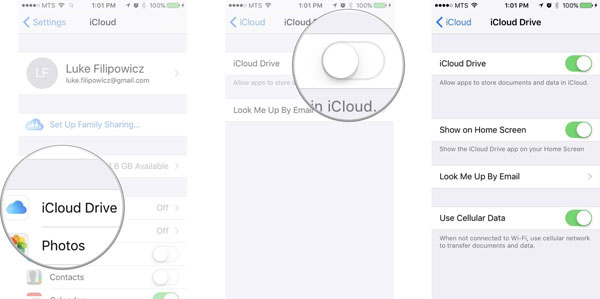
- First of all, you need to enable iCloud backup on your iPhone by navigating to "Settings" > [your name] > "iCloud".
- Select the data category you want to transfer to the computer and turn on its corresponding button.
- On your Windows PC, download and install iCloud from Apple official site. Run it and log in to your iCloud account.
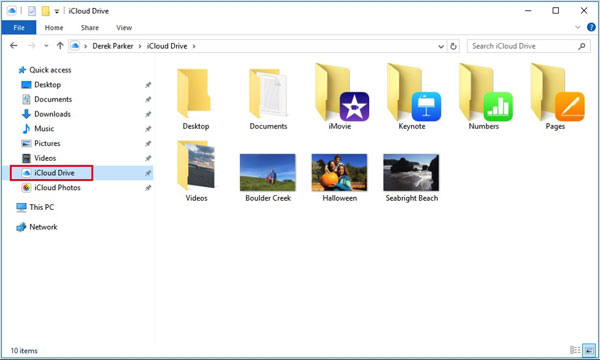
- Go to iCloud Drive, and here, you can view and copy files to your PC.
Way 4: How to Connect iPhone to Computer without iTunes
If you don't want to link iPhone to computer without iTunes, you can also use third-party software to connect iPhone to PC. Here, we strongly recommend MobiKin Assistant for iOS, because it is simple yet powerful iPhone data transfer software to connect your iPhone to Windows PC via a USB cable and transfer files without any data loss. For people who don't want to use iTunes, this software is simply a perfect iTunes alternative.
Core Features of Assistant for iOS:
- Provides two connecting methods, that's to say, you can connect iPhone to PC via USB cable or WiFi.
- It enables you to transfer a wide range of data between iPhone and computer, which include contacts, SMS, photos, videos, music, call logs, notes, books, apps, etc.
- No data quality loss during or after the data transferring process.
- It comes with 1-click iTunes backup and restore ability.
- The Mac version of Assistant for iOS allows you to connect iPhone to Mac and transfer files effortlessly.
- Supports overall iPhone/iPad/iPod models, including the latest iPhone 17/Air/17 Pro/17 Pro Max/16/15/15 Pro (Max), and iOS 26/18/17.
Below, I'll show you how to connect iPhone to PC and transfer files from iPhone to computer with Assistant for iOS
Step 1. Connect iPhone to Windows PC
Free download Assistant for iOS on your PC and connect your iPhone to PC via USB cable. Tap "Trust This Computer" on the iPhone screen if a pop-up appears.

Step 2. Select the files you need
From the main interface of the software, you can go to the left panel, where all files categories are displayed. Click each data category, you can preview and choose the files you want to transfer.

Step 3. Transfer files from iPhone to PC
After selecting all the files you need, you can click on the "Export" button from the top menu to start the transfer process from iPhone to PC.
Video Guide:
The Bottom Line
As you can see, you can hook up iPhone to computer in a number of ways. What works best for you will depend on what you want to achieve. iTunes and iCloud can make the connection done and sync your iOS data wirelessly. However, both methods will overwrite any previously backup data. Additionally, you can directly connect your iPhone to a Windows computer via a USB cable, but you can only move images and movies within your camera roll in this way.
MobiKin Assistant for iOS is suggested if you wish to backup or transfer all of the iOS data from your iPhone to your PC. It guarantees a quick transfer speed and supports a variety of media types, including messages, music, photos, and more.
Related Articles:
How to Manage Photos on iPhone with iPhone Photo Manager?
Transfer Data to New iPhone from Old iPhone/Android/PC
[100% Working] How to Fix "Unable to Complete Data Transfer" Error on iPhone


