How to Root ZTE Andriod Devices in One Click
ZTE is the No.4 largest handset manufacturers in the world and some models of it like AXON and BLADE are very popular for many users. And rooting their ZTE devices has been their preferred choice to access to the highest authority of the Andriod devices. After rooting, one can flash a custom ROM and Kernel on the ZTE device and uninstall the unwanted preinstalled apps to beautify the device's performance, and also it can better protect the battery life. So are you looking for the ways to root your ZTE mobile phone with ease? There are three ways for you to root your ZTE device with KingoRoot or Root Master or iRoot.
2. How to Root ZTE Device with KingoRoot
3. What should I Do to Root ZTE Device with Root Master
1. Preparation before Rooting
Before rooting the ZTE Andriod handset, there are some preparation is needed to make for guarantee.
* Ensure that your ZTE device has enough power, generally at least 60% battery level.
* Backup all data of your ZTE device in case of losing it.
2. How to Root ZTE Device with KingoRoot
KingoRoot is a free and safe Andriod rooting tool, which supports almost all models of Andriod devices including ZTE devices. It enables you to root your Andriod devices with a few easy steps. Now follow the steps below to start rooting ZTE device.
Step 1. Download KingoRoot.apk and install it on unrooted Andriod mobile. To install the app, please check "Unknown Sources" on your device and allow installation of KingoRoot.apk. Go for "Settings" > "Security" > "Unknown Sources".
Step 2. After installing the app, launch it and you might see a main interface of KingoRoot as below. Click the "One Click Root" button to start the rooting process. Then wait for a while until you get the message from the app to remind you that your phone has been rooted successfully.

Learn more about How to Perform KingoRoot.
3. What should I Do to Root ZTE Device with Root Master
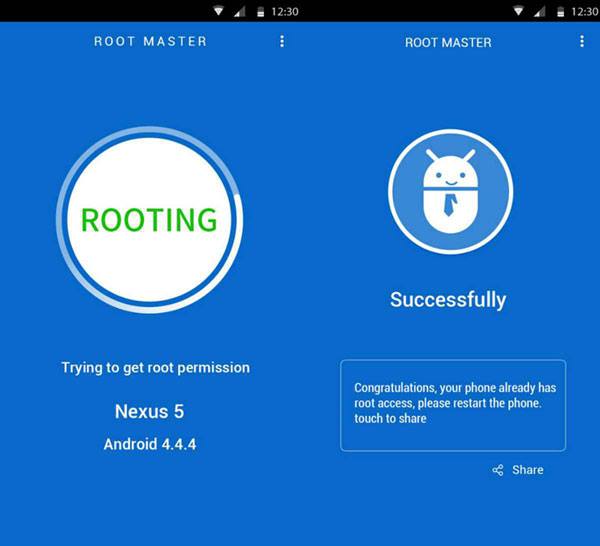
Root Master is a great Andriod rooting app with easy and faster performance. It is compatible with most of Andriod devices, including ZTE, HTC, Sony and other phone models. And it has improved its functions to access more apps and extend battery life. Now please follow the guide below to root your ZTE device with Root Master.
Step 1. Download Root Master software and install it on your computer.
Step 2. Connect your ZTE mobile device to PC with a USB cable. To connect successfully to your PC, please enable the USB Debugging Mode on your device. Go for "Settings">"Developer Options" to enable it. For some new ZTE devices, you might need to visit "Settings" > "About Phone" > "Build Number" and tap it for 5 to 7 times to enable the Developer Options.
Step 3. Launch the application and click "Root" button to start rooting. After a few minutes, a message shows to remind you that your ZTE device has been rooted successfully.
Learn more about Full Guide of Root Master.
4. Root ZTE Device with iRoot
iRoot is one of the greatest free Android rooting tools, which supports to root safely almost all models of Andriod devices from different manufacturers. And it is considered as a reassuring rooting app for it prevents from losing data when rooting your phone. However, it is suggested to backup all your phone data before rooting just in case. And iRoot provides two ways to root your Andriod device, rooting without computer or with computer. Now please follow the instructions below to start to root your ZTE device.
Root ZTE without Computer:
Step 1. Download and install the iRoot in Andriod version on your ZTE device.
Step 2. Launch the app and click "Root Now" to start rooting and wait for some time until it reminds you that your phone has been rooted successfully.
Root ZTE with Computer:
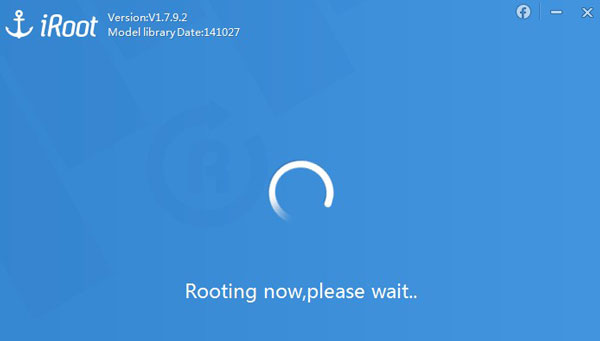
Step 1. Download iRoot in Windows version and install it on your computer.
Step 2. Run the app and connect your device to your PC with a USB cable. To make your device detected successfully by the computer, please enable the USB Debugging Mode on your device. Go for "Settings">"Developer Options" to enable it.
Step 3. After connecting to your PC, click "Root" button to start the rooting process. Wait for some time, and you might get the message to tell you that your device has been successfully rooted.
Conclusion
It's important to note that rooting your ZTE Android device may void its warranty and could potentially damage your device if not done correctly. Be sure to follow the instructions carefully and do your research before attempting to root your device. Besides, you'd better back up your ZTE data in advance if you don't want to lose your important data.
Related Articles:
How to Check Whether Your Android Device is Rooted or Not?
