How to Remove Root from Android Devices with Ease?
Android devices are best known for their numerous customization options, especially those that can only be achieved on rooted gadgets. Rooting your Android smartphone or tablet provides you with a relatively easy way to modify your device's operating system. You can then choose to modify your Android gadget's default settings or simply carry out multiple life-saving customizations that can help to improve your smartphone or tablet's performance and battery life.
See Also: How to Check Whether Your Android Device is Rooted or Not
There might come a time when you may need to unroot your Android device despite all these amazing benefits. For instance, you may wish to sell your gadget, download the latest over-the-air (OTA) updates that are being provided by your carrier, want to return your device to the shop for troubleshooting purposes or are just concerned about your security. That is why this informative guide is going to educate you on how to easily unroot your Android device.
1. How to Remove Root from Android Manually?
2. How to Unroot Android Devices with SuperSU app?
3. How Can I Remove Root Access on Android with KingoRoot?
4. How to Unroot Samsung Devices Specially?
How to Remove Root on Android Manually?
This introductory tutorial section is going to show you exactly how you can manually unroot your Android smartphone or tablet. Kindly follow the following steps to unroot your gadget.
Step 1. Visit the Google Play Store and download any leading root file manager application of your choice (preferably Root Browser or ES File Explorer).
Step 2. Launch the root file manager, select "/system/folder" and then tap on the "/bin/" section. Locate the "SU" file, tap and hold it and then select the "Delete" option provided. Kindly skip to the next tutorial section (tutorial b) if you do not find the "SU" file on your device.
Step 3. Open the "/system/xbin/" folder and then proceed to delete the "SU" file. After that, delete the "Superuser" APK file that is located in the "/system/app" folder.
Step 4. Exit the root file management application and then reboot your device to complete the unrooting process.
How to Unroot Android Devices with Super SU?
Step 1. Download and install the "SuperSU" application from the Google Play Store (you can obviously skip this step if you already have the application).
Step 2. Launch the application and then tap on the "Settings" menu option that is located on the screen's top right corner. Then select the "Full Unroot" option and then confirm by tapping "Continue".
Step 3. Wait for the operation to complete and then reboot your Android device. After that, you can uninstall the "SuperSU" application.
How Can I Remove Root Access on Anroid with KingoRoot?
KingoRoot is an advanced PC and Android application that can be used to both root and unroot any Android device in a single click. Kindly follow the following steps to unroot your gadget using the PC version of the easy to use Android root application.
Step 1. Download the KingoRoot program on your PC, locate its installation package file, double-click on it and then follow the on-screen instructions provided to install it.
Step 2. Launch the program and enable the "USB Debugging" option on your Android smartphone or tablet. Then connect the device to the computer with USB cable.
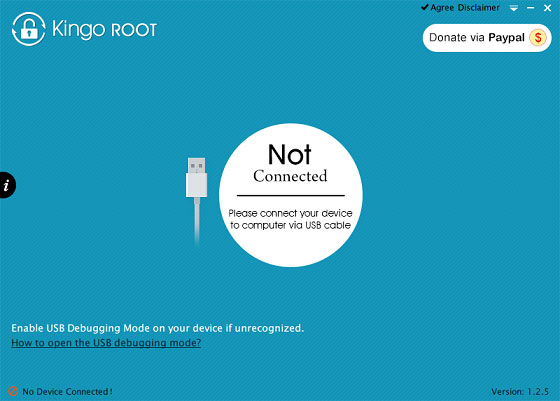
Step 3. This program will detect your device and display the root status in the main interface. Now, just select the program's "Remove Root" option and wait for about four minutes for the unrooting process to come to an end.
Step 4. Click "Finish" once you have been informed that KingoRoot app has successfully unrooted your Android device.
Extra Tips: How to Remove Root Access on Samsung Devices?
Samsung Galaxy devices are a bit complicated in nature, hence; making them a little difficult to remove root access. This does not have to be the case as you can follow the steps provided below to easily unroot your Samsung Galaxy device even if you were unsuccessful with the other three methods provided above.
Step 1. Download the appropriate stock firmware of your Samsung Galaxy device. Unzip the downloaded Samsung Galaxy stock firmware to locate the ".tar.md5" file.
Step 2. Download and install the "Odin3" PC program through the link of odindownload.com. This program will be used to push the downloaded stock firmware directly from your computer to your Samsung Galaxy device.
Step 3. Boot your Android device in "Download" mode by holding the "Home, Volume Down, and Power" buttons. Now, connect your device to the computer and launch Odin 3.
Step 4. Click the ".PDA" button provided, locate the ".tar.md5" file you had downloaded and uncheck the "Auto Reboot" and "PDA" boxes.
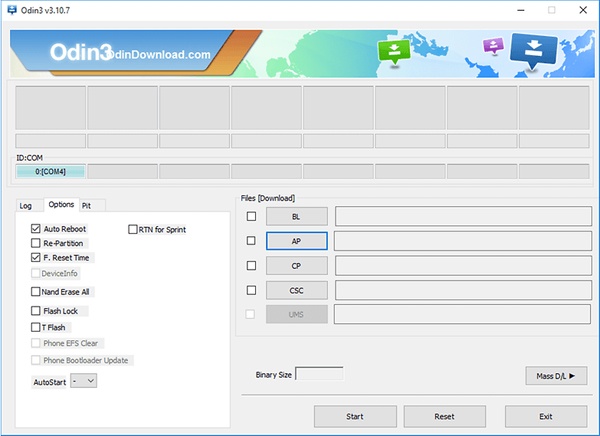
Step 5. Click "Start" and wait for about 8 minutes for your Samsung Galaxy device to be unrooted. The word "PASS" will be displayed on the Odin3 program's interface to indicate that your device has been successfully unrooted.
Your device will now automatically boot into the "TouchWiz" operating system.
Related Articles:
How to Root Samsung Devices with Odin
How to Transfer Contacts from Android to Computer? (4 Quick & Safe Ways)
Top 7 Ways to Transfer Files from Android to Android (Ultimate Guide)
