How to Transfer Files from Windows 11 to iPhone: Complete Guide
As more and more people use both Windows PCs and iPhones, sharing files between them has become more important than ever. Whether you're sending documents, photos, videos, or music from a Windows 11 PC to an iPhone, finding a simple and reliable way to transfer files is essential.
This easy-to-understand guide will show you seven different methods to move files from a Windows 11 computer to an iPhone. These methods include both wired and wireless options, with or without using iTunes, so you can choose the one that works best for you.

- Part 1: Transfer Files from Windows 11 to iPhone Using iTunes
- Part 2: Transfer Files to iPhone from Windows 11 with Assistant for iOS [Hot!]
- Part 3: Transfer Files to iPhone from PC in Windows 11 via iCloud
- Part 4: Transfer Files from Windows 11 to iPhone Using Email
- Part 5: Transfer Files to iPhone from Windows 11 Using Google Drive
- Part 6: Transfer Files from Windows 11 to iPhone through SHAREit
- Part 7: Transfer Files to iPhone from PC in Windows 11 via USB
Part 1: Transfer Files from Windows 11 to iPhone Using iTunes
If you want to move apps and media files from your computer to your iPhone, iTunes is one of the tools you can use. However, keep in mind that using iTunes to sync files will erase the existing data on your iPhone. Once erased, that data cannot be recovered. If you want to avoid losing anything already on your device, it's better to check out Method 2, which helps you transfer files without wiping your phone. But if you're okay with the data being replaced, here's how to transfer movies, photos, music, podcasts, and more using iTunes.
- First, gather all the files you want to send to your iPhone. Save them in an easy-to-find folder on your computer.
- Next, open iTunes and connect your iPhone to the computer using a USB cable.
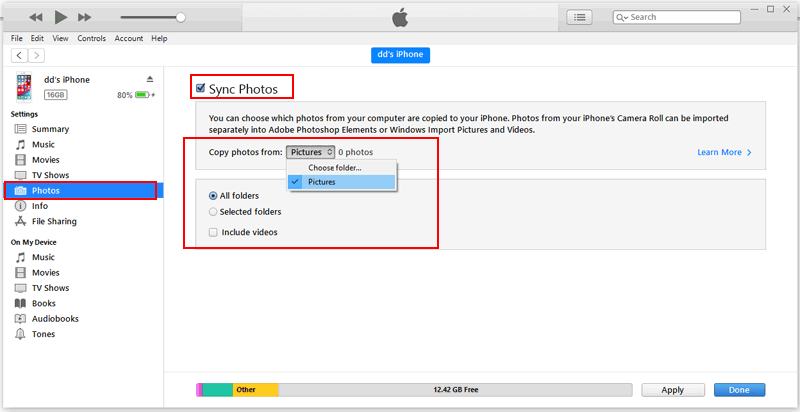
- In iTunes, go to the left sidebar and find the "Settings" section. Choose the type of content you want to transfer. For example, if you're sending photos, click on "Photos."
- Then, check the box next to "Sync Photos" and choose the folder where your photos are stored.
- Finally, click the "Apply" button. iTunes will start syncing the selected photos to your iPhone.
Guess you like:
Part 2: Transfer Files to iPhone from Windows 11 with Assistant for iOS
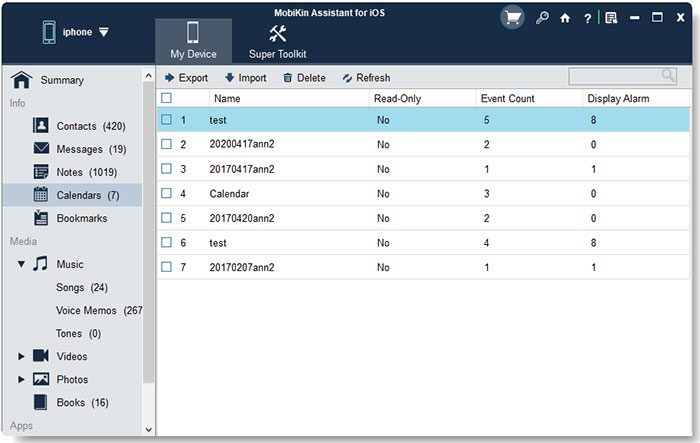
If you're looking for one of the easiest and fastest ways to move files from your PC to your iPhone, MobiKin Assistant for iOS is a great choice. This powerful iOS file transfer tool lets you easily transfer data between your iPhone and computer without needing to use iTunes.
All you need is a USB cable to connect your iPhone to your computer. Then, just install the program and you're ready to begin transferring files. Here are some of the top reasons why this tool is so useful:
Key Features of Assistant for iOS:
- It saves you time by allowing you to move large files from PC to iPhone, and vice versa, in just a few minutes.
- You can transfer over 15 different types of files, including photos, videos, messages, contacts, and more.
- There's no risk of losing your data during the process, unlike iTunes which may erase existing content.
- It works on both Windows and Mac computers.
- You can also manage your iPhone files directly from your computer, making it easy to add, delete, or organize content using your keyboard.
- Works with all generations of iOS devices, including iPhone 17/Air/17 Pro/17 Pro Max/16/15/14/13/12/11/X/8/7, etc.


How to transfer files from PC to iPhone without iTunes using Assistant for iOS?
Step 1: Install Assistant for iOS on your computer
Connect your iPhone to your computer using a USB cable. When a message appears on your iPhone asking if you trust this computer, tap "Trust." Then, open Assistant for iOS on your computer. The program will automatically detect your iPhone.

Step 2: Select the files you need
Choose the types of files you want to transfer from your computer to your iPhone. Click the "Import" button at the top. This will open a window showing your computer's files.
Step 3: Finish transfer files from PC to iPhone
Pick the files or folders you want to move to your iPhone and click "Open" to start the transfer.
Make sure your iPhone stays connected during the process. Once the transfer is complete, open the related apps on your iPhone to view the content.
If you want to move videos from your computer to your iPhone without using iTunes, we also have a guide that can help. You can also learn how to transfer photos from PC to iPhone.
Video Guide:
Part 3: Transfer Files to iPhone from PC in Windows 11 via iCloud
If you want to transfer files between your iPhone and your Windows 11 PC without using iTunes, iCloud is a simple and convenient solution. iCloud is Apple's cloud service that lets you store and access your files from different devices. Here's how you can use it to move files between your PC and iPhone easily.
- First, on your iPhone, go to the "Settings" app and tap your name at the top to open your Apple ID settings. Then, choose iCloud and make sure that "iCloud Drive" is turned on.
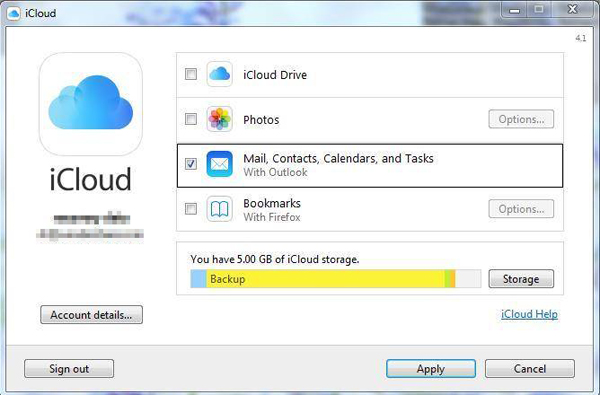
- Next, on your Windows computer, download and install the iCloud for Windows app from Apple's website. Once installed, open it and sign in with your Apple ID. In the app, make sure the option for iCloud Drive is selected.
- Now, open File Explorer on your PC. You should see a folder called iCloud Drive. You can drag and drop the files you want to transfer into this folder. After a short while, the files will upload to iCloud.
- On your iPhone, open the "Files" app and tap on the "Browse" tab. Then choose iCloud Drive. You will see the files you uploaded from your computer, ready to view or download.
Can't Miss:
Part 4: Transfer Files from Windows 11 to iPhone Using Email
Among all the ways to move files from an iPhone to a PC without using iTunes, email is one of the easiest. Whether you use Gmail, Yahoo Mail, or any other email service, you can send files quickly as long as you have a stable internet connection. The speed of the transfer mainly depends on how fast your internet is.
Here's how it works using Gmail to share photos, videos, and files from Windows 11 PC to iPhone:
- Open the Gmail app on your iPhone. If you don't have a Gmail account yet, you can create one for free.
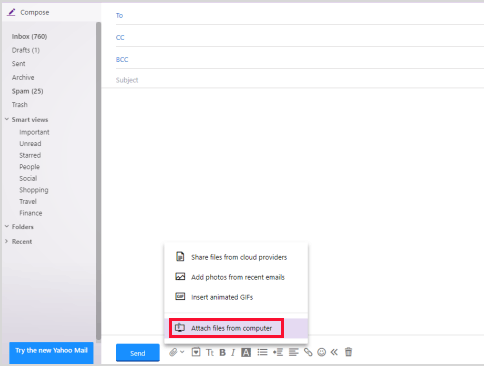
- Add the files you want to transfer to a new email. You don't even need to send it to someone else. Just save it as a draft, or you can send it to your own email address.
- Go to your PC and open Gmail in your web browser. Check the Drafts folder or your inbox. From there, you can easily download the files to your computer.
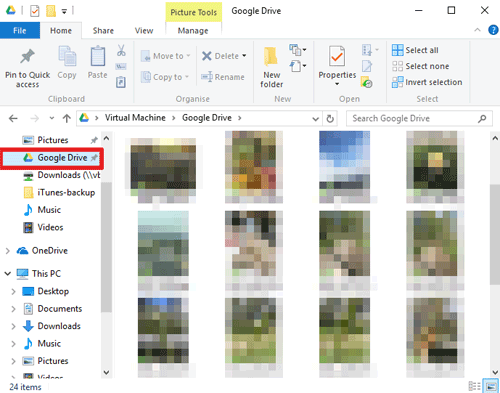
Part 5: Transfer Files to iPhone from Windows 11 Using Google Drive
Another great solution is Google Drive if you wish to transfer your data from your computer to your iOS device without iTunes. Google Drive is a great cloud-based storage platform built by Google that allows you to consolidate your business or personal data into one place. Below are the steps to transfer your data computer to iPhone/iPad without iTunes.
- Open your Google Drive from your iPhone or PC and log in with your credentials.
- Click the + My Drive option to transfer. Click on New, and a menu will pop up, giving you options to upload files to Google Drive.
- Select "Upload Folder" or "Upload Files", depending on what you want. If all your desired files are in one folder, for example, photos or music folder, you can upload them directly to keep your data organized. Else, you can upload each file individually. This applies to both PC and iPhones.
- Download your uploaded files from your PC or iPhone.
Part 6: Transfer Files from Windows 11 to iPhone through SHAREit
SHAREit is a free tool that makes it easy to transfer data between your iPhone and PC. To get started, go to ushareit.com and download the app for both iOS and Windows.
- Launch SHAREit on your computer and choose the option to display the QR code.
- On your iPhone, open the SHAREit app, tap the three dots in the top-left corner, and select "Connect PC/Mac."
- Choose "Scan to Connect" and use your iPhone's camera to scan the QR code shown on your computer. Make sure to allow camera access when prompted. If scanning doesn't work right away, try adjusting the distance between your phone and the screen until it focuses properly.
- Once connected, select the files you want to transfer. You can drag and drop them into the SHAREit window. A prompt will appear on your iPhone—just tap "OK" to receive the files in the SHAREit app.
- To save or open the files, tap the file inside the app, hit the share icon in the lower-left corner, and pick how you want to handle it.

For example, text files can be added to Notes. Photos and videos will go straight into your iPhone's camera roll. Music files will be stored inside SHAREit and can be played directly from the app.
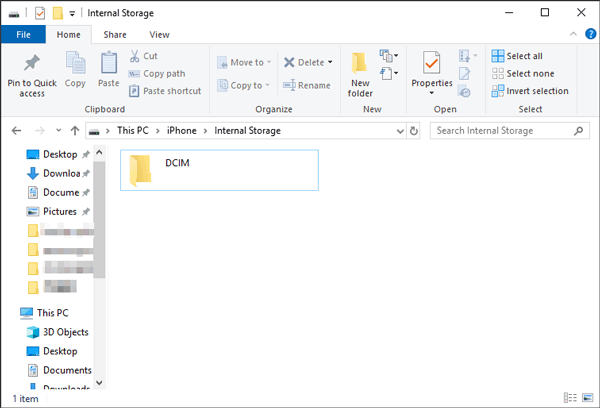
Part 7: Transfer Files to iPhone from PC in Windows 11 via USB
To move files from your PC to your iPhone using a USB cable, just follow these easy steps.
- First, plug your iPhone into the computer using a USB cable.
- Next, unlock your iPhone and allow the computer to access it if prompted. Your iPhone will then show up in File Explorer, and you'll see its available folders.
- Now, go to the folder on your PC where your files are stored. Choose the files or folders you want to transfer.
- Finally, copy them and paste them into one of the folders on your iPhone's storage through File Explorer.
Final Words
By now, you've learned seven different ways to transfer files from a PC to an iPhone, whether you want to use iTunes or not. While all of these methods help you move your files, each one works a little differently and comes with its own pros and cons. The best choice depends on what you need and what's most convenient for you.
No matter which method you go with, it's always a good idea to back up your files first. This simple step can save you from losing important data during the transfer process.
Relative Articles:
4 Flexible Ways to Connect iPhone to PC [With/Without USB]
5 Ways to Transfer Files from iPhone to PC Wirelessly
[Guide] Transfer Music from iPhone to Computer without iTunes
3 Ways to Back up iPhone to External Hard Drive without iTunes
