How to Install Android Lollipop on Phone and Tablet?
We know that Google have finally revealed Android 5.0 Lollipop last October. Soon after they also developed Android 5.0.1 and now Android 5.0.2 is finally here for the Nexus 7 and Nexus 10 tablets. So far Google has only rolled out Lollipop for its Nexus series of phones and tablets. That may have a little something to do with the fact that many Nexus users only bought the devices because they were assured that they would be among the first to get Android updates. But now, the facts have proved that the update is not entirely ready, so if you wish to experience the charm of the Android 5.0 Lollipop once it is released, you can updated factory images provided by Google to install the update on your Nexus device. Meanwhile, you'll also be required to install the Android SDK (or ADB) on the device. After that, you can follow the below instructions to install Android 5.0 Lollipop on Nexus phone or tablet step by step, and this method can not only used in your Windows computer, but also compatible for your Mac, Linux or ChromeOS machines as well.
IMPORTANT: The Android 5.0.2 System Image download contains all the files necessary for installation. Basically, everything that you would download as in a regular OTA Android update. However, bear in mind that this will wipe all user data and settings. Your phone will be reset to factory settings. I repeat, your phone will be reset to its original factory settings after this step. So please backup your Android data before doing it.
Steps to Install Android 5.0 Lollipop on Nexus Phone or Tablet
Step 1. Download and Install Drivers on Your Computer
The first thing that you must do before you can install Android 5.0.2 Lollipop is to install ADB and Fastboot to your computer. This program allows your Android devices can successfully connect to the computer via USB and flash the software into your phone or tablet.
Download the ADB installer for Windows and run it as Administrator: please remember to give the app access to run as an administrator. Then simply type a Y and enter (when prompted) to select yes to Install ADB & Fastboot and Drivers. When a new window appears just follow the steps for driver installation.
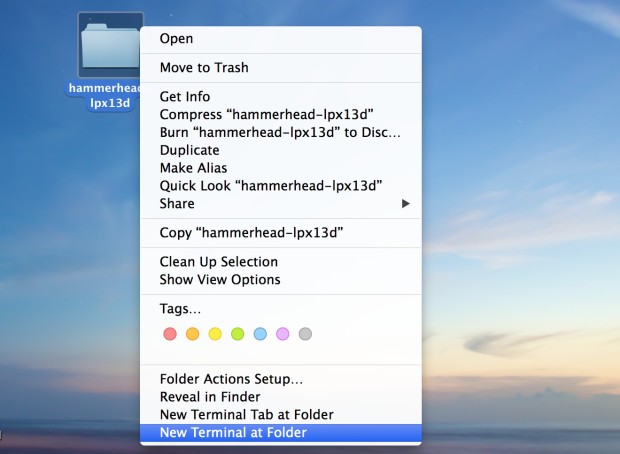
Tips: In order to install ADB on a Mac, Linux or ChromeOS you need to open Terminal paste the code from xda. Open Terminal by going to search, typing Terminal, then right clicking and opening the program.
Step 2. Download and Unzip Factory Image on Your Device
Now you'll need to be able to flash the new Android 5.0.2 image on your device. But obviously you cannot do this without going into the developer options menu and enabling USB Debugging.
- For Android 2.3 or earlier: Enter "Settings" < Click "Applications" < Click "Development" < Check "USB debugging".
- For Android 3.0 to 4.1: Enter "Settings" < Click "Developer options" < Check "USB debugging".
- For Android 4.2 or newer: Enter "Settings" < Click "About Phone" < Tap "Build number" for several times until getting a note "You are under developer mode" < Back to "Settings" < Click "Developer options" < Check "USB debugging".
After downloading the final Android 5.0.2 Lollipop System Images on your device, you can unzip the file to a folder. Then, you can find the folder and type "cmd" into the address bar (Windows). For Mac, Linux or Chrome OS users, you can open Terminal and change the folder.
Step 3. Finish the Installation
Open a Terminal in the adb folder and type "adb reboot bootloader" then hit enter. Then, you can type "fastboot oem unlock" in Fastboot and hit enter again. Now the program will start to erase data on your Android phone or tablet. Now you can open the folder with the unzipped Image file and type cmd into the address bar. Now go to "System Preferences" > "Keyboard" > "Shortcuts" > "Services" > "New Terminal at Folder" in the settings menu. After that, you can right-click a folder and you can open Terminal to copy and paste "flash-all.bat" to install the update to your device.
Once the files begin to install, your Nexus device may reboot. An Android figure will appear, followed by an Android logo. If the logo screen remains for a long time, just wait patiently. Be warned. The wait time could be as long as ten minutes. Once prompted to complete setup you can unplug your device. When finished, you can immediately start using Android 5.0.2 Lollipop on your Nexus phone or tablet. Enjoy!
Conclusion
That's the whole settings on how to install Android 5.0 Lollipop on your Nexus phone or tablet. If you found something important have been deleted after the updating, you can use the best Android 5.0 Lollipop Data Recovery software to retrieve them on Windows or Mac computer easily.
Related Articles
How to Recover Deleted Text Messages from Sony Xperia
How to Recover Deleted Contacts from LG Phone
How to Recover Deleted from Broken Android Phone
