
Top 7 Ways to Transfer Files from Android to Android (Easy Guide)
TL;DR:
No matter which method you choose, transferring files between Android devices is straightforward when you use the right tool for your needs. If you want the fastest and most reliable way to move all your important data without limitations, a dedicated transfer program like MobiKin Transfer for Mobile is an excellent choice.
If you want to transfer files from Android to Android, there are a variety of different fixers that can come to the rescue, but do they truly rescue from start to finish? No, a lot of them do not, even if they are being promoted to do so. Not every guarantee attached to a fixer is accurate, as they are not regulated by any entity. There are only a few fixers that can actually transfer files from one Android to another just as one would want.
- Part 1: One Click to Transfer Files from Android to Android with Mobile Transfer (Swift)
- Part 2: How to Transfer Files between Android Phones with Android Assistant
- Part 3: How to Transfer Files from Android to Android with NFC
- Part 4: How to Transfer Files between Android Devices with Quick Share
- Part 5: How to Transfer Files from One Android to Another with Bluetooth
- Part 6: How to File Transfer Android to Android with Cable Transfer
- Part 7: How to Transfer All Files from Android to Android with Google Backup
Part 1: One-Click to Transfer Files from Android to Android with Mobile Transfer
For those individuals who prefer simplicity, even when it comes to the solution utilized to conduct transfers between devices, then MobiKin Transfer for Mobile (Windows/Mac) should be taken into account. It is an easy, safe, and effective tool that will never fail to grant you desired results with each transfer conducted. It is simple to learn how to transfer all files from Android to Android with it.
Supported files: To transfer files from Android to Android, almost all important files are supported, including contacts, text messages (SMS), call logs, photos, music, documents, videos, apps and more.
Supported devices: Almost all Android phones/tablets and iOS devices are supported, including Samsung, Huawei, Sony, Motorola, ZTE, OPPO,iPhone, iPad, iPad, etc. For example, Samsung Galaxy, Xiaomi/Redmi/POCO, HUAWEI, and more.


Steps to Implement File Transfer via MobiKin Transfer for Mobile:
Step 1: Download MobiKin Transfer for Mobile to your computer. Once it has finished installing, launch it.
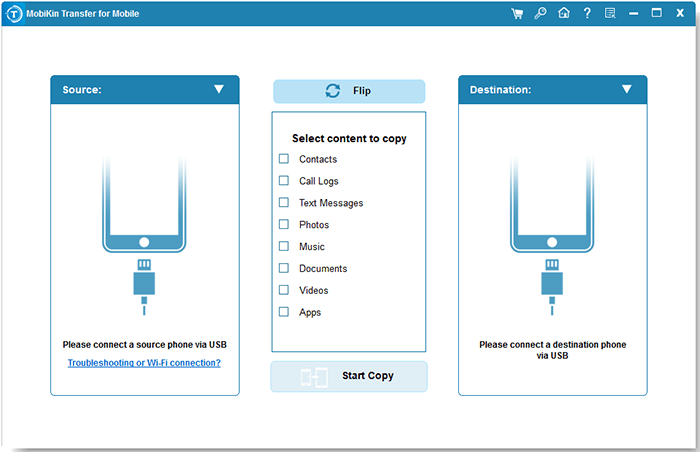
Step 2: Connect the two devices to the computer as prompted, using USB cables or Wi-Fi. USB cable is suggested for stable transfer.
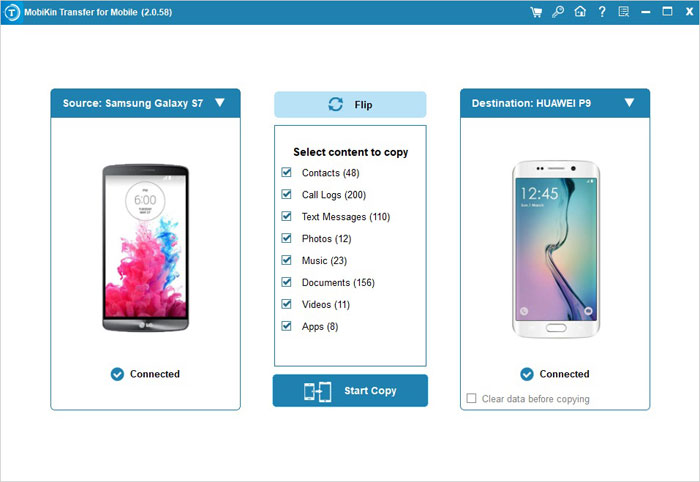
Step 3: Select files that you wish to transfer to the Android device of choice, and with one-click transfer will come to pass in a timely fashion manner.
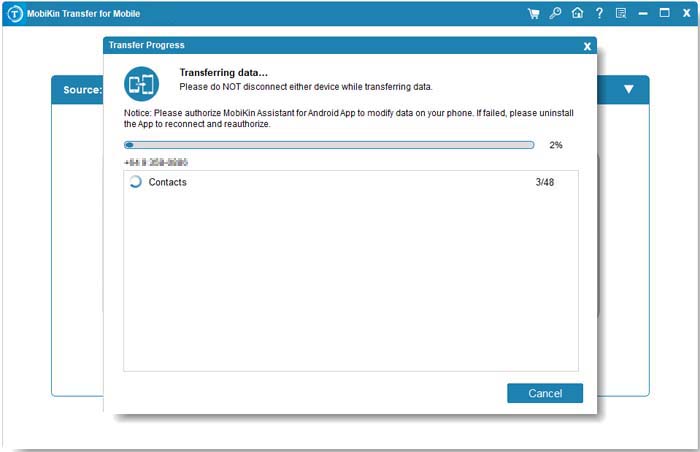
Quick Video Tutorial:
Click to Learn: Top 7 Best Screen Mirroring Apps for Android to PC [Worth a Shot]
Part 2: How to Transfer Files between Android Phones with Android Assistant
MobiKin Assistant for Android (Windows/Mac) has quickly become a favorite for those individuals who want the fastest way to transfer files between Android phones, and nothing is pinpointing that this will change anytime in the near future. You can conduct backup from Android to computer and then restore this backup from the computer to Android utilizing one-click 'Backup & Restore' feature.
It supports to transfer everything from Android to Android phone, such as contacts, pictures, movies and more. By the way, this is deemed to be the best app to transfer files between Android devices.
Steps to Implement File Transfer via MobiKin Assistant for Android:
Step 1: Before one can start benefiting from this program, one must first download it to computer, install it, and then launch it.
Step 2: Connect the device with a USB cable or Wi-Fi in order for MobiKin Assistant for Android to recognize it.
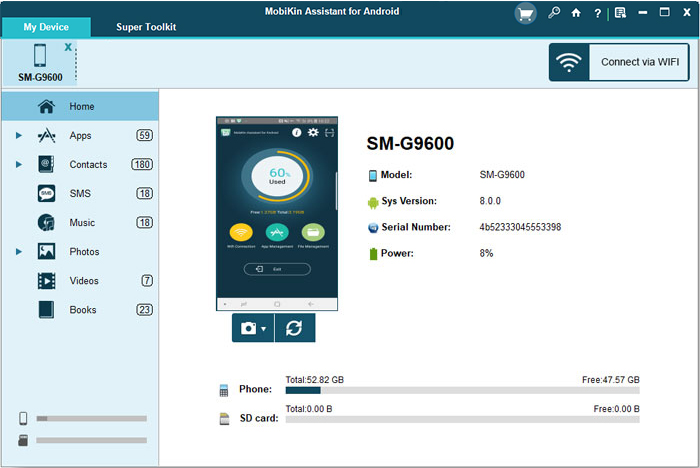
Then, you can choose the files you want to back up. Simply go to 'Super Toolkit' > 'Backup' > choose your device > select the files you want to backup > choose where to store the backup on the computer > click 'Back Up' to create an Android backup.
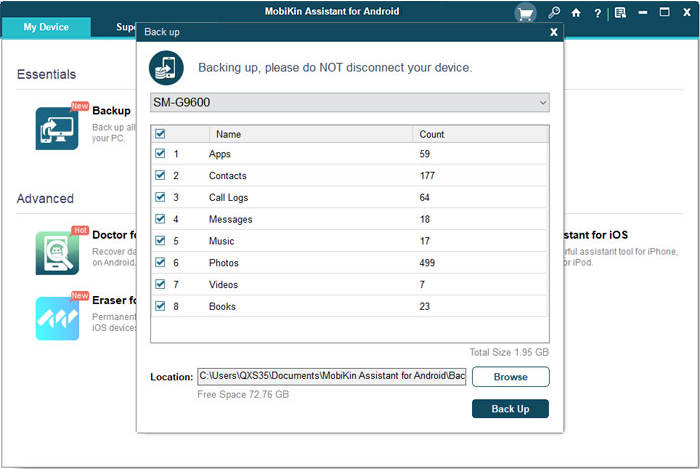
Step 3: Connect the other device to restore the aforementioned backup to it by simply clicking on 'Super Toolkit' > 'Restore' > choose the destination device > choose the backup you want to restore > choose the files you want > click 'Restore' to restore the backup from one Android to another.
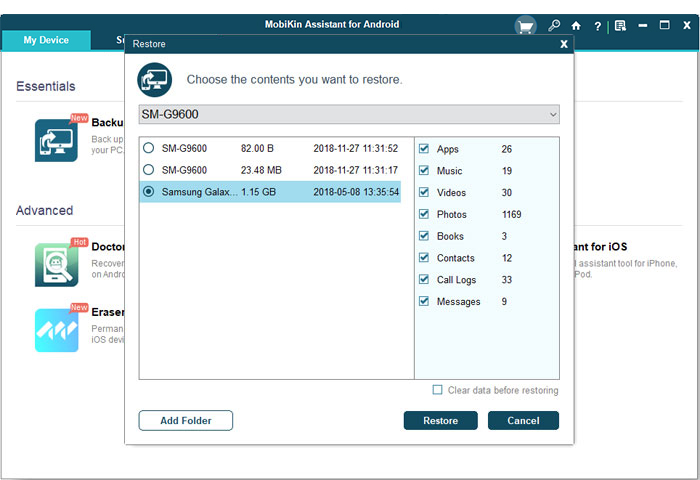
So, except for the MobiKin Transfer for Mobile, this method can also be used if you want to know how to transfer all files from Android to Android. For example, you can check how to transfer contacts from Android to Android using MobiKin Assistant for Android here.
Video Tutorial:
Check how to perform MobiKin Assistant for Android >>
See More: Visual Voicemail Not Working on Android? Reasons & 12 Solutions
Part 3: How to Transfer Files from Android to Android with NFC
Utilizing NFC to transfer files between Android devices has garnered a following due to appearing to be very easy to implement. It is quite easy, but this does not mean that it is the best choice. There are other better choices that do not put you at risk of an inferior transfer, but when there is no other choice, it is good to be aware of the following steps, because something is better than nothing.
Steps to Implement NFC Transfer:
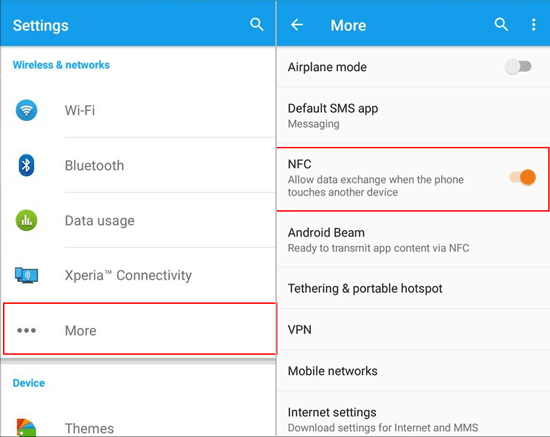
Step 1: Check if the device has NFC. You will be able to find out by going to 'Settings' and then 'More'. This would be under 'Wireless & Networks'.
Step 2: Click on 'NFC' to enable it.
Step 3: On the sender's device, open the file you want to share. On the receiver's device, the active screen will be the home screen.
Step 4: Begin the transfer of files by touching the backs of the devices together. The sender's device will show the 'Touch to Beam' message. Touch the screen for NFC transfer to take place.
Step 5: If the transfer was successful, the message 'Beam Complete' will appear.
Part 4: How to Transfer Files between Android Devices with Quick Share
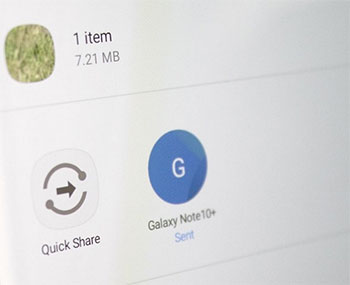
Quick Share is Google's built-in wireless file-sharing feature for Android devices. It lets you quickly transfer photos, videos, documents, apps, and other files between nearby Android phones, tablets, and Chromebooks using Bluetooth and Wi-Fi.
Steps to Implement File Transfer via Quick Share:
Step 1. Enable Quick Share on Both Devices
- Unlock both Android devices.
- Swipe down from the top of the screen to open Quick Settings.
- Tap Quick Share to turn it on.
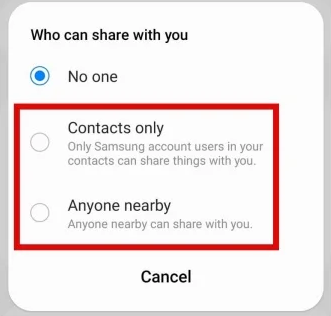
- If prompted, choose who can discover your device (Everyone, Contacts, or Your Devices).
Step 2. Select the Files to Transfer
- Open the Gallery, Files, or another app containing the files.
- Press and hold to select one or multiple files.
- Tap the Share icon.
Step 3. Choose Quick Share
- Select Quick Share from the sharing menu.
- Your phone will begin searching for nearby compatible devices.
Step 4. Select the Receiving Android Device
- Tap the name of the target Android device when it appears.
- If it doesn't appear immediately, make sure Quick Share is enabled and both devices are nearby.
Step 5. Accept the Transfer
- On the receiving device, tap Accept when the transfer request appears.
- Keep both devices close together until the transfer is complete.
Step 6. Access the Received Files
- Once the transfer finishes, tap Open from the notification.
- You can also find the received files in the Downloads folder or the appropriate app, such as Gallery for photos and videos.
Tips for Faster Quick Share Transfers:
- Keep both devices within a few feet (1–2 meters) of each other.
- Turn on Wi-Fi and Bluetooth on both phones.
- Keep the screens unlocked during the transfer.
- Avoid moving the devices too far apart until the transfer is complete.
- For very large files, ensure both devices have sufficient battery power.
Part 5: How to Transfer Files from One Android to Another with Bluetooth
This is one of the easiest ways to transfer files from Android to Android, but if you have a lot of files, it is best that you opt for another option, because there tends to be errors in transfers that have more than a few files.
Steps to Implement Bluetooth Transfer:
Step 1: Devices should be unlocked with Bluetooth connections on. Go to 'Settings' or the drop-down menu in the 'Connections' option to access Bluetooth. Start Bluetooth pairing on one headset in order for both headsets to be prompted to confirm the passkey. The devices will be paired once confirmed.
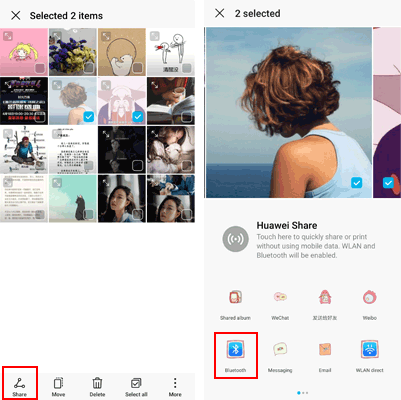
Step 2: On one of the devices, go to the 'Files' manager. Select 'Share' and select 'Bluetooth'. Then, choose the device you want to share with. To start the transfer, the receiver would have to confirm file share.
Step 3: On one of the connected devices, access the 'Bluetooth' Settings. Select the 'Settings' icon and then choose 'Unpair'. That is all.
Part 6: How to File Transfer Android to Android with Cable Transfer
You can simply transfer files utilizing a USB cable, but do not make it your go-to choice if you are going to transfer more than a handful of files, because it will turn into a total headache.
Steps to Implement File Transfer with Cables Only:
Step 1: Connect the sender device to computer with a USB cable and then click on 'View Files' when prompted on screen.
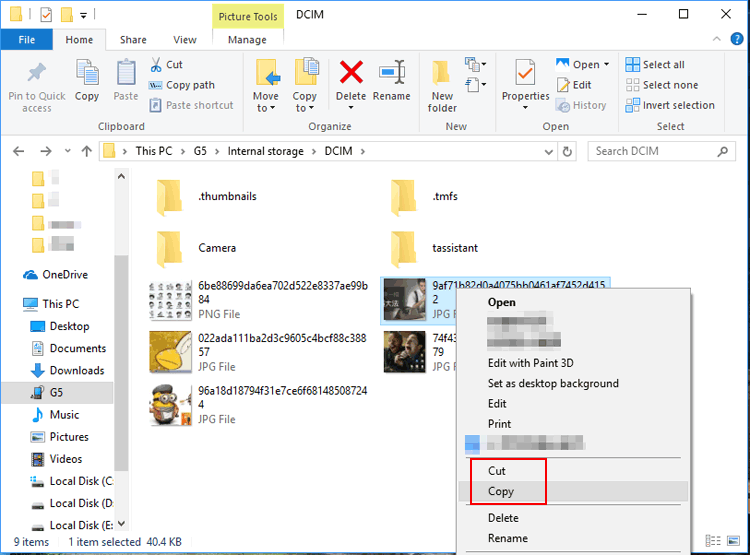
Step 2: Open 'Documents' or another file of the choice and place it side by side with the aforementioned. Begin to drag or copy the files you want to 'Documents' or other file.
Step 3: Disconnect the device and then connect the other one. Click on 'View Files' and then open 'Documents' or the other file you chose. Begin to drop or paste what you want to the receiver's device. Once you are done transferring, disconnect the device. You are all set.
Part 7: How to Transfer All Files from Android to Android with Google Backup
This is a highly-utilized fixer that works great on those devices that do not carry important files, as it has been known to not able to provide a good sync at all times. Its effectiveness depends on the number of files that are present on the device. The more files you have, the less of an ideal option it is.
Steps to Implement File Transfer via Google Backup:
Step 1: Sign in to your Google account on the sender's device.
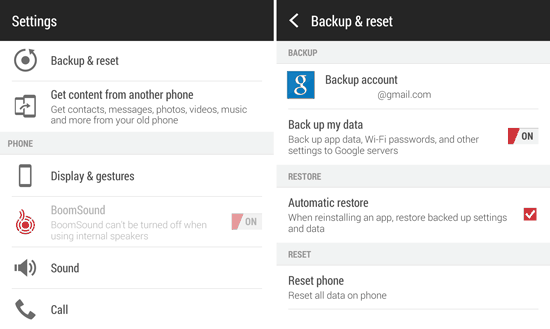
Step 2: Search for 'Backup & Reset' in the 'Settings' menu. Ensure you have 'Automatic Restore' and 'Backup Data' as both are flipped on the Google account. Google server will remember the password.
Step 3: On the receiver device, log in to the Google account you signed in to earlier. Everything that was synced you will be able to back to this device.
Each Important File Counts
In order to choose adequate fixer, analyze the files you are about to transfer. If you have important files, opt for the aforementioned first two fixers. For the least important, any one of the other would do, but remember to only use them when you have no other choice at hand.
Related Articles:
6 Best File Managers for Android to Keep Data Well-organized 2026
4 Ingenious Methods to Format Android Phone without Errors
Where Are Contacts Stored on Android? How to Export/Recover Them?
10 Tested Android Backup Software/Apps You Should Never Miss