How to Share iMovie Videos to iCloud?
Movie production was previously considered to be a special task that could only be done by film professionals. However, the advancement of technology, especially in the smartphone industry has made it a lot easier for normal folks just like you to produce superior homemade movies. It is now possible for you to shoot a homemade video using your iPhone or handheld camcorder. This is because the new iPhone models even support 4K (Ultra HD) video capturing which is the biggest video resolution in the entertainment industry so far.
See Also: How to Transfer Music from iPhone to iCloud
iMovie, which is included with "iMovie Theatre" is an Apple based service that allows you to view all your homemade clips, trailers, and movies right on your Mac or iOS device provided it is linked to iCloud. iCloud is a popular Apple-based cloud storage service that allows you to store and sync all your information across multiple devices. This article is entirely going to focus on showing you how to share iMovie video to iCloud.
It is important for you to note that Apple only provides you with a maximum of 5GB free iCloud storage space. Hence, you should consider purchasing additional cloud storage space if you wish to store more iMovie videos on iCloud.
Different Ways to Share iMovie Videos to iCloud by Yourself
There are basically two ways to share iMovie Videos to iCloud and they are as follows:
Way 1. How to Share Videos from iMovie to iCloud on Mac
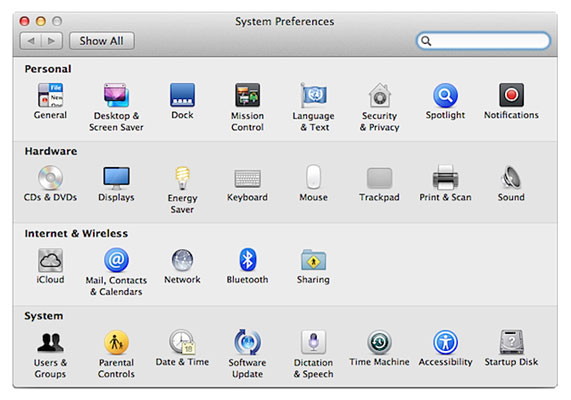
Step 1: Log in to iCloud using your default Apple ID and secret password. Then, select the "System Preferences" option that is located in the "Apple Menu" and then click on iCloud.
Step 2: Now you can proceed to select "Documents & Data" and then click on the "Options" icon that is located next to the "Documents & Data" option.
Step 3: Activate the "iMovie" service by clicking on the checkbox provided.
Step 4: Select the "Preferences" option while in "iMovie" and click on "Automatically Upload Content to iCloud" once prompted. Doing this will automatically upload all your iMovie files directly to iCloud once they are stored on your PC. Now you can proceed to share the uploaded iMovie video files with your friends.
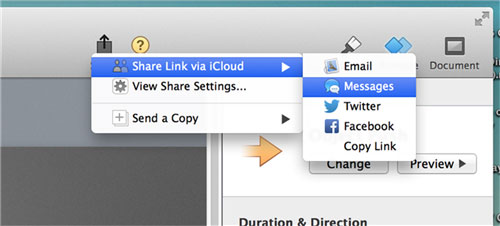
Step 5: To do this, simply click the "Share" button on your Mac computer and then select "Share Link via iCloud" to share your uploaded iMovie video files with your friends through different social media channels. You can also copy the file sharing link if you also wish to post your iMovie videos on multiple blogs and forums.
Congratulations! You have now successfully uploaded and shared your iMovie videos to iCloud right on your Mac personal computer. It is, however, important to note that you are only allowed to upload iMovie video files that are no longer than 15 minutes each. Now all your iMovie videos will be automatically uploaded to the "iMovie Theatre" whenever you publish them to various online sharing websites, send them to iTunes or export them as QuickTime video files.
Can't Miss:
How to Transfer Movies from iPad to Mac
How to Watch Free Movies on iPad, iPhone or iPod touch
Way 2. Simple Way to Share iMovie Videos to iCloud on iDevices
It is possible for you to share your iMovie videos to iCloud directly from your iPhone or iPad. The process is, however, different from that of using a Mac. Thus, this distinct, easy to follow, step-by-step tutorial is provided here.
Step 1: Download the latest "iMovie" iOS app(paid) from the Appstore and install it on your iPhone or iPad.
Step 2: Edit the specific iMovie video as preferred (you can skip this step if you are satisfied with your video file). Then gently tap on the edited iMovie video project or clip that you wish to share with your friends.
Step 3: Select the "Share" option and then tap on "iMovie Theatre". You will be asked to select the specific iMovie video you wish to upload to the iCloud service.
Step 4: Simply enter the name of the iMovie video file, confirm and wait for it to be exported to "iMovie Theatre". You can now also share the uploaded iMovie video file to various online video sharing and networking platforms simply by tapping on it and selecting the "Share" option.
There is absolutely no reason why you should make a cool or funny iMovie video if you can't show it to your friends. That is why this informative guide on how to share iMovie video to iCloud as focused on showing you how to upload and share all your iMovie video files. It is high time for you to finally receive the recognition and appreciation that you rightly deserve.
Related Articles:
How to Recover Deleted Videos on iPad
How to Extract Lost Files from iCloud Backups
Everything You Should Know about iTunes WiFi Sync
iPhone Won't Connect to WiFi, How to Fix It? [Solved]
How to Transfer Samsung/Android Data Wirelessly
How to Remove iCloud Account from iPhone/iPad without Password? [Fixed]
