7 Best Ways to Transfer Photos from Computer to iPhone with/without iTunes
You may have photos saved to your computer from an old iPhone, an Android device, or another source, and now you want to transfer them from your computer to your iPhone. iTunes is usually the first option that comes to mind, but we know it can be time-consuming, complicated, and not the most user-friendly option. So how do you transfer photos from computer to iPhone without relying on iTunes? Don't worry — we've got the answer for you!
There are many ways to transfer photos from PC to your iPhone, from using iTunes to leveraging various cloud services to using professional photo transfer software. In this guide, we'll introduce the best methods available. Read on to choose the method that's best for you.
- Method 1: Transfer Photos from Computer to iPhone without iTunes
- Method 2: Transfer Pictures from PC to iPhone Using iTunes
- Method 3: Send Pictures from Computer to iPhone via iCloud
- Method 4: Import Photos from Computer to iPhone with Google Photos
- Method 5: Copy Photos from PC to iPhone with File Explorer
- Method 6: Transfer Photos from Computer to iPhone by Email
- Method 7: AirDrop Photos from Mac to iPhone
Method 1: Transfer Photos from Computer to iPhone without iTunes
Transferring photos between computer and iPhone is possible without iTunes but with the help of third-party programs. iPhone Photo Manager is one such app that has many great features and works perfectly. This iPhone transfer software can be used to exchange files between iOS devices and computers. In addition to data transfer, it also allows you to manage iOS data on computer, such as deleting unwanted files, editing contacts, etc.
iPhone Photo Manager is considered the best iPhone transfer software since:
- Transfer photos from PC to iPhone completely or selectively.
- Enjoy lightning-fast transfer speeds, transfer 1,000 photos in just a few minutes.
- Compatible with multiple image formats, including JPG, PNG, GIF, HEIC, BMP, etc.
- Works without relying on a network - USB connection ensures your data stays safe.
- Supports multiple image file types, such as JPG, PNG, GIF, HEIC, BMP, etc.
- With an intuitive interface, you can easily complete transfer tasks with just a few clicks.
- Works seamlessly with all iOS devices and system versions, including the latest iPhone 16 series and iOS 18/17 updates.
To transfer pictures from your computer to your iPhone, you can follow the steps below:
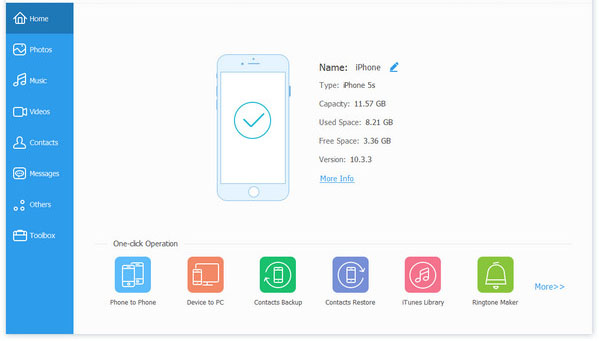
Step 1. Download, install and launch the iPhone photo transfer program on your computer.


Step 2. Connect your iPhone to the computer with a USB cable and make the connected device recognized. On the primary interface, select the "Photos" category from the top menu.
Step 3. Click the "Add" button followed by "Add File" or "Add Folder".
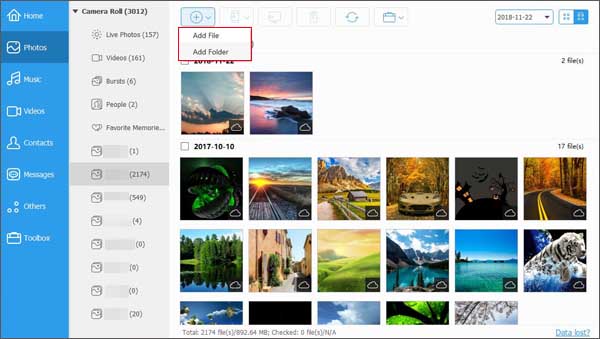
Step 4. Choose your wanted photos from computer and click "Open" to import photos from computer to iPhone.
Supposed that you want to transfer photos from iPhone to PC/Mac, you can turn to: How to Transfer Photos from iPhone to Computer.
Method 2: Transfer Pictures from PC to iPhone Using iTunes
iTunes has many advantages for iPhone users when it comes to backing up files and transferring them. It makes it easier to transfer different types of data between different iOS devices. For example, those who want to transfer their pictures from computer to iPhone can easily do so by going with the following steps.
Steps to put photos from computer to iPhone using iTunes:
- Make sure you have the latest version of iTunes. You can do so by simply updating the one you have.
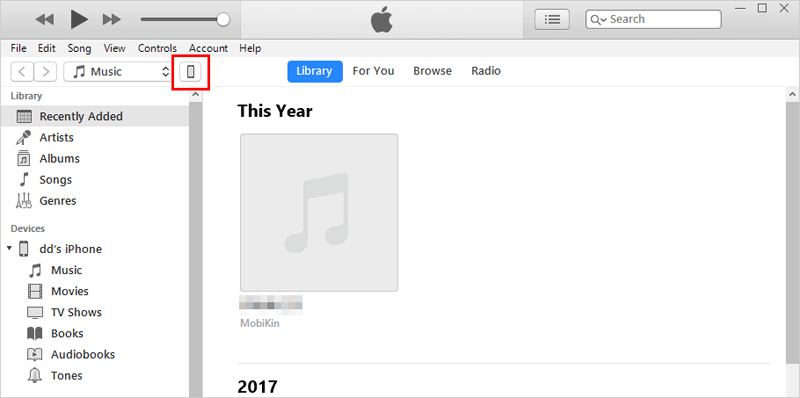
- Open iTunes and then connect your iPhone to your computer through a USB cable.
- When the connection is established, click the device icon at the upper left corner.
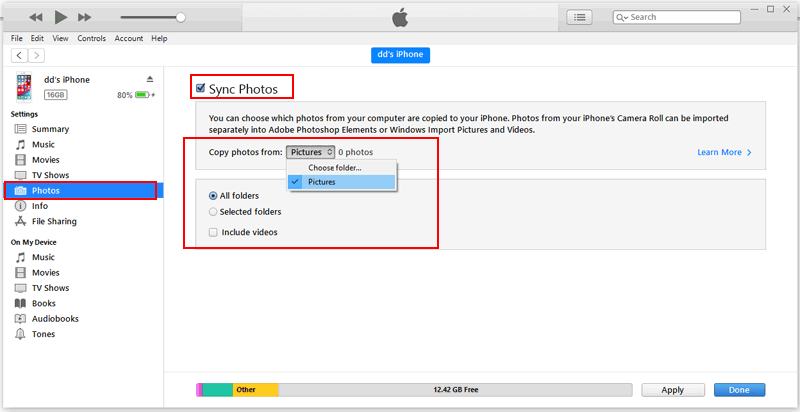
- From the list that appears on the left hand side, choose "Photos" and enable "Sync Photos" then check the option "Sync Photos from".
- Decide to copy the photos from "All folders" or "Selected folders".
- When you're done selecting the folders you want to add pictures from, click on "Done".
- Hit the "Apply" button and then wait for the pictures to be sent to your iPhone.
Some of you maybe interested in:
Method 3: Send Pictures from Computer to iPhone via iCloud
With the many benefits of iCloud, it's no surprise that many people prefer to backup their photos or other types of files to this service. It also makes restoring those files easier, which is one of its greatest features. You don't have to worry when you want to bring back your photos because the process is very simple.
iCloud photos has come up with an automatic download for all pictures. Any picture saved in iCloud can be automatically downloaded on your computer. All you have to do is to set up the features correctly.
Tutorial to move pictures from computer to iPhone via iCloud:
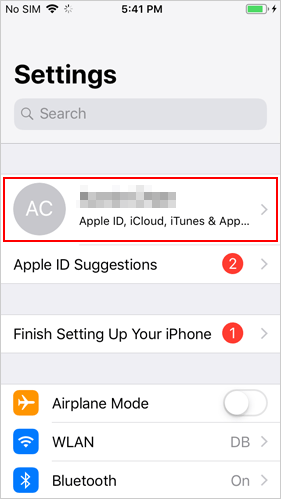
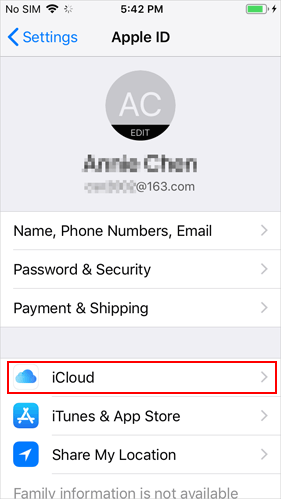
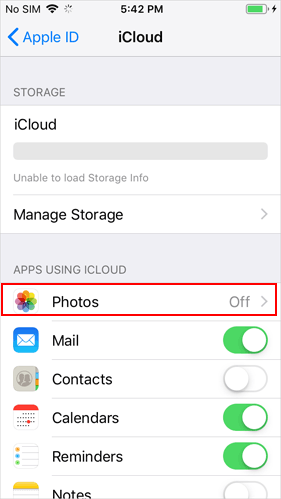
- Go to "Settings" > your name > "iCloud" > select "Photos" > enable "iCloud Photo Library" on your iPhone.
- Open iCloud on your computer and then log in with your account.
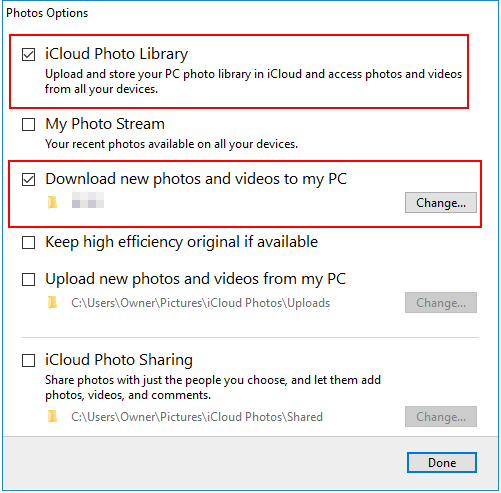
- Go to "Photos" followed by "Options" and then enable "iCloud Photo Library".
- Check the option "Upload new photos and videos from my PC" and go on to click on "Change" next to this option.
- Now you can choose the folder that contains the pictures you want and start adding photos to your iPhone.
Except for photos, you may also want to know:
Method 4: Import Photos from Computer to iPhone with Google Photos
Importing photos from computer to iPhone with Google Photos is another option. By using this way, you just need to upload the desired pictures from computer to Google Photos and then download it to your iPhone. It is easy to follow and complete.
Guide on how to send pictures from computer to iPhone with Google Photos:
- Open Google Photos on your computer by visiting photos.google.com. Then you need to login to your Google account.
- Click "Upload" option at the upper right corner of computer and then choose the wanted files from your PC.
- Tap on "Open" to begin the uploading process.
- Download, install and run the Google Photos App on your iPhone.
- Sign in your Google account and download the uploaded pictures to your iPhone.

Method 5: Copy Photos from PC to iPhone with File Explorer
You can transfer photos directly to your iPhone using File Explorer on your Windows PC. The photos will be saved in the DCIM folder, which you can later access in the Photos app on your iPhone.
- Connect your iPhone to your computer using a USB cable. When prompted, select "Trust This PC" on your iPhone.
- On your PC, open File Explorer and find "Apple iPhone" under "This PC".
- Double-click the Apple iPhone icon and open the "DCIM" folder.
- Copy the photos or photo folders you want to transfer and paste them into the DCIM folder on your iPhone.
- Once the transfer is complete, open the Photos app on your iPhone to view the photos.
Method 6: Transfer Photos from Computer to iPhone by Email
Email is one of the most convenient and simplest ways to transfer pictures to iPhone from a computer. However, most people shy away from it due to the limitations pertaining to size. You'll be forced to transfer a few photos at a time or compress the pictures to make them fit the email file size. This is considered hectic by most people. But when you only want to send a small number of images, you can take it into consideration.
Followings are the steps to send photos from computer to iPhone by Email:
- Create a new folder in your computer for the storage of the wanted photos.
- Select the photos you want to transfer then put them together in that folder and compress the folder.
- Log into your email account.
- Open a new Email composure then attach the folder you just created. Put your own email address as the recipient.
- Log into your recipient Email account on your iPhone and then download the attachment you just sent yourself.

Method 7: AirDrop Photos from Mac to iPhone
If you are using a Mac computer, you can try using AirDrop to copy pictures from Mac to iPhone. It allows you to transfer files of any type and size and can be used anywhere and at any time, including on an airplane. With this method, you must enable AirDrop on both devices. (If needed, you can also click to learn how to AirDrop from iPhone to Mac.)
Here is how to AirDrop photos from Mac computer to iPhone:
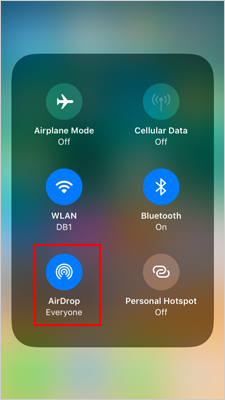
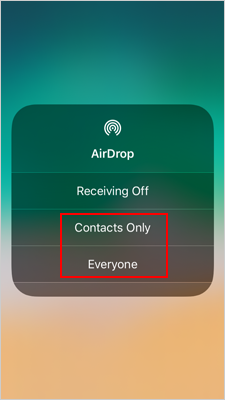
- On your iPhone, swipe down (or up, depending on your model) to open the Control Center. Tap "AirDrop" and select "Everyone" or "Contacts Only".
- On your Mac, open the "Photos" app or locate the pictures you want to send in Finder.
- Select the photos you want to transfer. Right-click the selected photos and choose "Share > AirDrop".
- Your iPhone should appear in the AirDrop window on your Mac. Click it to start sending.
- A pop-up will appear on your iPhone. Tap "Accept" to save the photos to your device.
The Bottom Line
With the help of this tutorial, you are now able to transfer photos from computer to iPhone without hassles. All the methods mentioned above are easy to follow and you can select the suitable according to your need. And if you have any problem during the transferring process, please feel free to contact us.
Related Articles:
How to Transfer Text Messages from iPhone to Computer?
iPhone Music Transfer: How to Transfer Music from iPhone to Computer Freely?
How to Transfer Contacts from iPhone to Computer?
How to Transfer Large Videos from iPhone to PC? (5 Ways Included)
