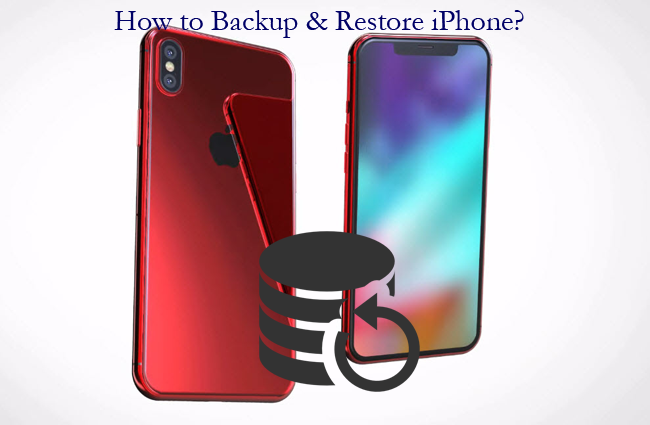
How to Backup and Restore iPhone [4 Best Ways in 2026]
Backing up your data is more important than ever to ensure its security. However, backing up data on your iPhone 17 can be frustrating due to iOS security measures, especially when you're trying to free up storage space or prevent file loss. It may seem like a complicated task, but don't worry! This guide will walk you through the backup and restore process on your iPhone using four methods, making the whole process as smooth and efficient as possible.
Method 1: Backup and Restore iPhone with USB Cable
Backing up and restoring your iPhone using a USB cable is a simple and reliable method for managing your photos and basic files. While it's not as comprehensive as using iTunes or iCloud, it's an efficient way to save your pictures and easily restore them later. This method allows you to manually copy files between your device and computer, ensuring that your photos are safely stored.
How to back up iPhone with USB:
- Connect your iPhone to your computer using a USB cable.
- Open This PC on your computer and find your iPhone listed under devices.
- Navigate to your iPhone's storage, open the folder containing your photos (usually under "DCIM"), and copy the files to your computer.
How to Restore iPhone with USB:
- Connect your iPhone to the computer again using the USB cable.
- Open This PC and locate your iPhone's storage.
- Copy the photos (or other files) from your computer back into the iPhone's folder (DCIM).
- Once copied, your photos will appear in your iPhone's Photos app.
Method 2: Backup and Restore iPhone via iCloud
Backing up and restoring iPhone via iCloud is a popular way since this is an official tool and it is easy to use. However, it's important to remember that it only provides a limited amount of free storage. This is usually the first 5GB, which is still a considerably big space but for some, it may not be enough. In that case, you'll have to pay for additional storage space which ranges from 50GB to 1TB. Another thing you need to pay attention to is that you need to factory reset your device before restoring iPhone from iCloud backup.
Backup iPhone to iCloud:
- Connect your iPhone to a stable Wi-Fi with a good speed.
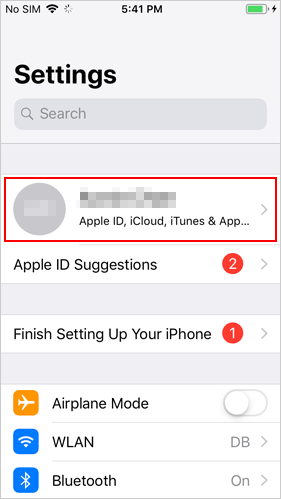
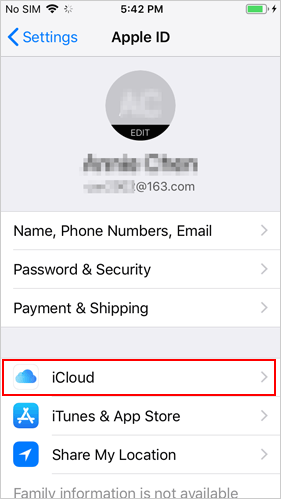
- Click on "Settings" > your name > "iCloud" on your device.
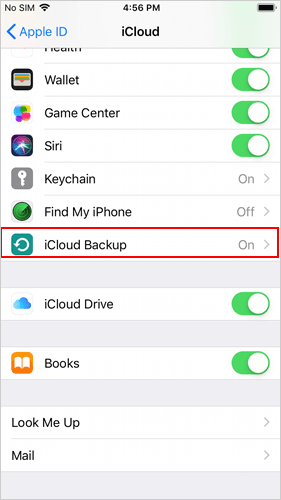
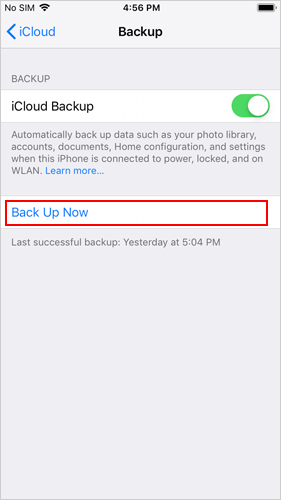
- Go on to tap on "iCloud Backup" and check whether it has already been activated. If not, turn it on.
- Tap on "Back Up Now" to start saving your iPhone files to iCloud.
- Wait for the process to complete then double check to see if the backup was successful. To do this, you can go to "Settings" > your name > "iCloud" > "Manage Storage".
Restore iPhone from iCloud Backup:
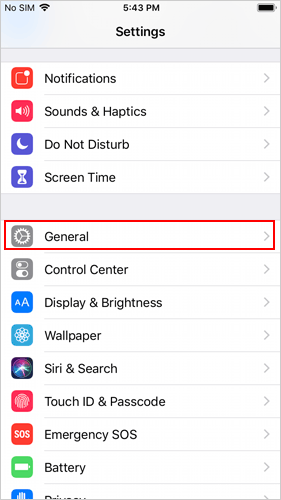
- Open your iPhone and then go to "Settings".
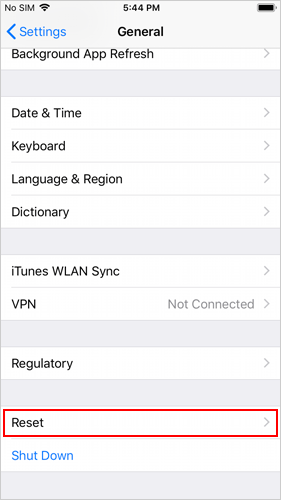
- In this section, you need to choose "General" followed by "Reset".
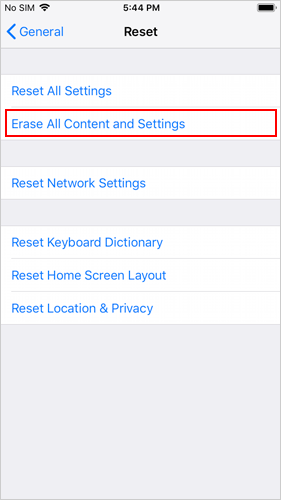
- Select "Erase All Contents and Settings" from the new menu.
- Then the phone will start the resetting process and restart.
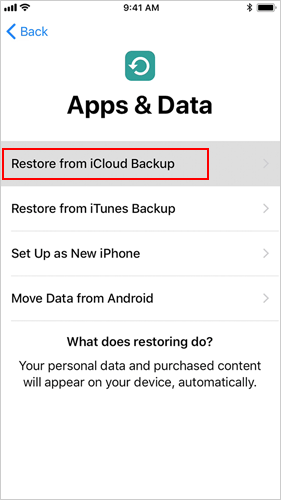
- Now you need to follow the prompts to set up the device.
- Choose "Restore from iCloud Backup" when you reach the "App & Data" display.
- Input your iCloud login credentials to get into your account then wait for your content to be restored.
If your restore from iCloud is taking forever, it could be caused by a slow internet connection, too large a data file, a server problem, etc. This guide provides seven effective solutions to speed up the iCloud restore process.
Method 3: Backup and Restore iPhone via iTunes
The second tool you can use to backup and restore iPhone is iTunes. iTunes is also an official tool that enables users to manage their iDevice, including backing up and restoring files. What's more important, this tool is totally free and has no any storage space limitation. The only disadvantage of this means is that the backup files will completely cover the current files on your device after the restoration.
How to Backup iPhone to iTunes:
- Update your iTunes to the latest version if you don't have one and then open it.
- Connect your iPhone to the computer using a USB cable. This is usually the same cable you use to charge your iPhone.
- Then the connected iPhone will be asked to trust the computer if it has not trusted the desktop beforehand.
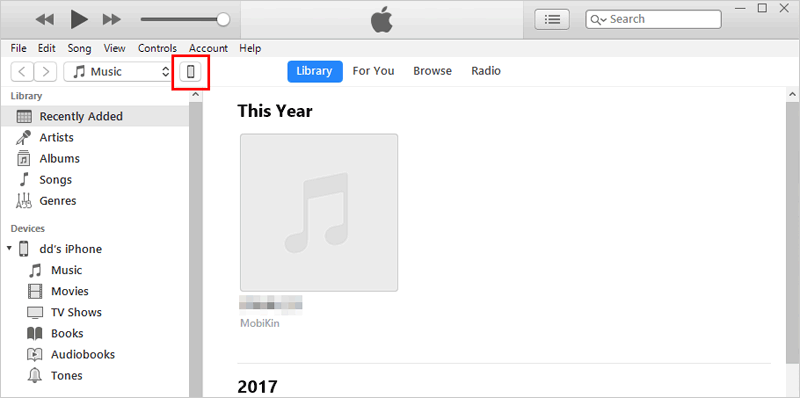
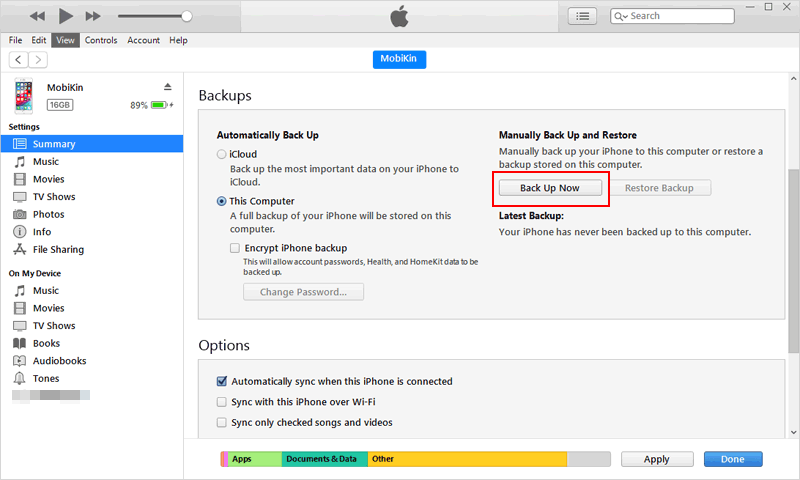
- Tap on the iPhone icon located at the upper left corner of iTunes and then the info of your iPhone will be displayed on iTunes.
- Choose "This Computer" and then click on the "Back Up Now" option under the "Backups" section to start backing up your iPhone to iTunes.
If needed, you can also click to learn more details about how to back up iPhone data to iTunes.
How to Restore iPhone from iTunes Backup:
- Connect your iPhone to the computer where iTunes is installed.
- Open iTunes and trust the computer if required.
- Click on the phone icon at the upper left corner of iTunes as well.
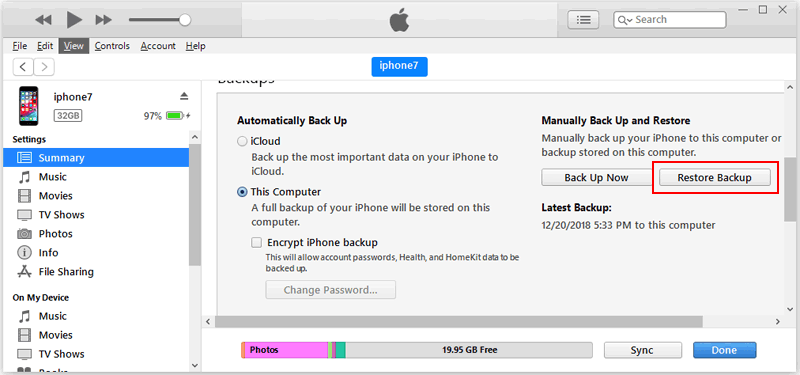
- Choose "Summary" and a new window will appear with a summary of possible actions and options.
- Tap on "Restore Backup" located on the right-hand side.
- Select the backup file you want to restore from. It's always better to choose the latest backup.
To get more details about restoring iPhone from iTunes backup, you can jump to the page: Simple Way to Restore iPhone from iTunes Backup File.
Method 4: Backup and Restore iPhone via Assistant for iOS
The best way to backup and restore iPhone is to use MobiKin Assistant for iOS actually. This is a professional iOS file transfer tool that allows you to transfer different kinds of files between iPhone/iPad/iPod and computer without hassles. What's more important, its "iTunes Backup & Restore" feature enables you to back up your data without covering older backup files. And certainly, it can do more than backup and restore, such as editing contacts info, deleting files and so on. Hence, for the users who need to manage his/her iDevice frequently, this is the tool that you can't miss.
Main Features of MobiKin Assistant for iOS:
- Quickly back up all your iPhone data, including contacts, messages, photos, and apps, to your computer.
- Easily restore data from your backup to your iPhone without any data loss or complications.
- Choose specific files (photos, videos, contacts, etc.) to back up or restore, saving you time.
- Operates independently of iTunes, providing an alternative and simplified solution for data management.
- Backup and restore data across different iPhone models, and iPads, including the latest iPhone 17 and iPad 11.


Backup iPhone Data with 1 Click
Step 1. Launch the installed software on your computer and use a USB cable to connect your iPhone to the PC.
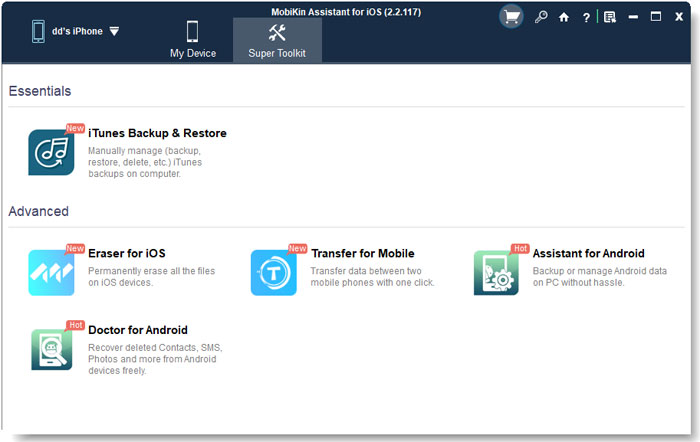
Step 2. Go with the on-screen prompts to make the connected iDevice recognized. Once done, you can will see the following interface:

Step 3. Click on "Super Toolkit" > "iTunes Backup & Restore".
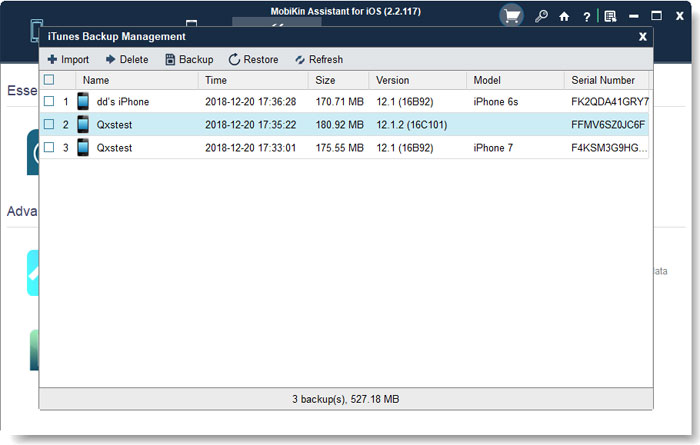
Step 4. Then a window will pop up. Just choose "Backup" from the top menu.
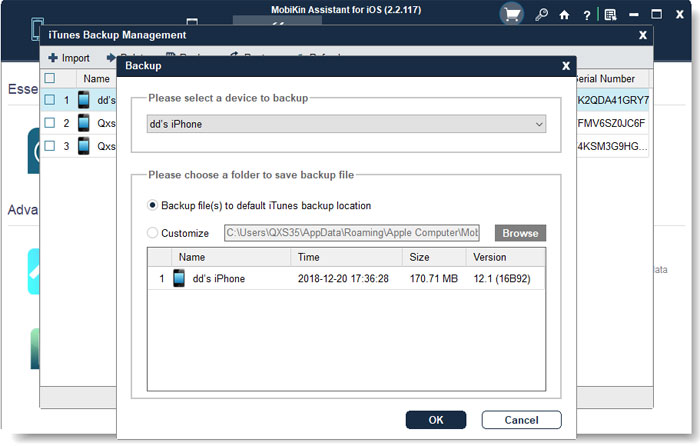
Step 5. Select a device to backup and choose the option "Backup file(s) to default iTunes backup location".
Step 6. At last, you can tap on "OK" to start backing up your iPhone data to iTunes.
Restore iPhone Data with 1 click
Step 1. Also, open the program and connect your iPhone to computer via USB cable. Then follow the prompts to let the tool recognize your iPhone.
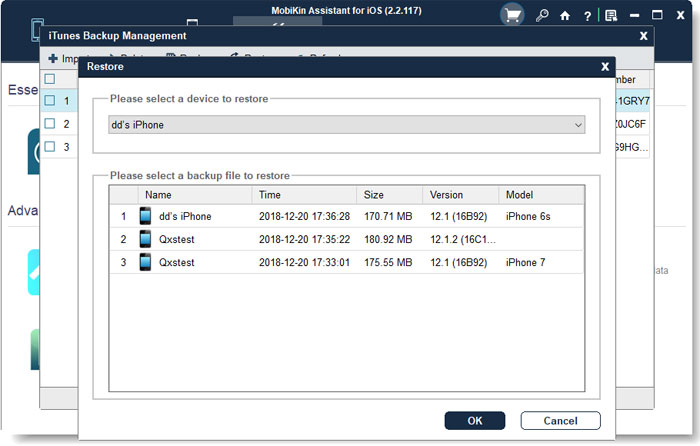
Step 2. Go to "Super Toolkit" > "iTunes Backup & Restore" > "Restore".
Step 3. Choose the backup files you want to get back and click on "OK" to restore it to your iPhone.
Video Guide:
Final Words
These are 4 fast and easy ways to backup and restore your iPhone. Each way is secure and easy to follow but in my opinion, method 4 - using MobiKin Assistant for iOS, is the best way since it won't cover the older backup files. Anyway, just choose the one you like to backup and restore your iPhone. And if you have any problem during the process, please feel free to contact us.
Related Articles:
3 Solutions to Restore iPhone/iPad from Backup (98% Success Rate)
How to Transfer Contacts from iPhone to Computer?
How to Transfer SMS (Text Messages) from iPhone to Computer?
