
5 Easy Methods to Transfer Word Documents to iPhone/iPad
TL;DR:
Need to move Word documents from your computer to your iPhone? Here are 5 simple ways to transfer Word files using Google Drive, email, iCloud Drive, AirDrop, or iTunes.
- Transfer Word documents to iPhone with Google Drive.
- Send Word documents to iPhone via email.
- Save Word files to iPhone using iCloud Drive.
- Transfer Word documents from Mac to iPhone with AirDrop.
- Move Word documents to iPhone through iTunes.
- Transfer other types of data to iPhone using MobiKin Assistant for iOS.
As a portable device, an iPhone lets you view Word documents, Excel files, and other files anytime and anywhere. With Microsoft Word or another compatible app installed, you can easily access your files on the go. But what if your Word documents are stored on your computer? Is there a simple way to transfer them to your iPhone?
Fortunately, there are several ways to do it. In this guide, we'll show you how to transfer Word documents to iPhone using Google Drive, email, and iTunes. Read on to find the method that works best for you.
- Part 1: How to Transfer Word Doc to iPhone with Google Drive
- Part 2: How to Transfer Word Document to iPhone Using Email
- Part 3: How to Save Word Doc on iPhone via iCloud Drive
- Part 4: How to Transfer Word Doc to iPhone with AirDrop
- Part 5: How to Transfer Word Document to iPhone via iTunes
- Bonus: How to Transfer Other Files to iPhone with Assistant for iOS
Part 1: How to Transfer Word Doc to iPhone with Google Drive
There are several options to transfer Word Doc to iPhone out there. Cloud storage like Google Drive could be one of the best means. You can back up your iPhone content to Google Drive, including photos, videos, audio, archives, texts, XML, Excel files, PowerPoint files, as well as Word documents, and so on. For this topic, just upload .doc/.docx files from your iPhone to the Drive. Then log in to the Drive on your iPhone and get your wanted stuff there.
Let's go over how to put word documents on iPhone with Google Drive?
- Visit drive.google.com from any web browser on your computer.
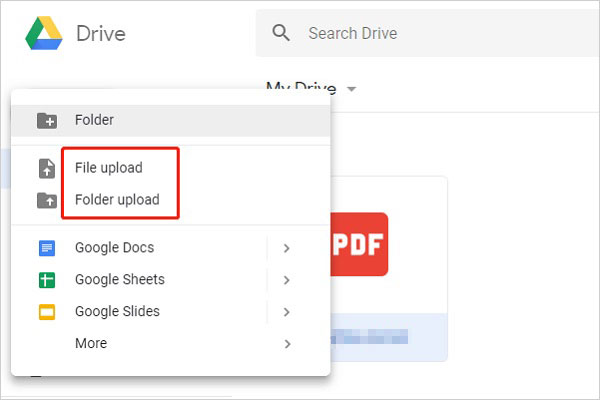
- Log in to your Google account and tap "New" from the top left.
- Choose File upload or Folder upload to copy your wanted Word Doc files to the Drive.
- Once done, you can see the files on the Drive account at once.
- Download and install Google Drive on this iPhone.
- Open the Drive and log in to the same Google credentials.
- Finally, you can get into the "Google Drive" folder to check and download the Word documents.
Pros:
- It's easy to use.
- You can view, edit, or download the Word documents on your iPhone directly.
Cons:
- Google Drive only offers 5 GB of free storage, so ensure you have enough memory before uploading your documents, or you'll have to pay for additional space.
- It's paid storage is a bit more expensive than other services.
You May Need:
Part 2: How to Transfer Word Document to iPhone Using Email
If you have an email account related to Gmail, Hotmail, Yahoo, etc., then it's easy to save Word documents on your iPhone in this way. Here, let's take Gmail as an example to explain the tutorial:
How to transfer Word Doc to iPhone using Email?
- Go to accounts.google.com from any browser on your computer.
- Log in to your Gmail account on the webpage.
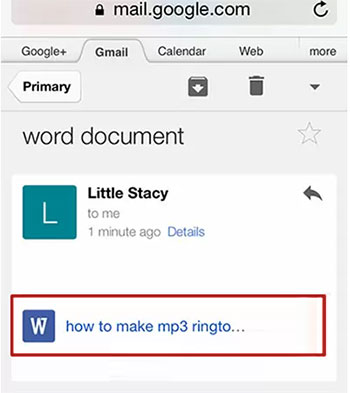
- Send an email with an attachment of Word Doc files you want to transfer to your iPhone.
- Sign in to the same Gmail account on this iPhone.
- Now you can access the attachment with Word documents.
- Just view the files from the Gmail screen directly.
Pros:
- You can view Word documents on any other device as long as you connect it to the Internet and log in to your email.
- It is totally free.
Cons:
- Email doesn't allow you to save or edit the documents on your iPhone.
- It can handle no more than 20 or 25MB of attachments at a time.
Here is a page covering how to delete documents & data on iPhone in many different ways. After reading the post, you'll find it easy to make your iPhone work fine.
Part 3: How to Save Word Doc on iPhone via iCloud Drive
iCloud Drive lets you upload Word documents from your computer and access them directly on your iPhone through the Files app. It’s a convenient option if you already use an Apple Account and want to keep your documents synced across devices.
- On your computer, open iCloud.com and sign in with the same Apple Account used on your iPhone.
- Select "Drive" and click the upload icon to upload the Word document.
- Wait for the document to finish uploading to iCloud Drive.
- On your iPhone, open the Files app and tap "Browse" > "iCloud Drive".
- Find the uploaded Word document and tap it to open or download it.
- If needed, tap the Share button and select "Save to Files" to save a copy to another location on your iPhone.
Pros:
- No USB cable is required.
- Works across iPhone, Mac, and Windows.
- Files can stay synced across devices.
- The Files app makes documents easy to access.
Cons:
- Requires an internet connection for uploading and syncing.
- Free iCloud storage is limited.
- Large files may take longer to upload.
Part 4: How to Transfer Word Doc to iPhone with AirDrop
AirDrop lets you quickly send a Word document from a Mac to an iPhone without cables or cloud storage. It works well for transferring one or a few files, as long as both devices support AirDrop and are nearby.
- Turn on Wi-Fi and Bluetooth on both your Mac and iPhone, and make sure the devices are within Bluetooth range.
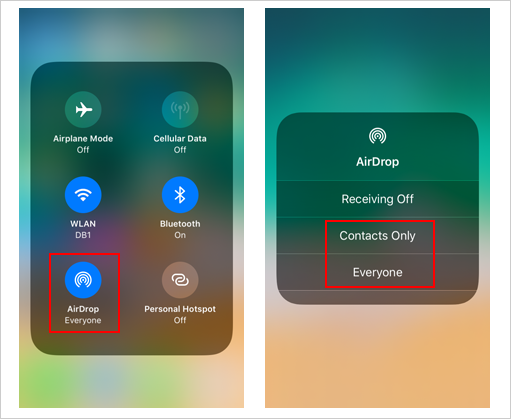
- On your iPhone, open Control Center, press and hold the network settings panel, tap "AirDrop", and choose "Everyone for 10 Minutes" or "Contacts Only".
- On your Mac, locate the Word document you want to transfer.
- Right-click the document, select "Share", and choose "AirDrop".
- Select your iPhone from the AirDrop list.
- Tap "Accept" on your iPhone when prompted, then choose an app such as Microsoft Word or Files to open or save the document.

Pros:
- No USB cable or cloud storage required.
- Keeps the original document format.
- Suitable for nearby Mac and iPhone devices.
Cons:
- Mainly suitable for Apple devices.
- Requires Wi-Fi and Bluetooth.
- Not ideal for transferring a large number of documents.
- Both devices need to be nearby.
Can't Miss:
Part 5: How to Transfer Word Document to iPhone via iTunes
Word documents on your computer can be synced to your iPhone by iTunes (version: 12.3 and earlier), according to the test from the Apple Support webpage. So, if you have the old version of iTunes installed on your computer, you can try this method.
To transfer document to iPhone via iTunes:
- Run the older iTunes on your computer.
- Connect your iPhone to this PC with an applicable USB cable.
- Head to "Store" > "Authorise This Computer…".
- Input your Apple ID and passcode as required. (iPhone doesn't show up in iTunes? Click here)
- Click your iPhone icon from the iTunes interface.
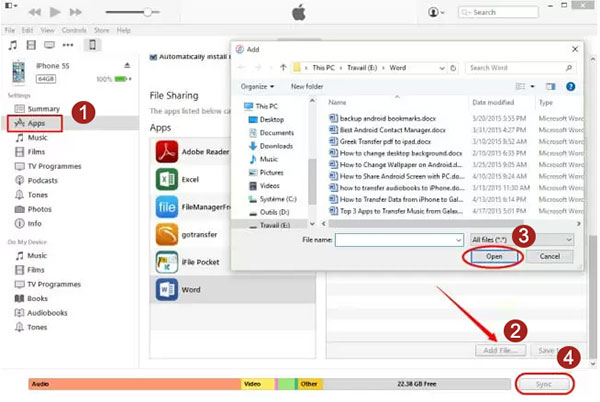
- Tap on "Apps" under "Settings".
- Scroll down to the bottom of the screen.
- Choose "Word" > "Add File…" at the right corner.
- Opt for the Word documents from the PC to transfer and hit "Open".
- All the doc files will be loaded to the main panel.
- Hit "Sync" to transfer them to the connected iPhone.
Pros:
- iTunes doesn't rely on WiFi to connect.
Cons:
- This method can only be used to operate on iTunes 12.3 and earlier.
- You need to select the corresponding apps while transferring various kinds of documents.
- iTunes supports limited file formats.
Bonus: How to Transfer Other Files to iPhone with Assistant for iOS
If you need to transfer more than just Word documents, MobiKin Assistant for iOS can help you manage and transfer various types of iPhone data from your computer. While it doesn't support transferring Word documents directly to iPhone, it can be useful for moving other supported files and managing your iPhone data without relying on iCloud or iTunes.
Key Features of MobiKin Assistant for iOS:
- Transfer photos, videos, music, contacts, messages, and other supported data between your iPhone and computer.
- Back up iPhone and iPad data to your computer for safekeeping.
- Restore backed-up data to your iPhone without erasing existing content.
- Manage, add, delete, and organize iPhone files directly from your computer.
- Work on a wide range of iPhone and iPad models.


Steps to Transfer Supported Files to iPhone Using Assistant for iOS:
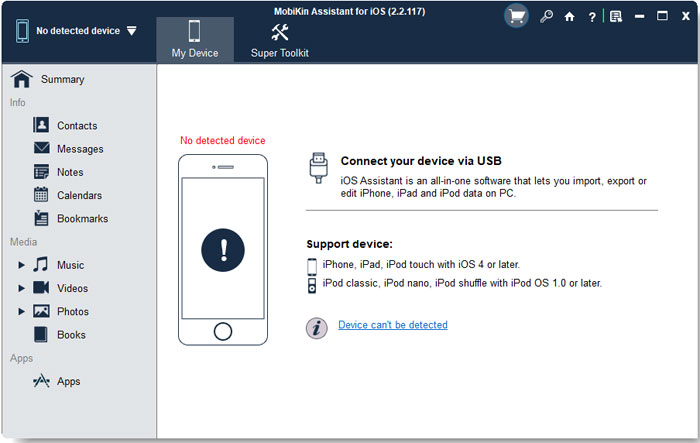
Step 1: Download and install Assistant for iOS on your computer. Launch the program and connect your iPhone to the computer with a USB cable. Unlock your iPhone and tap "Trust" if prompted.
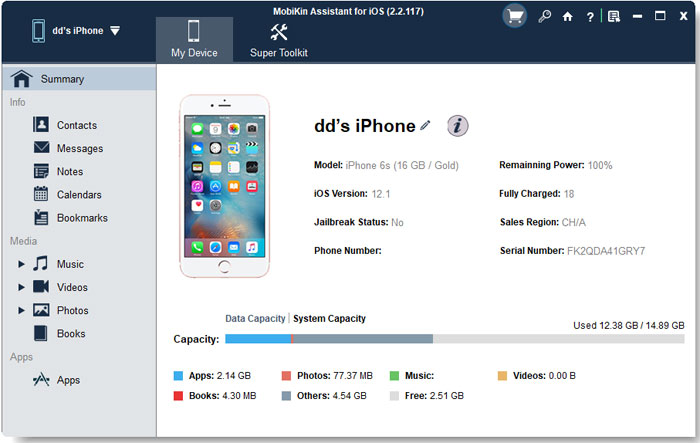
Step 2: Once the connection is successful, you can select the data category you want to manage from the left sidebar.
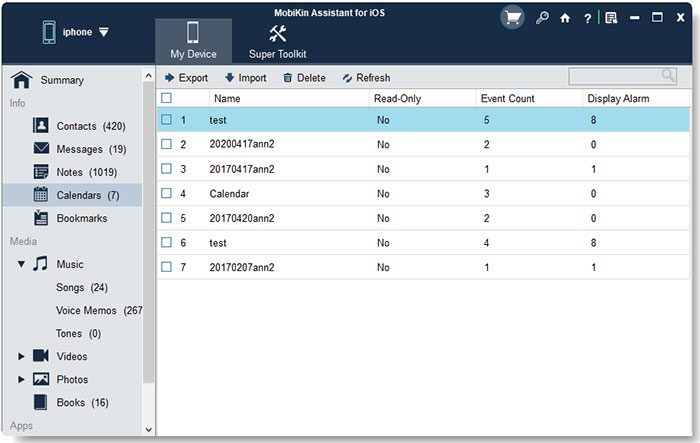
Step 3: Click "Import" or the corresponding transfer option, then select the files you want to import. Wait for the transfer to finish, then check the files on your iPhone.
Video Guide:
Words in the End
Transferring Word documents to an iPhone doesn't have to be complicated. Whether you prefer cloud storage, email, AirDrop, or iTunes, you can find a suitable method based on your devices and needs. Google Drive and iCloud Drive are convenient for cloud-based transfers, while AirDrop works well between Apple devices. If you also need to manage other types of iPhone data, MobiKin Assistant for iOS can provide additional help.
Related Articles:
How to Put PDF on iPhone/iPad in 6 Methods? (Simple Steps with Pics)
How to Transfer Data from iPhone to iPhone without iCloud?