[Stepwise Guide] How to Back up Photos from iPhone to PC/Mac/Cloud?
For iPhone users grappling with limited storage and the need to preserve precious photos, the quest to know how to back up photos from iPhone is common. The diverse methods available typically fall into two categories: cloud and computer backups. Navigating through numerous options can be overwhelming, making the selection of an efficient and swift backup method crucial. To streamline this decision, explore some of the best methods for backing up photos from your iPhone.
Whether opting for cloud-based solutions or computer-based alternatives, these approaches cater to different preferences, ensuring a seamless and reliable photo backup process tailored to your needs.

- Part 1. How to Back up Photos from iPhone to Computer?
> Way 1. Best Way to Back up iPhone Photos with Assistant for iOS
> Way 2. Back up Photos from iPhone via Windows Explorer
> Way 3. Back up Pictures on iPhone Using Photos App
> Way 4. Save Pictures from iPhone Using iTunes - Part 2. How to Backup Photos from iPhone to the Cloud?
> Way 1. Back up iPhone Photos to iCloud
> Way 2. Back up Photos from iPhone to Google Photos
Part 1. How to Back up Photos from iPhone to Computer?
Way 1. Best Way to Back up iPhone Photos with Assistant for iOS
To securely and efficiently back up your iPhone, MobiKin Assistant for iOS emerges as an optimal solution for preserving your iPhone photos. This application simplifies the backup process, offering a user-friendly interface with direct access to all features. Noteworthy aspects of this tool include:
Assistant for iOS - Back up iPhone Photos Flawlessly
- Selective Backup: Choose specific photos for backup, adding flexibility to the process.
- Ad-Free: No interruptions with plug-ins or ads, ensuring a seamless backup experience.
- Comprehensive Support: Backup contacts, music, videos, messages and more alongside photos.
- Efficient Incremental Backups: Selectively backup new photos, optimizing storage and time.
- Wide Compatibility: Works with iPhone models from iPhone 4 to iPhone 15, compatible with iOS 17/16. Also supports iPad and iPod touch backup.


Let's begin with the best way to back up photos from iPhone:
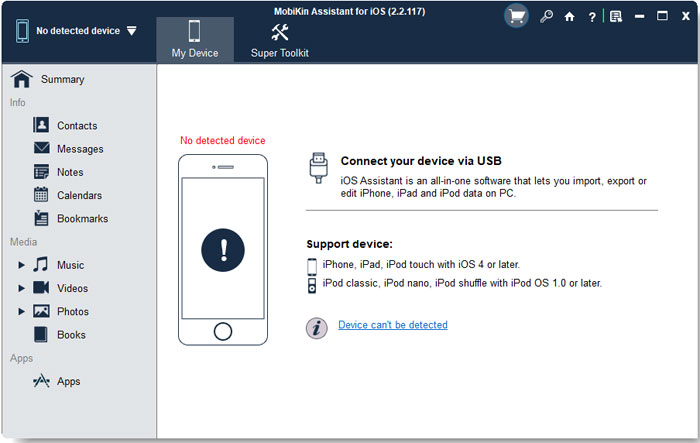
Step 1: Launch MobiKin Assistant for iOS on your computer and connect your iPhone using a USB cable. Once your iPhone is recognized, authorize the connection by tapping "Trust" on your device. The program will display the files on your iPhone.
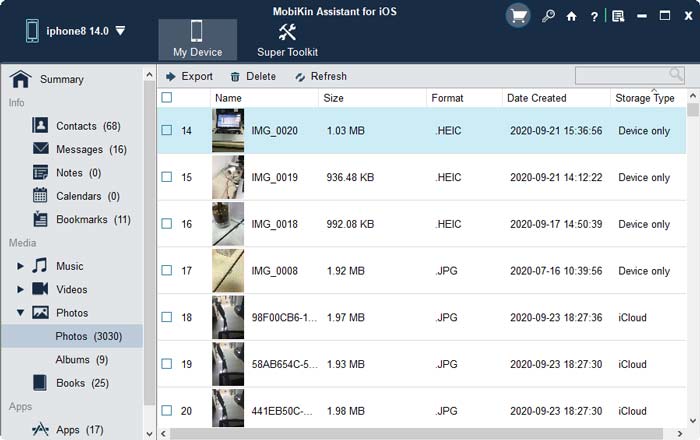
Step 2. Navigate to the "Photos" section on the left sidebar, preview and select the photos you want to backup by marking the corresponding boxes.

Step 3. After selecting all the photos you need, click the "Export" button on the top menu bar to initiate the backup of photos from your iPhone to your PC/Mac.
Readers are always interested in:
- How to Transfer Music from iPhone to Computer Freely?
- How to Transfer Contacts from Computer to iPhone 15/14/13/12/11/X/8/7?
Way 2. Back up Photos from iPhone via Windows Explorer
Ideal for users with earlier Windows versions, transferring and backing up photos to a computer is straightforward with Windows Explorer. This iPhone picture backup method is particularly suitable for older Windows computers and laptops. However, note that Windows Explorer can only detect Camera Roll photos, excluding images from Photo Library, Photo Stream, synced photos, and iCloud sharing. To proceed, connect your iPhone to your PC and ensure your phone is unlocked.
Option 1: AutoPlay
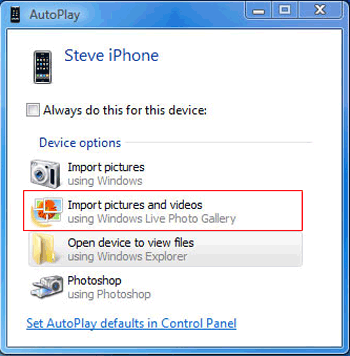
- Connect your iPhone to the computer and wait for the AutoPlay window to show up.
- Choose "Import pictures and videos."
- For the first transfer, opt for "Review, organize, and group items to import." For subsequent transfers, select "Import all new items now." Specify the folder to save photos and click OK.
- Click Next. If you chose "Review, organize, and group items to import," select your desired photos and click Import.
If AutoPlay doesn't appear, try Option 2.
Option 2: Access iPhone as Digital Camera
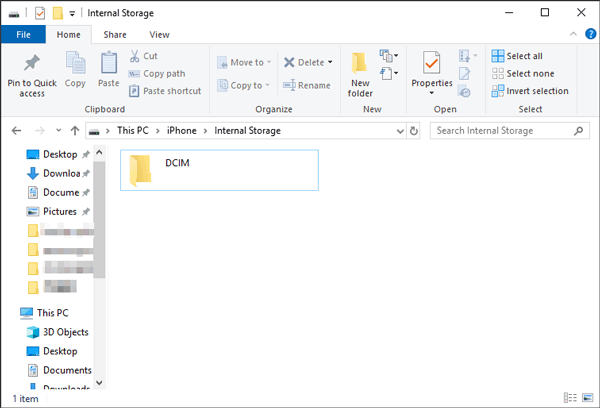
- Open My Computer and wait for your iPhone to appear under Portable Devices. Click on it.
- Navigate to your photos (usually under Internal Storage > DCIM).
- Select photos (hold Ctrl for multiple selections) or entire folders. Right-click, choose Copy.
- Open the desired computer folder, right-click, and select Paste to save the photos.
Way 3. Back up Pictures on iPhone Using Photos App
The built-in Photos app on both Windows 10 devices and Mac simplifies the process of transferring and backing up pictures without the need for additional downloads. This tool not only allows batch photo transfer but also provides the option to view and edit photos before backup. The only drawback is that the transfer of large batches may be relatively slow.
How do you back up pictures on iPhone using Photos app?
- Connect your iPhone to the computer using a USB cable. Ensure that you grant trust permissions on your iPhone for the computer.
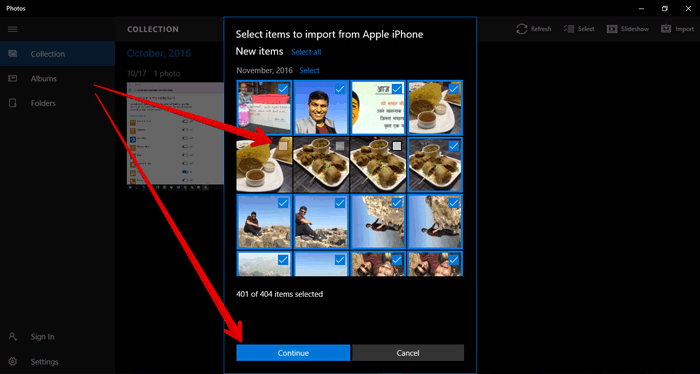
- Launch the Photos app on your computer. If it doesn't start automatically, locate it by typing in the search menu.
- Click "Import" at the top-right of the interface. From the drop-down menu, choose "From a USB device."
- Select individual pictures or albums on your device and click "Import selected." The chosen photos will be imported to the Photos app and stored on your computer.
Way 4. Save Pictures from iPhone Using iTunes
With the latest version of iTunes, critical tasks like recovery or backup can be accomplished. However, iTunes lacks the flexibility of selective backups, posing an inconvenience for some users. Despite this limitation, the auto-sync feature proves efficient for backing up iPhone photos.
How to back up photos on iPhone by using iTunes:
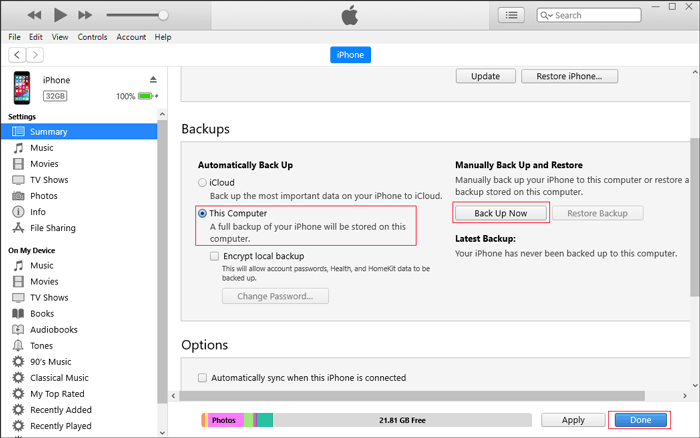
- Connect your iPhone to your computer using a USB cable and open iTunes.
- Locate and click on your device in iTunes, then go to the Summary section.
- Choose "This computer" as your storage preference. Optionally, select "Encrypt backup" to include a password in the file. Click "Back Up Now" and then "Finish" when the backup process is complete.
You may need:
Part 2. How to Backup Photos from iPhone to the Cloud?
Way 1. Back up iPhone Photos to iCloud
As the native cloud storage for iPhones, iCloud offers a seamless backup experience. Notably, it provides the option to choose between "Optimize iPhone Storage" and "Download and Keep Originals," enabling space-efficient photo storage. While iCloud defaults to backing up all photos and videos, the 5 GB of free storage has limitations, accommodating only around 2,000 photos. Upgrading to iCloud+ becomes necessary for larger storage needs. (Transfer large video files from iPhone to PC.)
Here are two methods to backup photos from iPhone to iCloud:
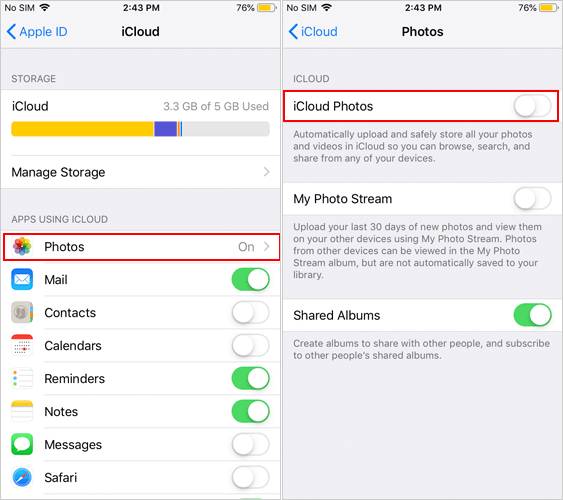
- Navigate to Settings > Apple ID > iCloud > Photos > iCloud Photos > Enable "Sync this iPhone."
- Navigate to Settings > Apple ID > iCloud > iCloud Backup to initiate the backup process.
Way 2. Back up Photos from iPhone to Google Photos
Google Photos stands out for its universal compatibility across devices, offering a significant advantage over other platforms. Additionally, users benefit from a generous 15 GB of free storage compared to Apple's 5 GB with iCloud. The seamless integration of Google applications using a single Gmail account adds to the convenience, eliminating the need to remember multiple passwords.
Here's how to back up photos from iPhone to Google Photos:
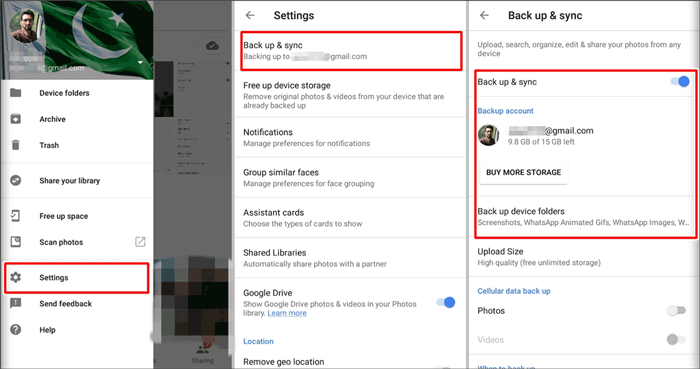
- Install Google Photos for iOS on your device and sign in to your Google account.
- Activate the photo backup feature by navigating to Menu > Settings > Enable "Backup & Sync." If prompted to grant access, go to iPhone Settings > Privacy > Photos > Turn on Google Photos.
- Your photos will then be automatically backed up to Google Photos.
Final Thoughts
Every method for backing up iPhone photos to PC/Mac/Cloud has its unique advantages and drawbacks, providing users with good options. To determine the most suitable choice for your needs, a thorough comparison of their features is essential. MobiKin Assistant for iOS has gained popularity due to its comprehensive features, but individual preferences differ. What may be perfect for one person might not align with another's needs. Hence, it's beneficial to explore alternative options.
If you have additional suggestions or effective ideas to store pictures from iPhone, please share them in the comments section, fostering a collaborative exchange of insights.
Related Articles:
How to Transfer Contacts from iPhone to PC
6 Ways to Transfer Photos from Computer to iPhone Effectively
5 Ways to Backup WhatsApp on iPhone Effectively
How to Import VCF to iPhone? (Productivity Tips)
How to Send Large Size Videos & Photos from iPhone Effectively?
