[2025 Updated] How to Transfer Messages from iPhone to Mac?
"I have important information contained in my text messages, and I need to back them up on my Mac for safekeeping. Can anyone suggest a reliable and efficient method to transfer text messages from iPhone to Mac? Any suggestions or advice would be greatly appreciated."
- From Apple Support Community
Transferring messages from iPhone to Mac has become a critical task, whether you want to conveniently send and receive messages on Mac, view messages on a larger screen, or want to transfer iPhone messages to Mac for backup or printing. This guide introduces four effective ways to accomplish this task, enabling users to easily transfer and organize their SMS data on Mac.
Part 1. Transfer Messages from iPhone to Mac with iCloud
While Apple employs a closed system for its products such as Mac and iPhone, it facilitates seamless integration across its ecosystem. Sharing and syncing data between an iPhone and a Mac is made effortless through various applications, with the Messages app being a notable example.
Regardless of whether you opt for iCloud settings or utilize your Apple ID to transfer messages to Macbook or Mac, the initial step involves enabling the Messages app on your Mac.
Step 1: Enable Messages app on Mac
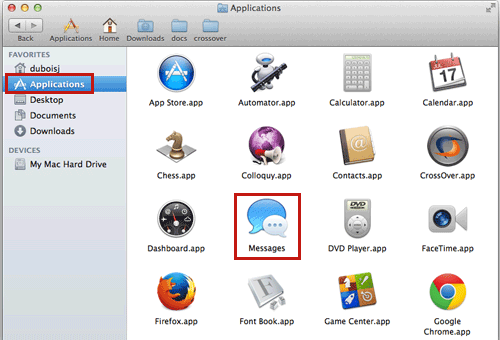
- Go to the Applications folder, find the Message app and double-click to open it. Or you can open the Message app from your desktop dock directly.
- Enter your Apple ID and password to corresponding boxes on the popup window, and hit the "Sign in" button to start setting up Message on Mac. If you have enabled two-step verification or two-factor authentication, you will be prompted to enter your verification code.
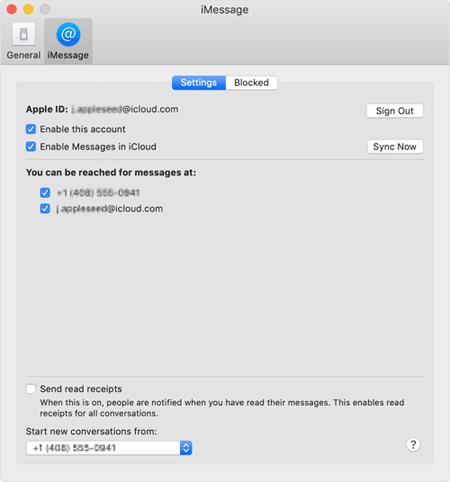
- After sign-in, unfold the "Message" menu on top of the application and select the "Preference" option. Go to the "Account" tab, tick the checkbox in front of "Enable this account", type in your phone number in the box of "Start new conversations from", and then click "Add Email" button to add email addresses that you want to catch up with.
- When activation is done, access the Message app, and you can see the new synced messages sent by other iOS device to your iPhone.
To effortlessly synchronize contacts on your Mac after enabling the Messages app, follow a similar process within the Contacts app on your Mac.
Step 2: Sync messages from iPhone to Mac via iCloud
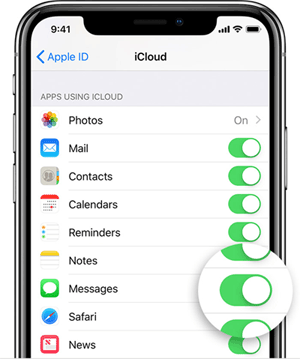
- Launch the Messages application on your Mac and navigate to "Message" > "Preferences" > "Account." Tick the "Enable Messages on iCloud" box and initiate the syncing process by clicking the "Sync Now" button.
- On your iPhone, access "Settings" > [your Apple ID] > "iCloud" and toggle the switch for "Messages" to the "ON" position.
- Proceed to "Settings" > "Messages" on your iPhone and select "Sync Now."
- Ensure both your iPhone and Mac are connected to a Wi-Fi network. The synchronization of iPhone messages to your Mac will commence seamlessly through iCloud. (If your iPhone can't connect to WiFi, find solutions here.)
Check If You Need:
Part 2. Transfer iMessages from iPhone to Mac via iMessage SMS Forward on Mac
To choose iMessage SMS Forward to download iPhone messages to Mac free, you will need to install the app on both your iPhone and Mac. The software is available on the Apple apps. Ensure you install it before you can proceed with the files transfer process.
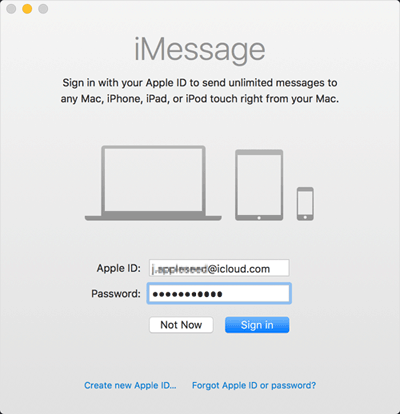
- Go to the "Messages" app on your Mac and launch it.
- Enter our Apple ID and password in the pop up screen and then click the button of "Sign In".
- Apply the correct code of the two-factor authentication if you had installed one.
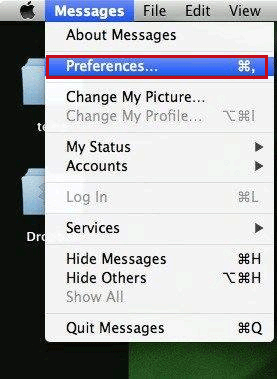
- On the top menu, you will see the section labeled "Messages". After you click on message, proceed and click on the "Preferences".
- Input the email address and phone number in the Accounts tab to receive the emails and text messages.
- You will have the option where you can input the email address and the phone number you would like to send messages or email at the start of a new conversation.
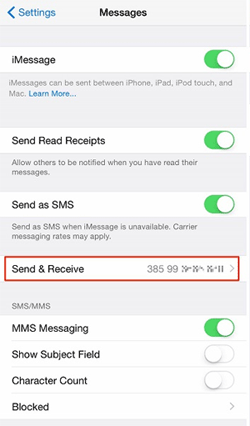
- After above operations, you have successfully set up the iMessages account on your Mac. Now, you should turn to iPhone and go to click "Settings" > "Messages" > "Send & Receive".
- Choose "Use Your Apple ID for iMessage" option and enter your Apple ID and password. Enter passcodes if you have set the 2-factor authentication before.
- Select the proper email address and click "Next".
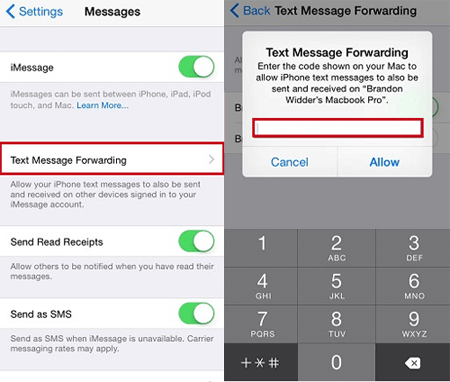
- Go to click "Settings" again and choose "Messages" > "Text Message Forwarding". Then, you will receive a verification code and you should enter the code to your iPhone so that the message forwarding is enabled.
- Now that you have enabled text message forwarding on the iPhone, then, you can go to the composer and choose the "Compose" button, or go to "File" followed by "New Message" or use "Command + N" to open anew message composing window.
- Enter the recipient's name and enter the message you want to send at the bottom of the screen. Finally click on "Return" to send the message.
![]()
Check If You Need:
Part 3. Transfer iMessages from iPhone to Mac with iTunes File Sharing
If you're familiar with iCloud, you might also be acquainted with iTunes, as they share similarities in their capability to transfer SMS from iPhone to Mac. iTunes, originally designed as a multimedia player, evolved into a versatile tool with various functions. Among these is iTunes File Sharing, a feature allowing users to add and manage files from their iPhones, making it an ideal choice for our purpose.
Here's a step-by-step guide on how to transfer texts from iPhone to Mac using iTunes:
- Ensure that your iPhone is connected to the Mac computer.
- Open iTunes on your Mac.
- Click on the device corresponding to your iPhone from the left side of the iTunes window.
- Navigate to the left sidebar and click on "Apps."
- Scroll down until you locate "File Sharing."
- Under the Apps section, select "Messages."
- A list of conversations will appear on the right side of the window. Choose the specific conversation you wish to transfer and save.
- The iTunes File Sharing feature is designed for transferring files from specific apps, and since Messages functions as an app, you can effectively transfer iPhone messages to your Mac using this feature.
Part 4. Download Messages from iPhone to Mac without iCloud/iTunes
An efficient and swift method for transferring text messages involves utilizing the dependable iOS data transfer software - MobiKin Assistant for iOS. This tool enables you to effortlessly move numerous messages from an iPhone to a Mac at a high speed, without the need for an internet connection. In addition to text messages, it boasts compatibility with over 25 other types of iOS files, such as contacts, videos, music, notes, and photos. This versatility allows you to seamlessly export photos from iPhone to Mac or import contacts onto your iPhone with ease.
Main Feature of Assistant for iOS:
- Directly and selectively sync all messages from iPhone to Mac.
- Preview text messages prior to initiating the transfer.
- Synchronize iPhone messages on Mac in TXT or HTML format for direct reading.
- Compatible with a wide range of iOS devices, including iPhone 17/Air/17 Pro/17 Pro Max/16/15/14/13/12/11/X/8/7/6/5/4, iPad, iPod touch, and more.
How to copy messages from iPhone to Mac using Assistant for iOS?
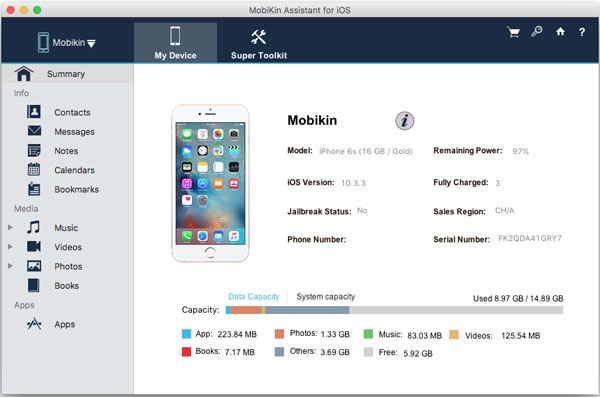
Step 1. Connect Your iPhone to Mac
Begin by downloading and installing MobiKin Assist for iOS on your Mac. Launch the application and connect your iPhone to the Mac using a USB cable.
Step 2. Preview and select the messages you need
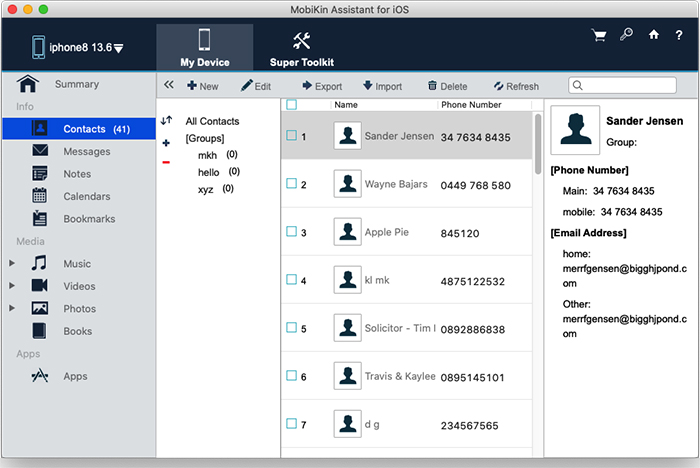
On the left side menu, all file types will be visible. Navigate to the SMS folder, and the program will initiate a scan of your phone's memory for text messages. Once the scanning process is complete, you can selectively choose the messages you wish to transfer.
Step 3. Import iMessages from iPhone to Mac
After selecting the desired text messages, utilize the "Expert" function located in the top menu to initiate the transfer of messages from your iPhone to your Mac.
[Video Tutorial] How to transfer messages from iPhone to Mac:
Summary
iPhone SMS to Mac transfer can be accomplished through the aforementioned five methods. However, some of these approaches may appear complex and time-consuming. For those seeking the easiest and safest solution, MobiKin Assistant for iOS Mac stands out. Compatible with all iOS devices and MacOS versions, it offers a user-friendly interface, enabling quick and effortless downloading of SMS messages from iPhone to Mac. By opting for Assistant for iOS, concerns about transferring various data types, including contacts, SMS, photos, videos, and music, from your iPhone to any computer will be alleviated. Obtain Assistant for iOS now for a seamless data transfer experience.
Related Articles
How to Transfer Photos/Videos from iPad to External Hard Drive
How to Backup Text Messages on iPhone Effectively?


