5 Ways: How to Transfer Photos from Android Phone to External Hard Drive
In this era of rapid development of the Internet, people prefer to store photos directly on Android or back them up online to cloud storage. To protect the security of our phone data to the greatest extent, we recommend that you transfer photos from Android to hard drive as an offline copy in case you need it.
The space of your smartphone will be used up quickly with a lot of images, which is why we need to transfer phone data to a computer or an external hard drive every once in a while. If you wish to know how to transfer pictures from Android phone to external hard drive, you can follow the guide below.
- Way 1: Transfer Photos from Android Phone to External Hard Drive Expertly
- Way 2: Transfer Pictures from Android to External Hard Drive with Windows Explorer
- Way 3: Move Photos from Phone to External Hard Drive via Android File Transfer
- Way 4: Transfer Photos from Phone Directly to External Hard Drive via ES File Explorer
- Way 5: Transfer Photos from Android to External Hard Drive without Computer via OTG
Alternatively, check out the video below to learn this topic visually:
Way 1: Transfer Photos from Android Phone to External Hard Drive Expertly
The fastest and easiest way to transfer photos from Android to an external hard drive is to use a third-party software called MobiKin Assistant for Android (Windows and Mac). It is a versatile Android device management tool that not only allows you to preview and manage your Android device data directly on the computer, but also enables one-click backup and restore to ensure the security of your device data.
A brief overview of MobiKin Assistant for Android:
> Back up Android phone to external hard drive, including photos, music, videos, contacts, SMS, call logs, etc.
> Restore data from the backup to Android without data loss.
> Preview and select the data before file transfer and management.
> Manage, edit, export/import, and delete Android data on computer directly.
> Provide two connection types: USB and Wi-Fi connections.
> Get along well with 8,000+ Android phones or tablets, covering Samsung, Google, Xiaomi/Mi/Redmi/POCO, Huawei, Sony, Motorola, Asus, DELL, TECNO, OPPO, etc.
> Easy to follow and no privacy concerns.


How do I transfer photos from Samsung phone to external storage by using MobiKin Assistant for Android?
Step 1. Run the Assistant for Android program - Launch the Assistant for Android software on your computer after you have downloaded and installed it. Then, connect your Android phone to the computer with a USB cable. Meanwhile, connect the external hard drive to the computer.
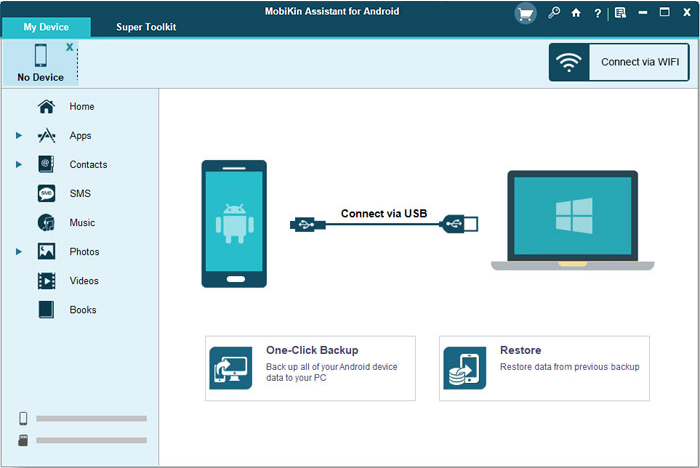
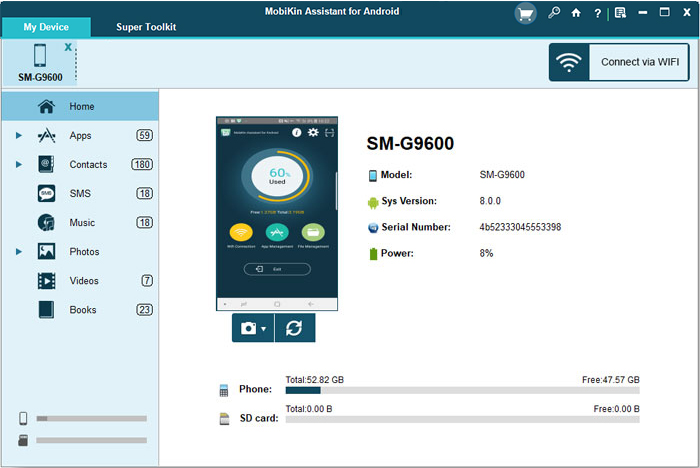
Step 2. Connect Android and external hard drive - Once the connection between your Android phone and the computer is successful, the main interface of the software will be displayed below. You can see all manageable Android data types are categorized on the left panel.
Step 3. Preview and handpick the images - Choose "Photos" > "Camera" from the left menu, and all the pictures from your Android will be listed on the right. Now, you can check and handpick the photos you want to transfer.
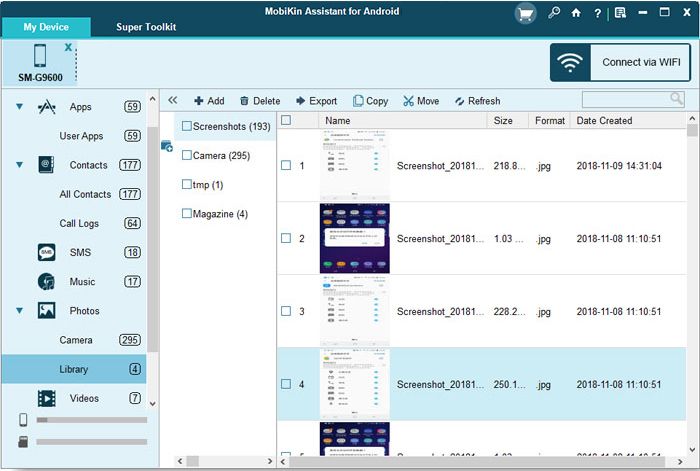
Step 4. Copy the photos to your hard drive - After all the desired photos are selected, you can click the "Export" option from the top menu, choose the external hard drive as the destination folder, and then all the selected photos will be saved to the drive instantly.
Want to watch how MobiKin Assistant for Android works? Here's the Video Guide:
Note: Most standard external hard drives are compatible as long as they use a file system supported by your Android device. Ensure the drive doesn't require more power than the phone can provide through the OTG connection.
You Might Also Need: If you're unable to find your desired images for transfer, you can recover them from your phone without a backup.
Way 2: Transfer Pictures from Android to External Hard Drive with Windows Explorer
How can you transfer files from Android devices to an external hard drive without downloading any third-party program? Well, this is feasible on a Windows PC, but it may not be very smooth to operate. It will be more time-consuming. Can you transfer photos from Android phone to external hard drive via Windows Explorer? Follow the drill below:
- Connect your Android smartphone to your Windows PC through a USB cable that comes with the Android device.
- Follow the hints to make your phone recognized by the PC. Then, select the "MTP" (Media Transfer Protocol) option on it.
- On your PC, open "This PC"/"My Computer", and you will see the connected Android phone showing up under "Devices and Drivers".
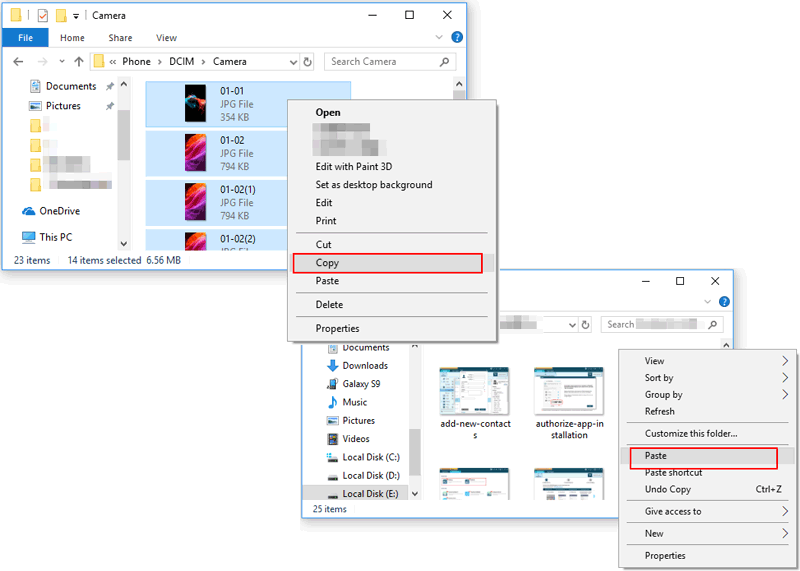
- Double-click the name of your Android phone, open the "DCIM" folder, and copy all the photos you want to transfer to any location on the computer.
- Connect the external hard drive to the PC and open it under Devices and Drives.
- Paste all the photos to the external hard drive.
You Might Also Enjoy:
Way 3: Move Photos from Phone to External Hard Drive via Android File Transfer
You can also transfer files from phone to hard drive on Mac, as long as you make use of the Android File Transfer program. (Android File Transfer doesn't work on Mac?) Let's see how to transfer photos from a tablet or phone to external hard drive via Android File Transfer now:
- Download and install Android File Transfer on your Mac.
- Connect your Android phone to a Mac and choose the "Transferring image" mode on it.
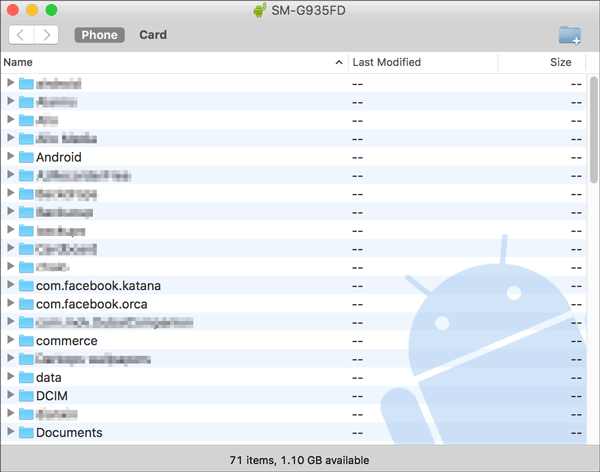
- The Android File Transfer app will open automatically and detect the connected Android device.
- Navigate to the folder where all the photos are saved.
- Select the photos you want to transfer, and drag-n-drop them to a folder on your Mac.
- Connect your external hard drive to the Mac.
- Drag the folder containing the photos you need to this hard drive.
Way 4: Transfer Photos from Phone Directly to External Hard Drive via ES File Explorer
If you want to transfer photos from Android phone to external hard drive without a computer, you can connect phone to external hard drive directly. To do that, you have to install a third-party Android data management app like File Explorer with the assistance of an OTG cable.
But please note that this method can only be used for an external hard drive in FAT32 format. Can I back up my Android phone directly to an external hard drive? Here's how:
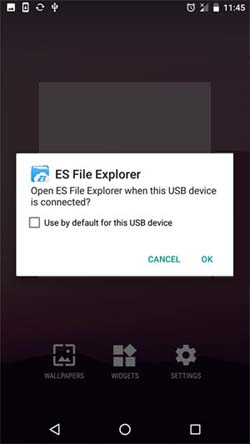
- Download ES File Explorer from Google Play for free, and install it on your Android phone.
- Insert the external hard drive into a 3-in-1 adapter and plug it into the Android phone.
- Launch the ES File Explorer app on your Android phone, and it will detect the external hard drive.
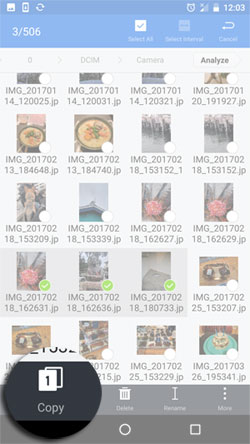
- Tap on "Internal Storage" > "DCIM" > "Camera" to see the "Camera folder" to view all the photos.
- Tap and hold the photo(s), and mark the checked dot on the one(s) you want to transfer.
- Tap on the "COPY" button at the lower taskbar menu.
- Go back to the Home menu by tapping on the Backward key, and then get into the external storage device.
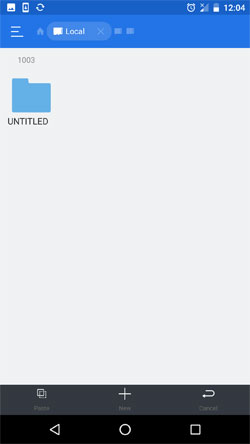
- You'll see a root folder named "UNTITLED". Just enter it into the folder.
- Tap the "+" sign to create a new folder.
- Open the created folder and tap "Paste" at the lower taskbar menu to transfer the selected photos to the connected external hard drive.
You May Also Like: Top 12 Best ES File Explorer Alternatives [Expert's Advice]
Way 5: Transfer Photos from Android to External Hard Drive without Computer via OTG
A USB OTG (On-The-Go) cable lets you connect your Android device directly to an external hard drive without a computer. This makes it easy to transfer photos, manage media files, and free up space on your device efficiently. It's a convenient solution for on-the-go backups and organization.
How to transfer photos from Samsung/Android phone to external hard drive with OTG?
- Connect your Android device to an external hard drive using a USB OTG adapter.
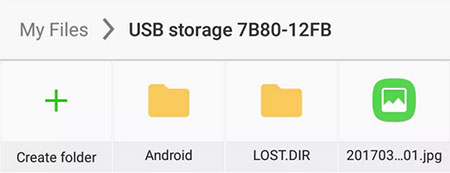
- Once the drive is detected by your phone, open the file manager app, typically named Files or My Files.
- Navigate to the folder containing your photos, usually found in the "Camera" folder within the "DCIM" directory.
- Select the desired photo and choose either the "Copy" or "Move" option.
- After copying the photos, navigate to the directory on the external hard drive where you want to transfer them.
- Select the destination folder and paste the copied images into it.
Closing Remarks
A USB flash disk is a miniature of a mobile hard drive. And it is wise to transfer photos from Android device to U-disk. To be honest, and apparently if you want to free yourself from the relatively cumbersome and restrictive OTG transfer procedure, then advise you to choose the all-around Android data manager - MobiKin Assistant for Android.
Further, after the transfer is done, you might as well keep your USB flash drive from dust and water. As time goes by, you may want to access the photos from the USB flash drive and relive the cherished memory of the past one day.
Related Articles:
5 Desirable Ways to Recover Photos after Factory Reset on Android Phone
10 Best Google Photos Alternatives You Must Know [Latest Info]
Top 13 Photo Managers for Android to Manage Android Pics with Ease
How to Transfer Photos from Android to iPhone? 7 Creative Ways