How to Erase iPhone Data for Selling? 3 Tactics & Helpful Tricks
"If I sell my iPhone and erase all contents and settings, can the buyer possibly recover the data like a computer hard drive?" -- from Reddit
iPhones are built to last, often up to 10 years with proper care. But since Apple updates devices frequently, most users upgrade every 3 years by selling their old devices. Before selling, however, it's important to take a few steps to avoid potential issues. This passage explains how to erase iPhone data for selling. Take steps on your old device so you won't have concerns once your phone is sold.
- Part 1: What to Do before You Erase iPhone Data for Selling [9 Things]
- Part 2: How to Directly Wipe iPhone to Sell [Not Safe]
- Part 3: How to Erase iPhone for Selling via iTunes/Finder [Less Secure]
- Part 4: How to Completely Erase iPhone Data for Selling [Completely Safe]
- Extra: How to Restore iCloud Backup to New iPhone 17/16
Part 1: What to Do before You Erase iPhone Data for Selling [9 Things]
1.1 Back Up Data
MobiKin Assistant for iOS (Windows and Mac) is a professional tool that lets you easily back up your iPhone data to your computer. Using it ensures that your contacts, messages, photos, and other important files are safely stored before you sell your device. It's an essential step to prevent data loss and protect your personal information.


Free download this professional program on your computer and back up your iPhone to your PC conveniently before doing the folllowing things.
You can also keep a copy of your iPhone data using iCloud. Quick Guide: 1. Make sure your iPhone is connected to a stable Wi-Fi network. 2. Open Settings – Tap your Apple ID name at the top. 3. Go to iCloud > iCloud Backup. 4. Turn on iCloud Backup if it isn't already enabled. 5. Tap Back Up Now and wait until the backup completes. (iCloud automatically backs up your iPhone daily when it's plugged in, locked, and connected to Wi-Fi.)
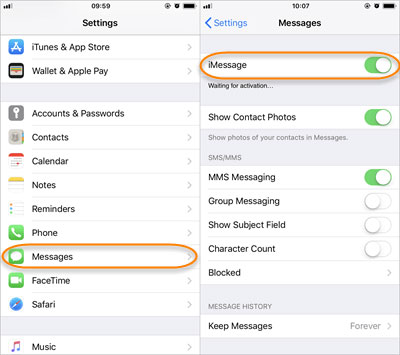
1.2 Disable iMessage & FaceTime
Turn off iMessage:
- Open the Settings app.
- Scroll down and tap Messages.
- Toggle iMessage off (the switch will turn gray).
You May Also Like: [100% Work] 3 Ways to View iMessage History on iPhone
Turn off FaceTime:
- Go back to Settings.
- Scroll down and tap FaceTime.
- Toggle FaceTime off.
1.3 Unpair Apple Watch
- Keep your iPhone and Apple Watch close together.
- Open the Apple Watch app on your iPhone.
- Tap My Watch at the bottom of the screen.
- Tap All Watches at the top.
- Tap the 'i' icon next to the watch you want to unpair.
- Select Unpair Apple Watch and confirm.
- If prompted, enter your Apple ID password to disable Activation Lock.
NOTE: Unpairing will automatically back up your Apple Watch data to your iPhone, so you can restore it later on a new device.
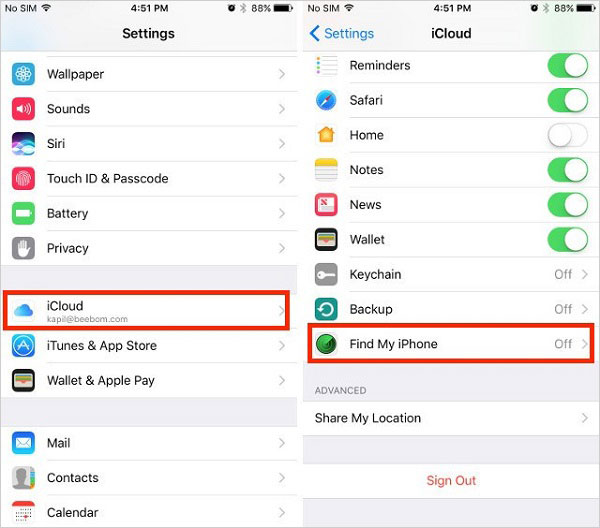
1.4 Disable Find My iPhone
- Open the Settings app.
- Tap your Apple ID name at the top.
- Select Find My.
- Tap Find My iPhone.
- Toggle off Find My iPhone.
- Enter your Apple ID password when prompted.
- Tap Turn Off to confirm.
Click to Explore: All You Want to Know about Find My iPhone Offline Last Known Location [2025]
1.5 Remove iPhone from Trusted Devices
- Go to appleid.apple.com.
- In the sidebar or top menu, select Devices.
- Find and click on your iPhone in the list.
- Click Remove from Account.
- Confirm when prompted to complete removal.
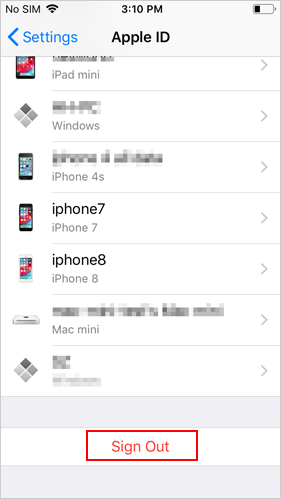
1.6 Sign Out iCloud/Apple Account
- Open the Settings app.
- Tap your Apple ID name at the top.
- Scroll down and tap Sign Out.
- Enter your Apple ID password if asked, then tap Turn Off (this disables Find My iPhone).
- Choose whether to keep a copy of your data (contacts, calendars, etc.) on the device.
- Tap Sign Out again to confirm.
1.7 Remove Cards from Apple Pay
- Open the Settings app.
- Tap Wallet & Apple Pay.
- Under Payment Cards, select the card you want to remove.
- Tap Remove Card.
1.8 Take Out SIM Card
- Power off your iPhone - Press and hold the side button and volume button until the power slider appears, then slide to turn off.
- Locate the SIM tray - On most recent iPhones, it's on the left side of the device. On some older models, it may be on the right side.
- Insert the SIM eject tool (or paperclip) into the small pinhole next to the SIM tray.
- Gently press in until the tray pops out.
- Pull the tray out and remove your SIM card.
- Reinsert the empty tray back into your iPhone.

1.9 Clean Your iPhone
- Turn off and unplug the iPhone.
- Remove the case and accessories.
- Wipe exterior with a microfiber cloth lightly dampened with 70% isopropyl alcohol or a safe disinfectant wipe.
- Clean ports and speakers with a dry cotton swab or soft brush.
- Polish the screen with a dry cloth and ensure the device is fully dry.
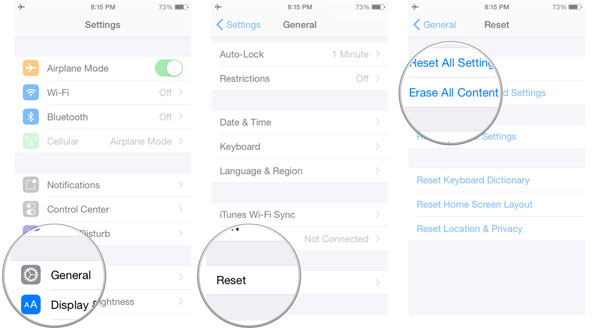
Part 2: How to Directly Wipe iPhone to Sell [Not Safe]
Erasing all content and settings from an iPhone lets you directly wipe the device, removing apps, personal data, and restoring it to factory settings - making it convenient for selling. This built-in method is quick and doesn't require additional tools or computers. However, it is not entirely safe, as some data may still be recoverable with specialized software. Here's the user guide:
- Go to Settings > General > Transfer or Reset iPhone > Erase All Content and Settings.
- Follow the on-screen instructions and enter your passcode if required.
- The iPhone will reset, deleting all personal data, apps, and settings.
Part 3: How to Erase iPhone for Selling via iTunes/Finder [Less Secure]
iTunes and Finder are official Apple tools that allow you to manage and restore your iPhone from a computer. They can erase all content and settings, securely restoring the device to factory settings - making them ideal for preparing an iPhone for sale. Compared to erasing directly on the device, this method is more thorough and reliable in removing personal data.
Steps to Erase iPhone via iTunes (Windows or macOS Mojave and earlier):
- Connect your iPhone to your computer using a USB cable.
- Open iTunes and select your iPhone from the device icon.
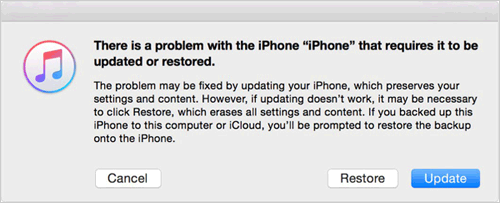
- Click Restore iPhone.
- Confirm that you want to erase all content and settings and restore the device to factory settings.
- Wait for the process to complete, then safely disconnect your iPhone.
Steps via Finder (macOS Catalina or later):
- Connect your iPhone to your Mac.
- Open Finder and select your iPhone from the sidebar.
- Click Restore iPhone.
- Confirm to erase all content and restore factory settings.
- Wait until the iPhone restarts and shows the setup screen.
Part 4: How to Completely Erase iPhone Data for Selling [Completely Safe]
As a powerful tool that can completely erase all data on your iPhone, MobiKin Eraser for iOS makes it safe to sell, donate, or recycle. It offers multiple security levels and permanently removes personal information, including previously deleted files. Trusted by over 680,000 iPhone users, it provides a reliable and user-friendly way to protect your privacy.
MobiKin Eraser for iOS - Core Highlights:
- One-Click Erasure: Wipe all data from your iOS device with a single click.
- Multiple Security Levels: Choose Low, Medium, or High for speed vs. security
- Permanent Deletion: Erase previously deleted files beyond recovery.
- Comprehensive Data Wiping: Remove contacts, messages, photos, apps, settings, and more.
- User-Friendly Interface: Easy to use without technical knowledge.
How to Wipe Your iPhone Using MobiKin Eraser for iOS?
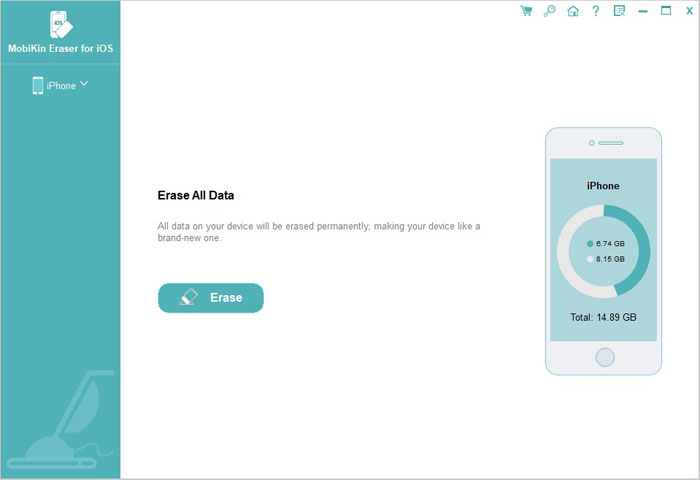
- Launch the installed Eraser for iOS program on your computer and connect your iPhone via a USB cable.
- Once recognized, click the 'Erase' button in the program interface.
- Choose a security level - Low, Medium, or High - based on your needs, then click 'OK' to confirm.
- In the confirmation box, type 'delete' and click 'Erase' to begin wiping your iPhone.
- Keep your device connected until the process is fully completed.


Extra: How to Restore iCloud Backup to New iPhone 17/16
To restore your old iPhone's iCloud backup to a new iPhone, like iPhone 17/17 Pro/17 Pro Max/Air, begin setting up the new device until you reach the "Apps & Data" screen. Select "Restore from iCloud Backup," sign in with your Apple ID, and choose the most recent backup from your old phone.
Keep the new iPhone connected to Wi-Fi and power as it restores, which may take some time. After it finishes, your apps and data will download, and you may need to sign back into some accounts.
Words in the End
When preparing your iPhone for sale, erasing all data is essential to protect your privacy. You can do this directly from Settings, though this method may not completely prevent data recovery. Using iTunes/Finder provides a more secure wipe, while MobiKin Eraser for iOS offers the most thorough solution with multiple security levels, permanently removing all data. Before use, ensure you have followed the essential steps mentioned in Part 1.
Related Articles:
Top 7 Ways to Delete Data from Android Phone Permanently Before Selling It
7 Quick Fixes to Restoring from iCloud Backup Taking Forever
How to Transfer Data from iPhone to iPhone without WiFi - 4 Ways
10 Best iPhone Manager Software to Transfer and Manage iOS Files
