3 Solutions to Wipe Cache Partition on Android
The cache is basically a temporary directory that the system uses to download the temporary files needed to install the application. The Android OS actually uses partitions to organize files and folders, one of which is used for system caching. It is well known that all installed applications use caches to make them faster to use, and erasing cache partitions usually has no noticeable impact on the end user. Therefore, if your device is full of memory and is almost at its highest level, clearing the cache can increase the available storage space on the device.
In this article, we'll share three simple solutions to allow you to erase Android's cache partition, using the Settings app, Android Recovery mode and professional Android data erasing software.
Solution 1. Wipe Cache Partition on Android Using the Settings App
Anyway, here is where you should be looking to clear the cache partition on Android device from Settings. Just proceed with the steps below.
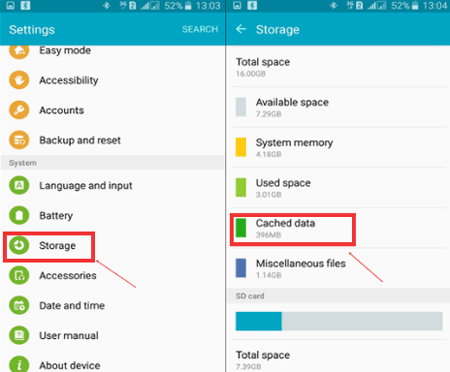
Step 1. From the home screen of your Android phone, navigate to the Settings app.
Step 2. Scroll down the Settings page to find the Storage tab. Open it and go to the bottom of the screen to tap the Cached data tab.
Step 3. Press the Cached data tab and a popup will appear to delete it. Just select OK option to confirm the deleting process.
After that, all of your cached data and temporary files will be wiped completely from your Android device. Please note that some versions of the Android OS won't let you delete cache this way.
People Also Read:
How to Delete Skype History on Android
How to Fully Wipe out Android SIM Card
Solution 2. Delete Cache Partition on Android Using Android Recovery Mode
Deleting cache partition from Android by using Android recovery mode, you will wipe out the total partition without clearing the cache itself. This method, I think, is much better than the first solution because this will clear out complete cache files and make your Android device perform better. Just follow the steps below.
Step 1. Turn off your Android phone.
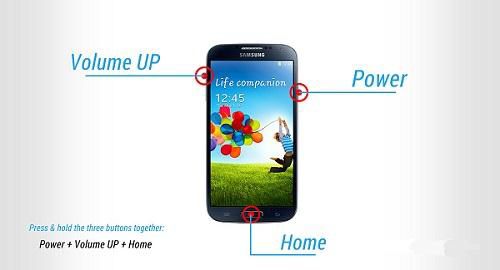
Step 2. Reboot your Android device into recovery mode:
* For Samsung phones, you can press and hold Volume Up + Bixby (or Home button) + Power buttons together.
* For most of the Android devices, you should press and hold the Volume Up + Power button.
* If the steps don't work on your Android device, you can go online to find the suitable method to turn your Android device into recovery mode.
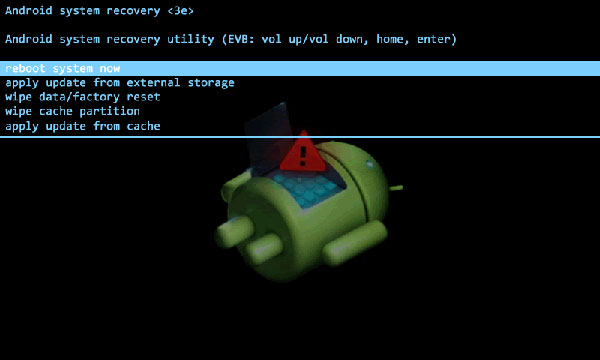
Step 3. Once you see there is an exclamation mark on the dead Android screen, you should release the Power button but continue to hold the Volume Up button until the Android logo appears. If you release both of the buttons simultaneously, don't worry, you can press and hold the volume up button and power button again and when you see Android recovery screen shows up, you can release both buttons.
Step 4. You have successfully entered the Android recovery mode. Now, you should use the Volume Down button to choose the option of "wipe cache partition" and use Power button to select it.
Step 5. You will be asked whether you are sure to wipe cache, just click "Yes" to confirm it and wait for the reset to finish.
Step 6. After all the steps above, you will be back to Android recovery screen. Now, you can choose the option of Reboot system to restart the Android device.
Solution 3. Erase Cache Partition on Android Using Android Data Eraser
The above two ways to wipe cache partition on Android actually can't delete files for good and those deleted files can still be recovered back with some professional Android data recovery programs. If you want to delete data on Android phone/tablet permanently, you can draw support from the Android Data Cleaner. The software can scan and delete all the cache files from all brands of Android devices like Motorola, HTC, LG, Samsung, Sony and so on. The erasing performed by the Android Data Cleaner is 100% permanent and no one can recover the deleted data back. It is very suitable for those who want to resell or donate their devices.
You can download the software and then follow the steps below to begin the process of erasing cache partition on your Android.


Step 1. Install and launch Android Data Cleaner
Install the Android Data Cleaner on your computer and run it. Connect the Android device to your computer with its USB cable. And install the MobileGo connector on your device as requested and then you will see an interface like this.
Step 2. Choose the correct cleaning mode
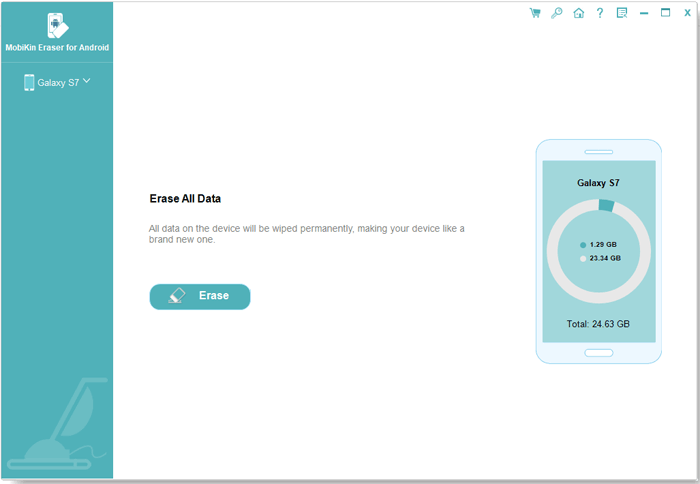
Then select the mode to clean temp files on Android. Simply select the Erase All Data mode to go on.
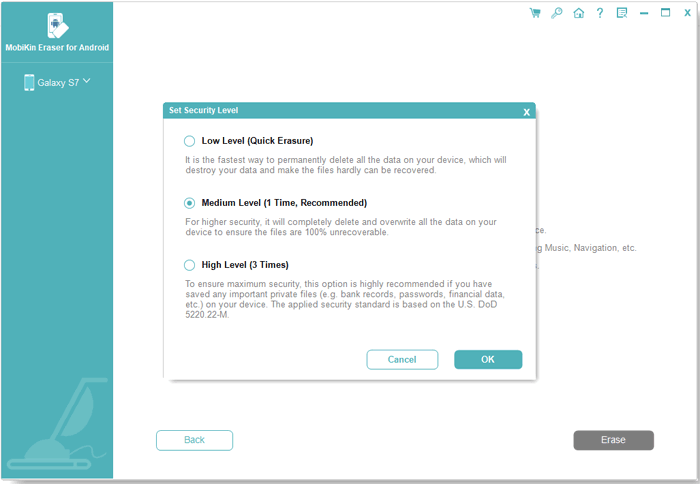
Step 3. Start to wipe Android cache partition
You will see a new window, just enter the "delete" on the box to confirm your action and click the Erase Now button finally to wipe cache partition from your Android device.
Bonus:
With this article, you should have a clear understanding of the Android Wipe Cache Partition. In fact, this is a very simple process for clearing the space occupied by unnecessary cache files on the device. Among the three methods discussed above, the easiest and safest method is of course to use the professional Android Data Eraser. It does not pose any risk to the device and provide users with one-click process. Clearing the cache does not prevent any application from being used.
Therefore, you should pay close attention to the storage conditions in the system settings and periodically clear the cache. I hope that the information about Android cache partition cleanup mentioned in this article will actually help you.
Related Articles:
7 Top-rated Ways to Delete All Photos from iPhone 15/14/13/12/11 [2023]
4 Methods to Delete Photos/Videos from Android Phone Singly, Multiply or Entirely
3 Incredible Ways to Delete iPhone Photos from PC/Mac
