6 Painless Ways to Back Up Music/Songs on Android Device [Quick]
The necessity of creating a backup for music on your Android device arises from the inherent vulnerability of songs stored on such devices. These files may be inadvertently deleted or lost, leading to potential frustration for users. Therefore, it is highly recommended that individuals routinely figure out how to back up music on Android to prevent unforeseen loss. Fortunately, there are multiple options available.
- Part 1: How to Back Up Songs on Android via File Explorer
- Part 2: How to Back Up Music on Android in One Click
- Part 3: How to Back Up My Music on My Android Flexibly
- Part 4: How to Back Up Music to Google Drive
- Part 5: How to Back Up Your Music on Android via YouTube Music
- Part 6: How Do I Back Up My Music with G Cloud Backup
- FAQs for Android Music Backup
Part 1: How to Back Up Songs on Android via File Explorer
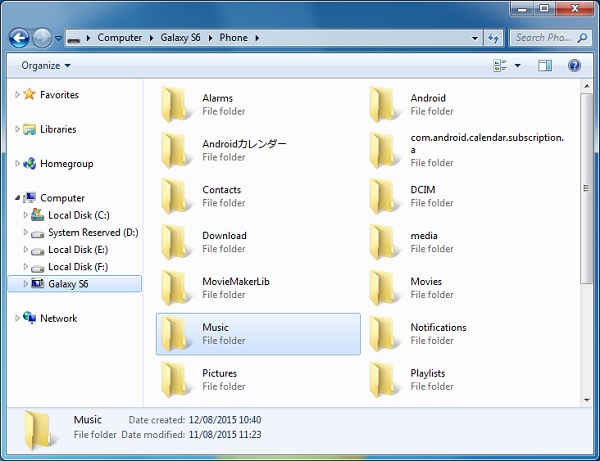
Maybe you can try a classic method to transfer the music files - copying and pasting the songs - via USB. This is an easy but time-consuming means. If you are familiar with your folder on your device and do not need to sync too many songs, you can try it as follows:
- Link your Android phone to your computer with a USB cable, and the device will be recognized as a removable USB drive.
- Drag down the "Notifications" panel from the top of the phone screen.
- Tap on "Media device (MTP)". Next, click "OK" when the notification saying "Allow USB debugging" pops up.
- After that, turn to your PC and open the "Portable Devices" under "This Computer" folder.
- Now, find out the "Music" folder and copy the songs you want to back up.
- At last, paste the copied files into a new folder on your computer as a backup.
Part 2: How to Back Up Music on Android in One Click
It is advisable to utilize an Android backup and restore application known as MobiKin Backup Manager for Android (Windows and Mac) for easy and swift backup on your computer. Known as MobiKin Android Backup & Restore, this tool is user-friendly and allows for the comprehensive backup of nearly all data on your Android device. Additionally, it provides the capability to restore data from the backup to the device without difficulty.
Read More about MobiKin Android Backup & Restore:
1) One click to back up Android contacts, music, videos, photos, text messages, call logs, documents, apps, and more to a PC for backup.
2) Directly restore the backups to any Android device with simple steps.
3) You are allowed to connect your Android phone to the computer via USB or WiFi.
4) Compatible with 8,000+ Android devices, including Samsung, OPPO, Motorola, Sony, Huawei, TECNO, OnePlus, Google, Xiaomi, Infinix, etc.


Operating Manual:
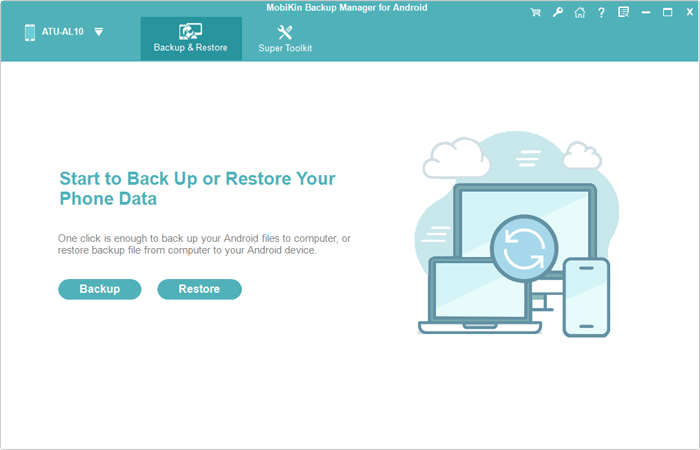
Step 1: Get started with this software
Download the MobiKin Backup Manager for Android and install it on your computer. When it is finished, it will open automatically. Now, connect your Android phone to the same computer via USB, and you will see such a user interface on the screen. (How can you connect your phone to your PC with WiFi?)
Step 2: Select "Music"
Choose "Backup" from the main interface to proceed (If you wish to restore data from the backup to Android, click "Restore" here). As you can see, all supported data types are listed here. For this topic, you should tick off the "Music" tab.
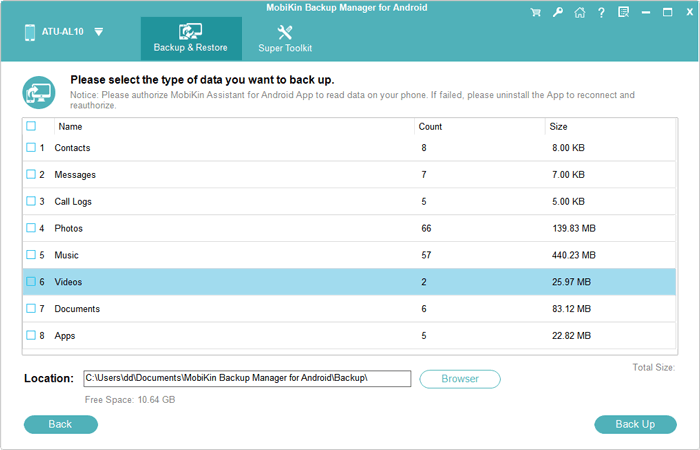
Step 3: Back up Android music
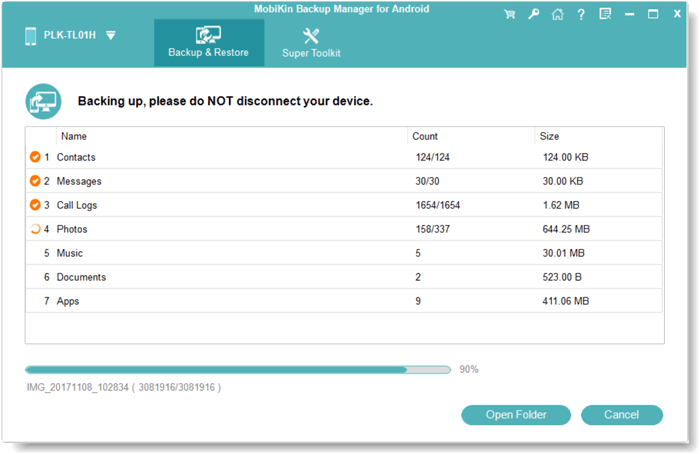
After selecting the "Music" tab, you can also choose an output directory to store these files by clicking on "Browser". After that, click "Back Up" at the bottom right to start the procedure.
Video Guide: Learn how to use this software in a visual manner.
Part 3: How to Back Up My Music on My Android Flexibly
We would like to present a thorough method for backing up Android devices flexibly using MobiKin Assistant for Android, available for both Windows and Mac. This software is both professional and highly effective for Android backup purposes.
This music backup app for Android enables users to not only selectively back up music from their Android devices to a computer and vice versa but also to transfer various other files, including contacts, SMS, call logs, videos, and photos. Further, it also helps back up and restore all phone data with a single click and manage your device content on your PC.


Operating Manual:
Step 1. Launch the installed software on your computer and use a USB cable to build a connection between your phone and the desktop. After the connection, go with the prompts on the screen to activate USB debugging on your phone so that the tool can detect it.
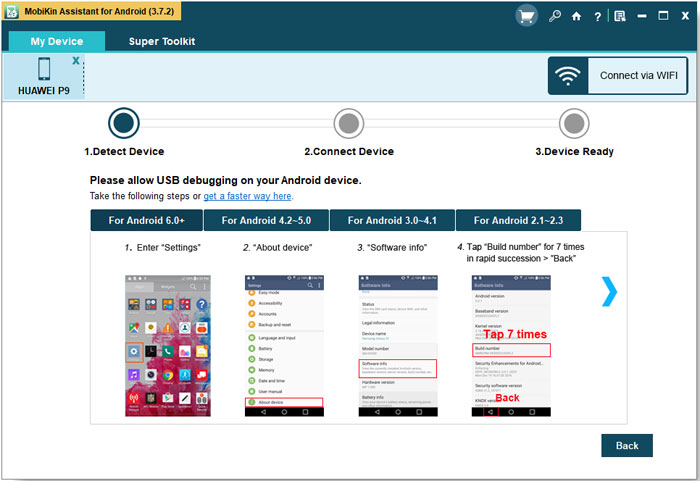
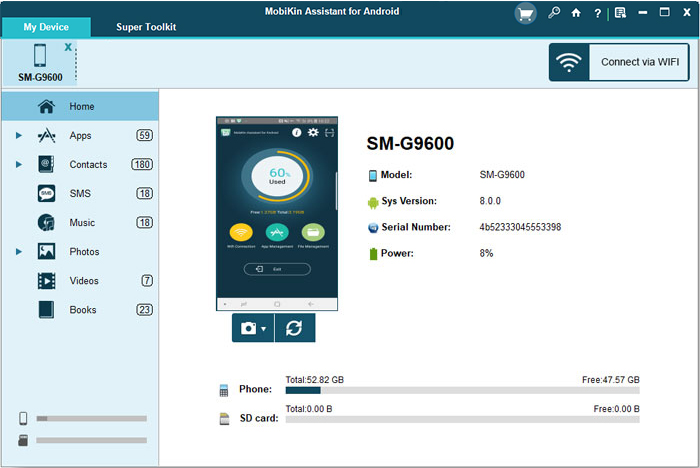
Step 2. Once the device is recognized, you will get the main interface of the software, which displays the parameters and files of your device. Now, you can start to back up your music selectively or in a batch.
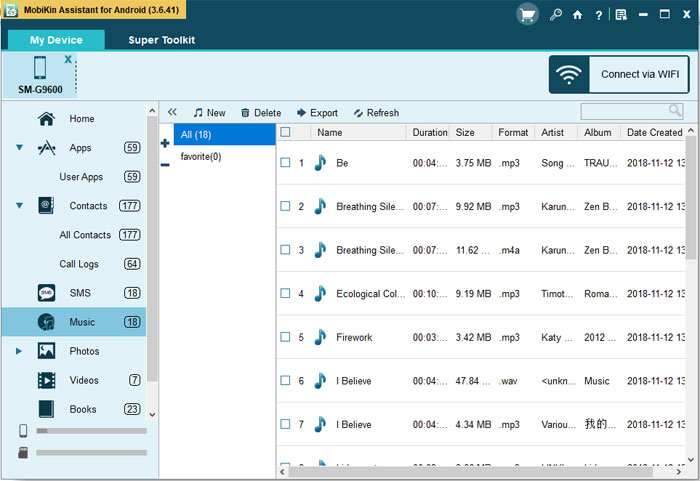
* Back up Android songs selectively - Tap on "Music" in the left panel to locate the detailed info in the right column. Then, preview the songs and mark the wanted files. After the selection, hit the "Export" button to transfer the songs to your computer.
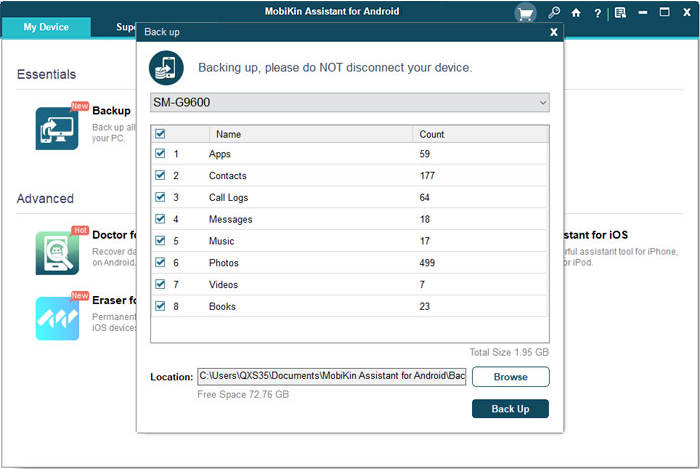
* Back up Android songs in a batch - Navigate to "Super Toolkit > Backup" and then tick the "Music" category listed in the window. Next, browse a folder to save the selected songs and hit "Back Up" to start the transfer.
After the transmission, you can go to check the backup music on your computer. Just open the output folder you just chose and all the saved songs will be listed there.
Part 4: How to Back Up Music to Google Drive
Android cloud backup is a popular way, and it is also one of your options here. There are a lot of cloud storage services on the market, such as Google Drive, Dropbox, OneDrive, etc. You can make a comparison among them and select the required one to back up your favorite songs. Let's take Google Drive as an example in this part.
Operating Manual:
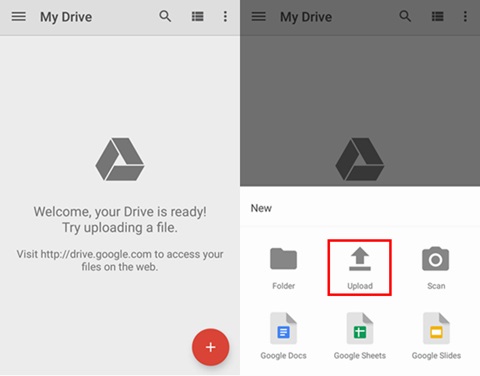
- Connect your Android phone to WiFi and launch the Google Drive application on your device.
- Next, sign in with your Google account and tap the red "+" icon at the bottom right corner to open the menu.
- From the menu, select the "Upload" option to upload the wanted audio.
- When the upload ends, you can visit the official site of Google Drive on your computer to access and view the audio files you have uploaded.
With a Google account, you can select to sync your music with Gmail as well. Just go to "Settings > Account > Google" to sign in to your Google account and tick the file types you want to back up to your Google account. Finally, tap on the "Sync" button to copy the files.
Part 5: How to Back Up Your Music on Android via YouTube Music
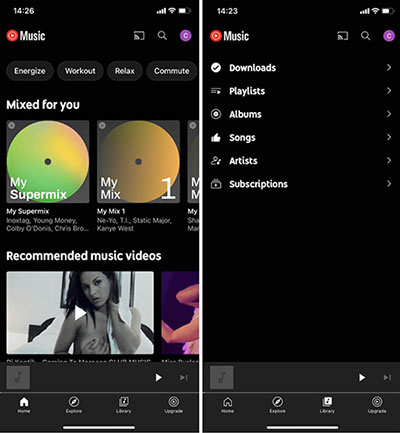
YouTube Music replaced Google Play Music in 2020 and lets users upload up to 100,000 personal tracks for free. While it's not a full backup service, it can store and sync your music across devices. For non-music files, other backup solutions are needed.
Operating Manual:
- Navigate to the official website and click on your profile picture to find the "Upload" option.
- After selecting the desired file from your phone, confirm your choice by tapping "Select" and agreeing to the "User Policy".
- Following this, wait for the song to be processed. For accessing music backups on Android devices, users can go to the "Library" tab.
Note: For music purchased from YouTube Music or other streaming services, check if the service allows downloading and storing files offline. Then, you can back up those downloaded files like any other music file. However, subscription-based streaming platforms may restrict file usage.
Part 6: How Do I Back Up My Music with G Cloud Backup
G Cloud Backup is a free Android backup app that is simple and safe to save music, contacts, messages, photos, videos, documents, call logs, files, and more to a cloud location.
Operating Manual:
- Download the app from Google Play and follow the instructions to properly install it.
- Next, create a G Cloud account.
- After getting the account, you can select the file types you want to sync to the Cloud.
- The application will upload your files to the cloud account automatically.
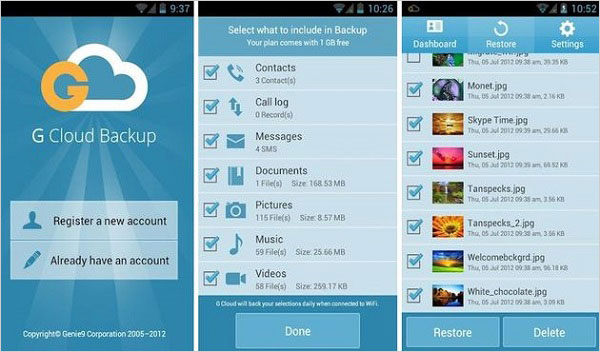
* You can only use this app on one Android phone. If the application detects another account when you activate it on another device, it will deactivate the previous account and activate the G Cloud on the new device.
FAQs for Android Music Backup
Q1: What should I do if I lose my music files on Android?
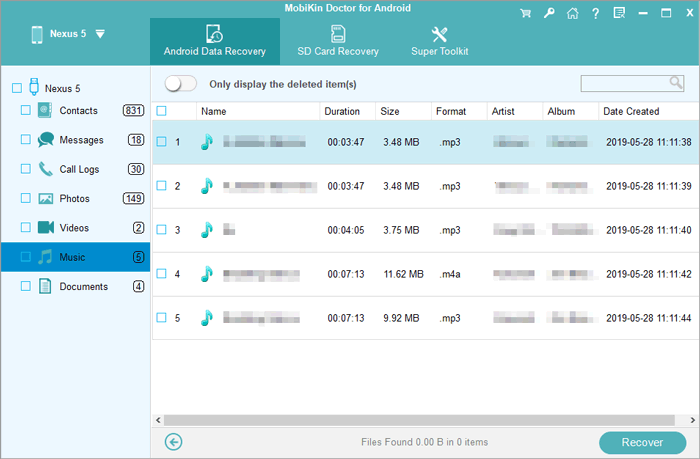
If you lose your music files, you can restore them from any backups you've made to cloud storage, your computer, or by using backup apps like MobiKin Doctor for Android.
Q2: Where is music stored on Android?
Music on Android is usually stored in the Music folder in internal storage or on an SD card. Music from streaming apps may be stored in "Internal Storage > Android > data" but often can't be accessed directly.
Q3: What to do before backing up your Android music to a PC?
- Ensure all music files are in accessible folders like the Music folder.
- Enable USB debugging in Settings > Developer Options if needed for smooth data transfer.
- Remove duplicates or unneeded tracks to save space and time.
- Have a reliable USB cable to connect your Android device to the PC.
- Check your PC's storage capacity for sufficient space for the music backup.
Words in the End
All in all, there are at least 6 efficient methods for backing up music on Android devices. Regardless of the option you choose, you can accomplish the backup process without any difficulties. If you have any innovative suggestions for effective Android music backup, we encourage you to share your thoughts in the comments below.
Related Articles:
2026 List of Best Music Managers for Android Phones
6 Best Methods to Transfer Music from Android to Android Quickly
[Top 5 Methods] How to Transfer Music from Android to iPhone 17/16 In Minutes?
How to Back Up iPhone Music Efficiently? (with Clear Steps and Pics)