How to Screen Record on iPad: Step-by-Step in 2025
Sometimes a simple screenshot just doesn't cut it when you want to capture something on your iPhone or iPad. Maybe you're trying to make a quick tutorial showing how to enable a certain feature, or you want to save part of a video that you can't download. That's where screen recording comes in, and the good news is, it's very easy to do.
With screen recording, you can even add audio to explain what's happening on your screen or share your thoughts while recording. Once you're done, you can save the video or share it right away. Here's how you can record your iPad screen.
Way 1: Screen Record on iPad via Built-in Recording Tool
If your iPad is running iOS 11 or later, you can easily record what's happening on your screen with the built-in Screen Recording feature, no extra app needed.
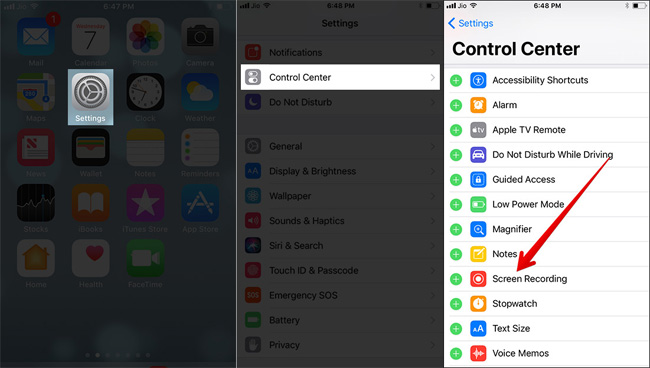
- Enable and add the screen recording feature into the Control Center by clicking "Settings > Control Center > Screen Recording > Tap +".
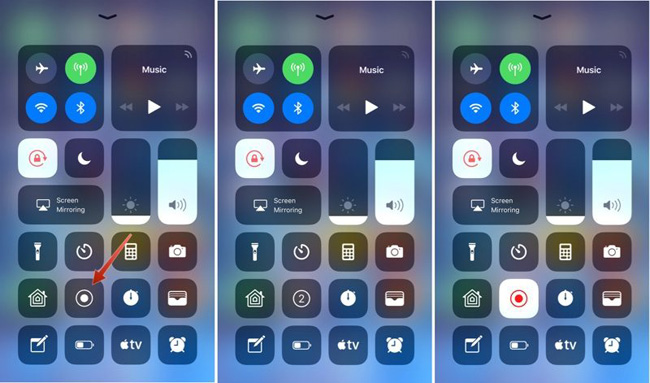
- Open the "Control Center" and tap the "Screen Recording icon" (a circle with a dot inside).
- Before you start, turn on the "microphone" if you want to record your voice or any external sound.
- Tap "Start Recording", and your iPad will begin capturing everything on screen, along with system audio.
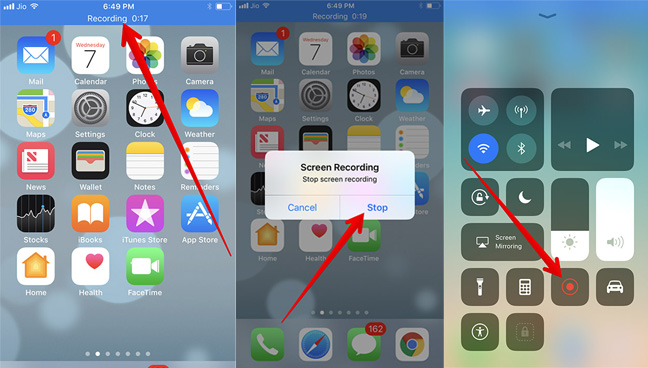
- When you're done, tap the "red status bar" at the top and choose "Stop". The video will automatically appear in your "Photos" app.
Read More:
Way 2: Record Screen on iPad via Camera App
The Camera app on your iPad is mainly meant for taking photos and shooting videos with the built-in camera. Unfortunately, it doesn't include a screen recording feature like the one you can access from the Control Center or third-party apps.
Still, there's a creative workaround. You can use another device's camera—such as another iPad, iPhone, or computer—to record your iPad screen. Here's how to do it:
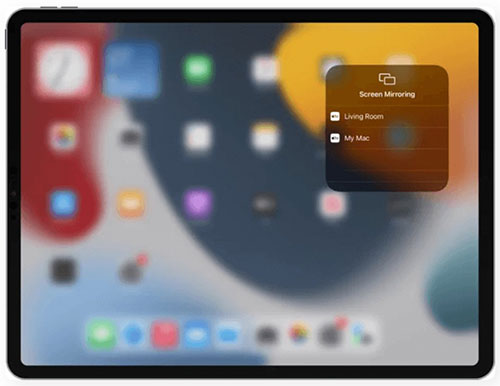
- Mirror your iPad's screen to another device, such as an Apple TV, a Mac using QuickTime Player, or a computer with a screen mirroring app.
- On the second device, open its Camera app or any video recording program.
- Adjust the camera so it clearly captures your iPad's screen—make sure everything is visible and in focus.
- Start screen mirroring on your iPad, then begin recording on the second device.
- Do whatever you need to record on your iPad. When you're done, stop the recording on the other device and turn off screen mirroring.
This method is a bit old-school, but it works if you just need a quick, simple way to record your iPad screen without using the built-in Screen Recording tool.
Way 3: Screen Record on iPad via AirShou
Recording an iPad screen video without computer means you need to find a reliable screen recorder app and install it on your device. AirShou could be an ideal option under this situation. It lets you record your iPad, iPhone or iPod touch screen without using a computer, and it is totally free. However, this app can't be downloaded from App store, so you'd better to pre-download it from an external website, then follow the below steps to record you wanted iPad screen video.
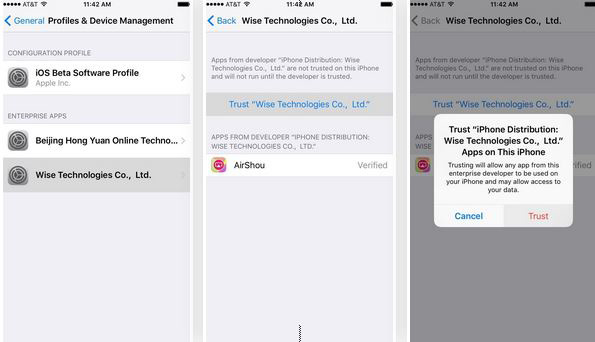
- Download the AirShou from Emu4ios Store, then launch it on your iPad. Since iOS will prevents the installation of untrusted apps on your iDevice, so if you get a notification, you can fix it by following the below steps: Settings > General > Profile and Device Management > AirShou > Trust.
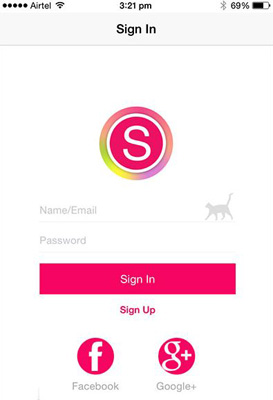
- Sign in with your own AirShou account or directly register using Facebook or Google+ account.
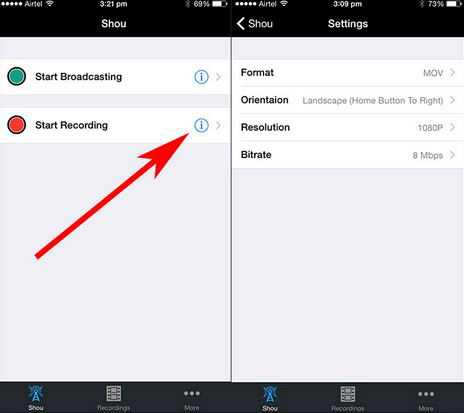
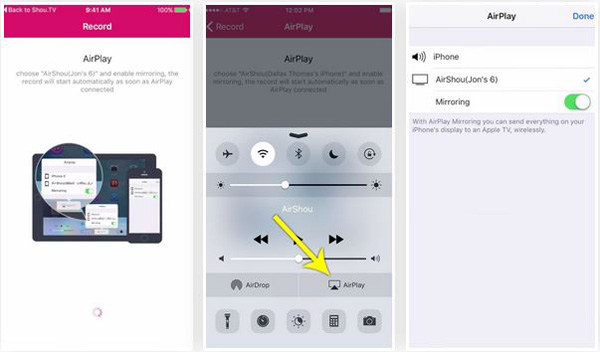
- Now, you'll see a new interface with the recording option on your iPad. Just tap on the recording icon to start the process.
Note: Here, you should to make sure that you have selected your device from the AirPlay list and the "Mirroring" option is toggled ON as the below picture.
Pros:
- No requirement of the version of the OS that are running on your iPad.
Cons:
- A little bit complicated of the beginning settings.
- Downloaded from external website, not always works well and can't be updated automatically.
Bonus Tip: How to Back Up iPad Screen Recordings on PC/Mac
Backing up your iPad screen recordings to your computer is a smart way to free up space and keep your valuable videos safe. Whether you record tutorials, gameplay, or creative projects, having a secure copy on your PC or Mac ensures nothing gets lost. MobiKin Assistant for iOS makes this process quick and easy. It allows you to preview, manage, and back up your iPad videos (including screen recordings) to your computer in just a few clicks, without using iTunes.
A detailed list of features about MobiKin Assistant for iOS:
- Back up iPad videos like screen recordings, movies, TV shows, as well as music, contacts, messages, photos, notes, calendars and more.
- Transfer data from iPad/iPhone to computer, and vice versa.
- Manage iOS data on PC/Mac (edit, delete, or add).
- One-click iTunes backup and restore support.
- Privacy-friendly, free trial available, and error-free results.
- Fully compatible with the latest iPadOS versions, including iPadOS 26.


Steps to back up iPad screen recordings using Assistant for iOS:
Step 1: Launch the Program and Connect Your iPad
Download and install MobiKin Assistant for iOS on your computer. Launch it and connect your iPad via a USB cable. Tap Trust on your iPad if prompted.

Step 2: Preview and Locate Screen Recordings
Once connected, the program will detect your device and display all data categories. Click Videos or Camera Roll to preview your screen recordings. (Videos Disappeared from iPhone/iPad?)
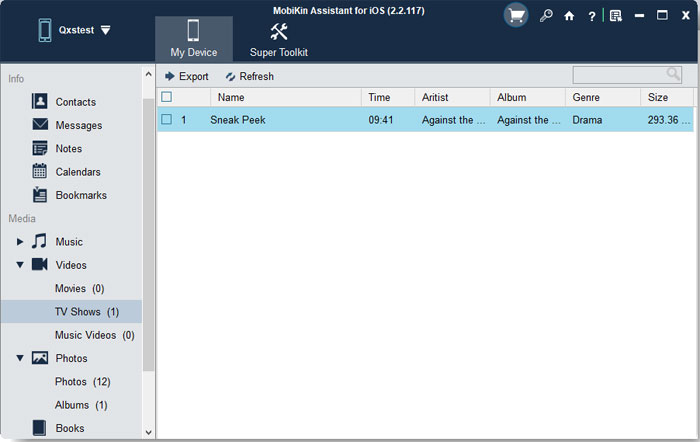
Step 3: Export Screen Recordings to Computer
Select the screen recording files you want to back up and click Export on the top menu. Choose a destination folder on your PC or Mac to save them securely.
Video Guide:
FAQs about iPad Screen Recording
Q1: Why Can't iPads Screen Record?
If your iPad can't screen record or you don't see the option, it's usually due to one of these reasons:
- Old iOS version – Screen recording only works on iOS 11 or later. Update your device if needed.
- Not in Control Center – Add it manually: go to "Settings" > "Control Center" > "Customize Controls" and include "Screen Recording."
- Restrictions enabled – Screen Time or content restrictions may block this feature. Check under "Settings" > "Screen Time" > "Content & Privacy Restrictions."
- App limits – Some apps disable recording to protect sensitive or copyrighted content.
- Low storage – Free up space if your iPad is almost full.
- System glitch – Restart your device to fix temporary issues.
- Wrong gesture – On newer iPads, swipe down from the top-right corner to open the Control Center. (How to Fix iPhone Screen Recording Not Working?)
Q2: How Long Can You Screen Record on an iPad?
The length of a screen recording on an iPad mainly depends on two things:
- Storage space: Screen recordings are saved as video files, which can be large. Recording at high resolution or for a long time can quickly use up storage. When your iPad runs out of space, the recording will stop automatically.
- Battery life: If your iPad isn't plugged in, the battery limits recording time. Once the battery runs out, the iPad will shut down and stop recording.
With enough storage and power, you can record your iPad screen for up to 3 hours.
Conclusion
This guide explains how to safely and efficiently record your iPad's screen. It covers using the built-in screen recording tool, alternative methods like using another device's camera and third-party screen recording tools, and shares tips on saving recordings, recording duration, storage space, and battery life. Follow these steps to ensure smooth, high-quality screen recordings every time.
Related Articles:
Top 8 Solutions to Fix iPad Keeps Restarting
How to Fix iPad Won't Unlock Quickly [9 Ways]
