What Does iTunes Backup Include - 5 Things About iTunes Backup
In the course of enjoying the conveniences afforded by the iPhone, it is imperative to prioritize the safeguarding of stored data within the device. In instances where storage space becomes constrained or concerns regarding potential data loss arise, proactive iPhone backup is advised. Both iTunes and iCloud represent viable options for this purpose, offering near-identical content in their respective backups. Therefore, a critical inquiry arises: What does iTunes backup include? Does iPhone backup to computer include photos? This article aims to elucidate these inquiries comprehensively.
Part 1: What Does iTunes Backup Includes?
What does iPhone backup include? Does iTunes backup everything? An iTunes backup comprehensively encapsulates various data elements critical to the iPhone's functionality. The iTunes backup file list typically includes:
- App Data: Stored information related to applications installed on the iPhone.
- Contacts: Contact details, including names, phone numbers, and associated information.
- Messages: Text messages and iMessages.
- Photos and Videos: Multimedia content captured or saved on the device.
- Call History: Log of incoming and outgoing calls.
- Calendar Events: Scheduled appointments, meetings, and events.
- Notes: Personal notes and memos.
- Settings: Configuration settings for system preferences and customizations.
- Voice Memos: Audio recordings made on the iPhone.
- Health Data: Fitness and health-related information.
- HomeKit Data: Data associated with HomeKit-enabled devices.
- Wallet Data: Credit cards, boarding passes, and other digital wallet contents.
- Safari Bookmarks and History: Browsing history and saved bookmarks.
- Passwords: Encrypted password data.
This comprehensive iTunes backup file list ensures a holistic preservation of the iPhone's essential data and settings, facilitating a seamless restoration process when necessary.
You May Be Wondering:
Part 2: How to Back up iPhone with iTunes?
How to Back Up iPhone with iTunes:
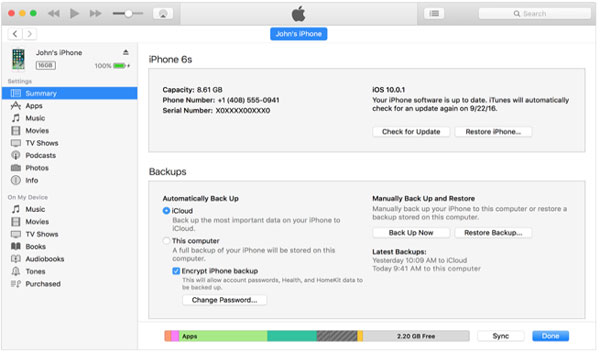
- Use a USB cable to connect your iPhone to your computer. Open iTunes if it doesn't open automatically.
- If prompted on your iPhone, click "Trust" to establish a secure connection.
- In iTunes, click on your iPhone icon in the upper-left corner.
- Under the "Summary" tab, in the "Backups" section, select "This computer" and, optionally, check "Encrypt iPhone backup" for added security.
- Click "Back Up Now" to start the backup process. Wait for it to complete; the time required depends on your data size.
- After completion, check the "Latest Backup" section for the time and date of the latest backup.
How to Restore Backup Files from iTunes to iPhone:
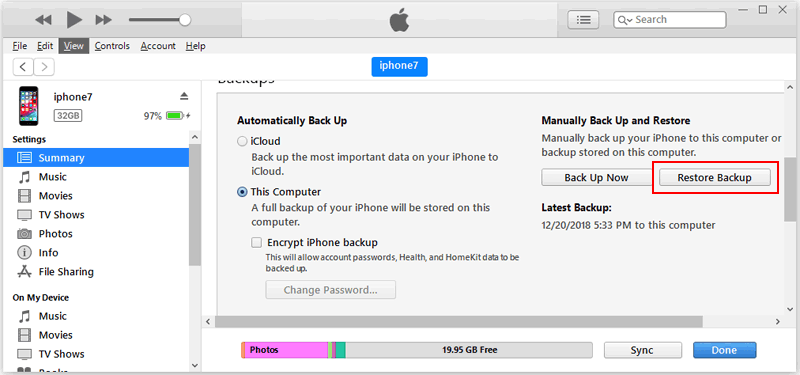
- Use a USB cable to connect your iPhone to the computer containing the iTunes backup.
- Launch iTunes on your computer if it doesn't open automatically.
- Click on your iPhone icon in the upper-left corner of iTunes.
- Under the "Summary" tab, in the "Backups" section, select "Restore Backup."
- Choose the relevant backup from the list and click "Restore." If the backup is encrypted, enter the password.
- Allow iTunes to restore your iPhone to the selected backup. The process may take some time.
- Once restored, follow on-screen instructions to complete the setup on your iPhone.
Note: Once the iTunes backup is restored, the existing data on the iPhone will be deleted and replaced with the data in the backup file. If you don't want to delete your data and want to create a custom backup, read on.
Check if You Need:
- How to Transfer iTunes Library to External Hard Drive?
- 2 Efficient Methods to Backup and Restore iPhone without iTunes
Part 3: Where Does iTunes Store Backups?
iTunes stores backups in different locations based on the operating system:
For macOS:
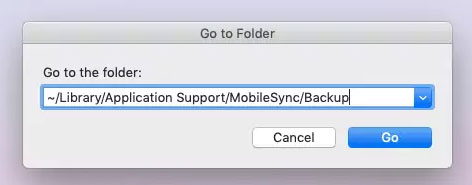
- To access iTunes Store Backups Location on Mac, use the "Go to Folder" option in Finder and enter the path: ~/Library/Application Support/MobileSync/Backup/
For Windows:
- On Windows 7: C:\Users\[Username]\AppData\Roaming\Apple Computer\MobileSync\Backup\
- On Windows 8, 10: C:\Users\[Username]\AppData\Roaming\Apple\MobileSync\Backup\
- Ensure that hidden files and folders are visible in Explorer to access AppData.
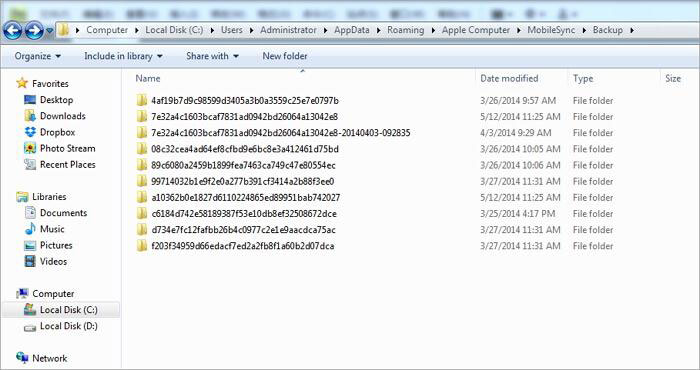
Note: Replace [Username] with your actual Windows username.
These directories contain folders named with unique identifiers for each device. Each folder represents a specific backup, and the contents within capture the data and settings of the respective iOS device.
Part 4: How to Delete Old iTunes Backup?
iTunes backup files might consume substantial space on your local drive. If iTunes backup failed, and a message indicates insufficient disk space during the backup attempt, free up storage on your Mac or PC. To manage this, you can eliminate outdated iTunes backups directly from the iTunes application:
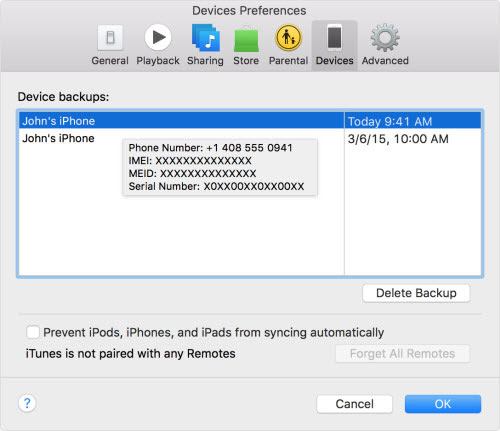
- Launch iTunes and access Preferences. On Mac: Navigate to iTunes > Preferences; On Windows: Go to Edit > Preferences.
- In the preferences panel, locate and click on "Devices." Choose the desired backup and click "Delete Backup." Confirm the action on the subsequent screen to remove the selected backup, thereby optimizing your storage space.
Part 5: How to Decide What to Include in Your Backup?
As mentioned earlier, using iTunes to back up your iPhone means it saves all your data at once and doesn't let you check or change the backup location. If you're looking to back up specific files, iTunes won't be of much help. That's where third-party software comes in handy. We recommend MobiKin Assistant for iOS (Windows and Mac), a user-friendly tool for all iOS devices. It lets you back up your iPhone data selectively or entirely, and you can easily view these backup files on your computer.
Assistant for iOS - Selectively Back Up iPhone Data
- You can preview and select files when backing up or restoring your iPhone.
- You can back up your iPhone fully or selectively.
- Supports backup of almost all types of data, including contacts, texts, images, music, videos, books, safari, playlists, notes, etc.
- No previous data on iPhone will be wiped, zero data loss.
- You can locate and even view your backups on computer with one click.
- It supports all iOS devices, covering iPhone 15/14/13/12/11/11 Pro/SE/X/XR/Xs/8/7, iPad Pro/Air/iPad mini with Retina display/iPad mini/iPad 2/iPad, iPod touch 6/5/4/3/2, etc.
How to selectively back up iPhone data with iTunes alternative - Assistant for iOS?
Step 1. Install and open the software on your computer. Connect your iPhone using a USB cable and hit "Trust" on your iPhone.

Step 2. Your iPhone data will be sorted out by the software. Click the file folders on the left to choose the files you want. The software will scan your iPhone and show the files you've selected.

Step 3. Preview and mark the files you wish to back up. Click "Export" to save them on your computer. That's it! Simple and secure iPhone data backup.
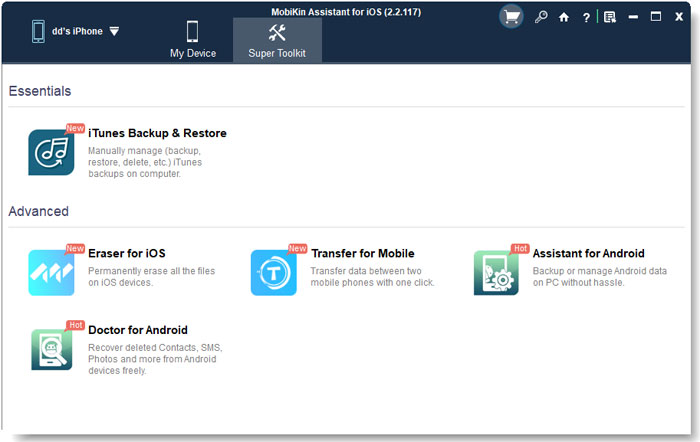
You can also go to "Super Toolkit" on the top screen, choose "iTunes Backup & Restore" to back up and restore your iPhone with one click.
Write in the End
Now that you've gone through this guide, you should have a better grasp of iTunes backup. We covered what does iPhone backup save, the steps for backing up an iPhone to iTunes, locating iTunes backup files, deleting outdated iTunes backups, and selectively backing up iPhone data with a viewable backup on your computer. If you have any lingering questions about iPhone backup, don't hesitate to reach out to us in the comments section below. We're here to help!
Related Articles:
Top 6 iTunes Alternative for Android Phones/Tablets in 2023
iPod Won't Sync with iTunes? 10 Easy Solutions to Fix It!
How to Erase or Wipe iPhone without iTunes?


