5 Wonderful Ways to Transfer Photos from Android to Flash Drive
"How can I transfer photos and videos that are currently in a cloud and I can see on my phone onto a flash drive?" -- from Files by Google Help
Unlike cloud storage, a USB flash drive offers a compact, portable, and independent solution for storing Android data with ample storage. Backing up Android photos to a flash drive ensures safety even if your phone is damaged or lost, making it a preferred choice for many. This guide will show you how to transfer photos from Android to a flash drive, along with key considerations before you begin.
- Part 1: Considerations before Transferring Photos from Android to Flash Drive
- Part 2: How to Transfer Pictures from Android to Flash Drive via File Explorer
- Part 3: How to Transfer Photos from Android to Flash Drive Flexibly [Specialized]
- Part 4: How to Transfer Photos from Android Phone to Flash Drive via OTG
- Part 5: How to Transfer Pictures from Android to Flash Drive via Google Photos
- Part 6: How to Transfer Pics from Android to USB Stick Using Google Drive
- FAQs about Android Photos on Flash Drive
Part 1: Considerations before Transferring Photos from Android to Flash Drive
To transfer photos from Android to a flash drive, use a USB-C OTG cable for a direct connection or a PC. Check compatibility with a "USB OTG Checker" and connect your phone to the "male" end and the flash drive to the "female" end. Also, explore additional helpful tips:
- Confirm file format compatibility between your Android device and the flash drive.
- Maintain sufficient battery level to avoid interruptions during transfer.
- Ensure sufficient space on the flash drive for the photos.
- Transfer photos from your phone to your PC to prevent accidental loss.
- Opt for a reputable USB flash drive to minimize data corruption risks.
- Arrange photos on your Android device for easier selection during transfer.
- Shut down unnecessary apps to enhance transfer speed.
- Keep your Android OS and file manager app up to date for improved compatibility.
Part 2: How to Transfer Pictures from Android to Flash Drive via File Explorer
The primary method for transferring photos from Android to a USB stick is File Explorer, offering fast transfers while preserving quality. Steps may vary by Android version and device. Here's a general guide for how to download pictures to a flash drive with File Explorer:
- Connect your Android device to a computer using the provided USB cable.
- Plug your USB flash disk into the computer, and once it's automatically detected, you'll see the flash drive icon on the computer.
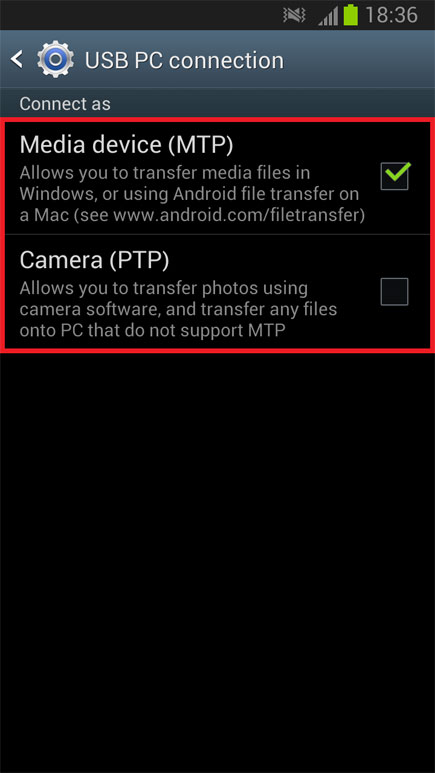
- Follow the prompts to have your phone recognized by the computer, setting the USB connection mode to "MTP" (Media Transfer Protocol).
- Navigate to "This PC" or "My Computer" and double-click the name of your phone.
- Open the "DCIM" folder, select the pics, and copy-paste them to the connected USB drive.
Disadvantages:
- May not support large file transfers efficiently.
- No automatic backup or organization features.
- Limited to manual operation, which can be time-consuming.
You Might Also Like: Want to transfer pictures from Android to an external hard drive? Try the 5 easy techniques.
Part 3: How to Transfer Photos from Android to Flash Drive Flexibly [Specialized]
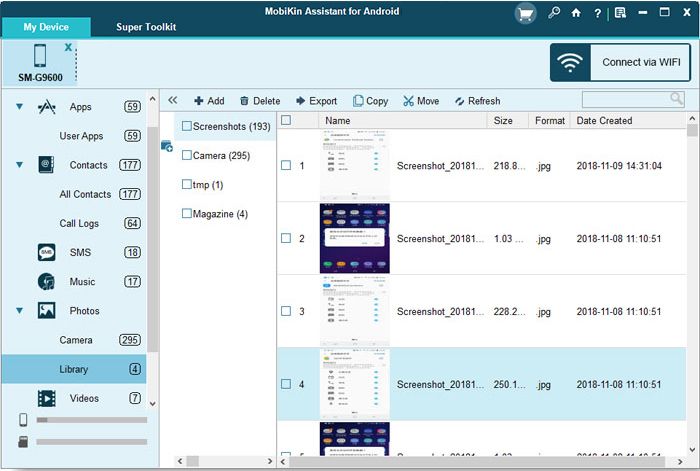
Beyond transferring photos from an Android phone to flash memory, some may need an all-in-one program for personalized photo operations. Well, MobiKin Assistant for Android (Windows and Mac) fits the bill. This utility lets you view Android pictures on a computer, displaying details like name, size, format, and creation date. It also facilitates tasks such as deletion, export, copy, or move, along with several other remarkable features.
What makes MobiKin Assistant for Android remarkable?
* Swift: Transfer photos from Android to flash drive quickly without quality loss.
* Classified: Display images in an informative way for easy sorting.
* Convenient: Copy data from computer to Android flexibly.
* Widely Supported: Apply to various items, including images, music, videos, contacts, SMS, call logs, books, etc.
* Manageable: Manage Android devices smartly with foolproof operations.
* 1-click backup & restore: Back up and restore Android devices in one touch.
* Well compatible: Get along well with overall Android phones or tablets.
* Additional: USB and Wi-Fi connection, risk-free, and efficient technical support.


Can you transfer pictures from Android to flash drive with MobiKin Assistant for Android? Here are the steps:
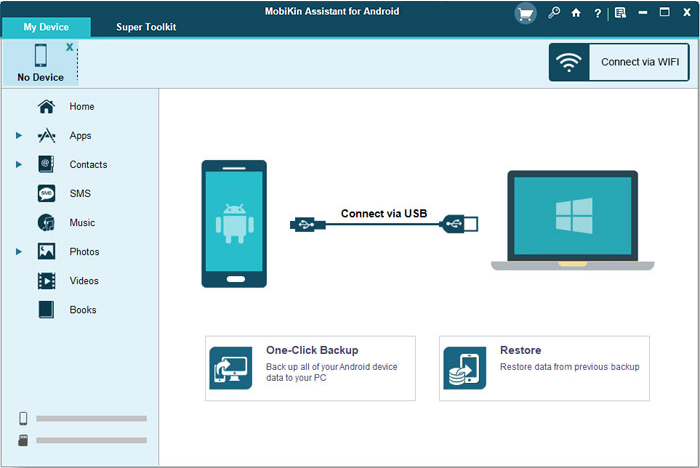
Step 1. Initiate - Initiate the Android manager software after the download. The initial interface will prompt you to hook up your Android device to the computer using a USB cable.
Step 2. Link - Follow the prompts to establish a physical and virtual connection. After a successful process, the main interface will appear. Next, plug your USB flash drive into the computer, and it will be detected and displayed.
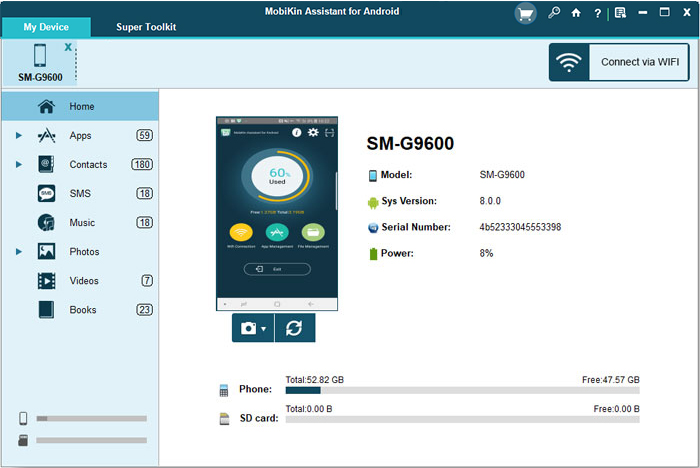
Step 3. Select & Transfer - Navigate to "Photos" > "Camera" in the left menu, and all images will be listed on the right. Finally, choose any pictures you require and click "Export" in the top menu before setting the USB flash drive as the destination.
Video Tutorial:
Disadvantages:
- Dependent on USB debugging being enabled on the Android device.
- This tool is not compatible with Android versions earlier than 6.0.
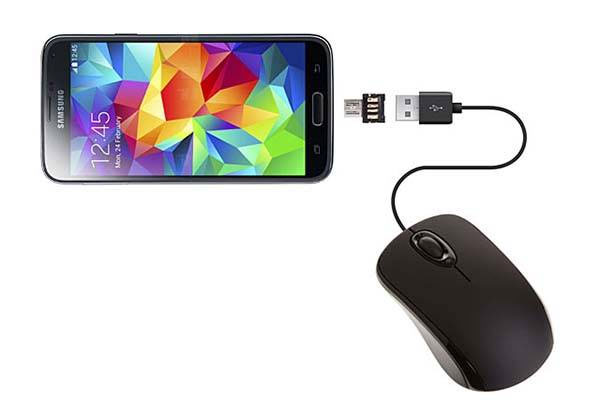
Part 4: How to Transfer Photos from Android Phone to Flash Drive via OTG
OTG (On-The-Go) adapters allow you to connect a USB flash drive to your Android phone directly, facilitating access to internal storage for transferring photos to USB sticks. Additionally, OTG enables photo transfers between your phone and camera.
- Connect your USB flash drive to your device's full-size USB port using the OTG cable.
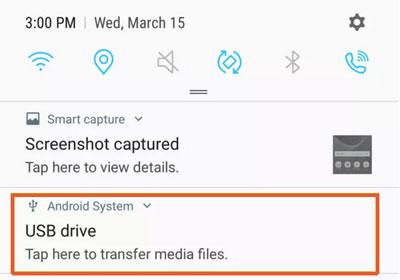
- Slide down from the top to access the notification shade; if File Manager opens automatically, skip this step.
- Tap "USB drive" in the pop-up window to establish a connection.
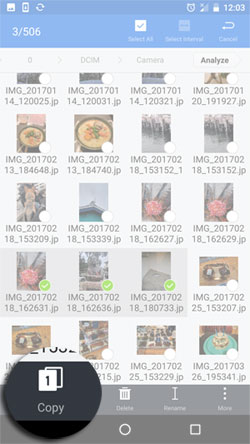
- In the My Files app, go to the "Images" folder and long-press the desired photos.
- Select "Copy", return to the My Files main screen, and click on "USB storage".
- Opt for "Copy here", and the photos will be transferred to the USB flash drive.
- After completion, swipe down the notification panel to safely unmount your USB.
What if you don't have the My Files or other built-in app on your phone? Try tools like Files by Google. Here's how to use it: Run the app on your phone and tap "Browse" at the bottom. Look for the "USB available" notification. If not, reinsert the USB drive. Tap the desired storage device, select "Allow," and find files by scrolling to "Storage devices" and tapping your USB storage.
Disadvantages:
- Requires a compatible OTG adapter and device.
- Flash drives must be formatted correctly (e.g., FAT32 or exFAT).
- Potential for device or flash drive incompatibility.
- No backup or recovery options in case of accidental deletion.
- Physical connections may wear out over time with frequent use.
Part 5: How to Transfer Pictures from Android to Flash Drive via Google Photos
Google Photos enables you to include your pictures in your account, granting them the ability to view and contribute photos. It's straightforward to upload your pictures online, download them to your Android device, and then transfer them to a USB stick.
How to move photos from a phone to flash drive using Google Photos?
- Ensure your Android phone is now linked to your USB stick via an OTG cable.
- Download the Google Photos app from your phone's app store and sign in.
- Open the app and select what you want if you didn't delete images from Google Photos.
- Tap the three-dot icon in the upper-right corner.
- Tap the "Copy" option and choose the USB drive option on the following screen.
- Select the folder on your USB drive where you want to place the pics.
- Finally, tap "Paste" at the top to allow the migration to complete.
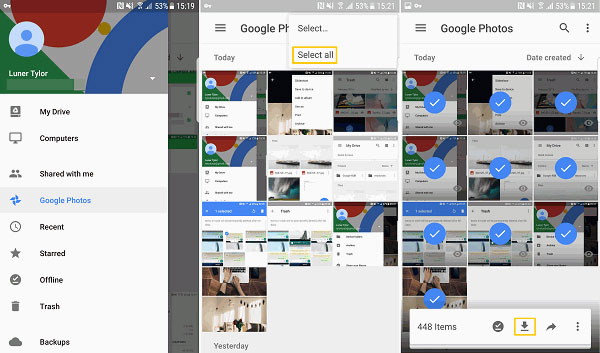
Expanded Knowledge: For those curious about transferring Google Photos directly to a flash drive, follow this guide: Visit the Google Photos website on your PC, sign in, and download the desired images. Then, insert the flash drive into your computer's USB port, open the folder containing the downloaded photos, copy the selected photos (Ctrl+C), and paste them into the flash drive (Ctrl+V).
Disadvantages:
- Limited free storage (15GB shared across all Google services).
- Requires an active internet connection for uploads and downloads.
- The quality of photos may be reduced if "Storage Saver" mode is enabled.
- May not be accessible in areas with restricted internet access.
Part 6: How to Transfer Pics from Android to USB Stick Using Google Drive
Google Drive provides a simple, wireless way to transfer photos from Android to a flash drive. Upload your photos to the cloud and download them anytime, without needing cables or extra equipment. Below is the concrete guide:
- Open the Google Drive app on your Android phone.
- Tap the "+" New button and select "Upload".
- Choose the photos you want to upload and confirm.
- Access Google Drive on your computer, making sure you are logged in with the same account.
- Locate the uploaded photos and download them.
- Connect your USB drive to the computer.
- Copy the downloaded photos and paste them onto the USB drive for storage.

Disadvantages:
- Limited free storage (15GB shared across Google services).
- Manual organization of photos is needed after transfer.
- Not ideal for users who want offline transfer methods.
FAQs about Android Photos on Flash Drive
Q1: What format should be applied to configure the flash drive?
The majority of flash drives are typically formatted as FAT32, a file system that is compatible with both Android and Windows operating systems. It is important to ensure your USB drive is formatted in a file system that is compatible with the devices you intend to use it with.
Q2: How to transfer a compressed file of 4GB or larger to a USB drive?
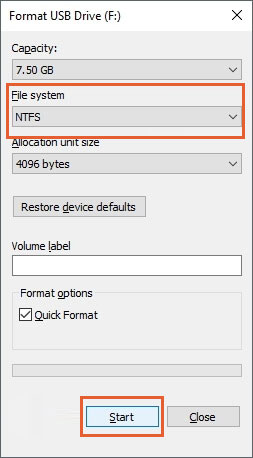
For USB flash drives facing limitations with files larger than 4GB, resolve this by reformatting. Follow these steps:
- Insert the USB flash drive and back up all files to your computer.
- Right-click on the "USB Drive" and select "Format".
- On a Windows computer, choose "NTFS"; on Mac or Linux, select "exFAT".
- Click "Start" to begin the formatting process.
- A warning will appear, indicating that all files will be deleted. Confirm by clicking "OK".
- Once complete, you can freely transfer larger files. (Note: If you still need the flash drive to work on macOS or Linux, switch back to FAT32 format.)
Q3: How do I fix the reordering of my photos when I relocate them?
To align the sorting options between your flash drive and computer, identify your computer's sorting preference (e.g., by date or type). Right-click in the flash drive window, choose "Sort By", and select the corresponding option to match your computer's settings.
Q4: Can I edit photos directly on the flash drive using my Android phone?
Yes, if your phone detects the flash drive and supports editing software. Open the photo on the flash drive using a photo editing app, make changes, and save the file back to the drive.
Wrap It Up
A USB flash disk is a compact version of a mobile hard drive, making it a smart choice for transferring photos. For a more customizable, convenient, and versatile solution, consider using the comprehensive Android data manager - MobiKin Assistant for Android.
Additionally, it's advisable to protect your USB disk from dust and water after exiting safely from your device. Over time, you may wish to revisit the photos on the flash disk and reminisce about cherished memories from the past.
Related Articles:
How to Transfer Photos from Android to Android? 8 Flexible Approaches
How to Back Up iPhone to Flash Drive or USB/Thumb Drive: 3 Easy Methods
How to Recover Deleted Photos on Android with or without Backup? 8 Ways
How Do I Transfer Photos to SD Card on Android Phone? 6 Tactics