
What to Do If Android Internal Storage Is Full? 5 Solutions
TL;DR:
To quickly resolve a full Android storage issue without tedious manual steps, the article strongly recommends using a dedicated eraser tool like MobiKin Eraser for Android for a one-click, permanent cleanup. However, because this process wipes all data, it is crucial to first back up your important files using a tool like MobiKin Assistant for Android or cloud services to avoid permanent loss.
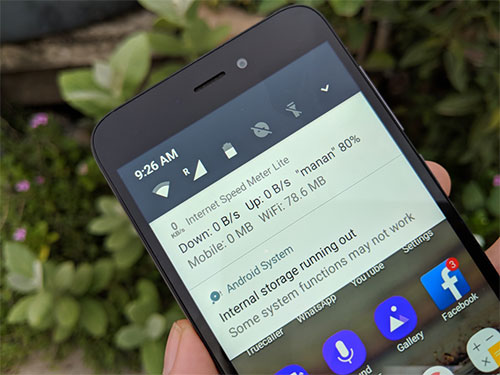
Even as Android storage expands to 128GB, it quickly fills up with apps, photos, and videos. Once full, performance drops and apps crash when opened.
What to do if my Android internal storage is full? In order to use our Android device more smoothly, we had to delete some infrequent but large files. Today, we will introduce 5 effective ways to explain how to free up internal storage on your Android device when phone memory is full.
- Method 1. Free up Internal Storage on Android Using Eraser for Android (Complete)
- Method 2. Transfer Apps to SD Card to Avoid Internal Storage Full Message on Android
- Method 3. Copy Files to PC or Cloud to Solve Android Internal Storage Gets Full
- Method 4. Delete Useless Files from Android to Get More Internal Storage
- Method 5. Factory Reset Android Phone to Clear Android Internal Storage
Method 1. Free up Internal Storage on Android Using Eraser for Android (Complete)
When you find that your Android phone or tablet's internal phone memory is full, and frequent stutters occur, it's time to clean up your device's memory. Deleting files manually can take a lot of time and effort. If you don't have much time and want to find the fastest and easiest way to clear your phone's memory with one click, then use MobiKin Eraser for Android (Windows/Mac) now.
NOTE: This third-party software enables you to erase your phone data permanently without any trouble. We kindly suggest you make a backup of your Android device before you use the MobiKin Eraser for Android software.
Highlights of MobiKin Eraser for Android:
- 100% safe to use; Simple and hassle-free; 3 erasing modes.
- Wipe data from your Android phones and tablets completely and permanently.
- Erase photos, contacts, text messages, call logs, and other private data from Android devices with simple clicks.
- Supports almost all Android devices available in the market.


Clean your Android internal storage with the help of Eraser for Android and you won't have to worry anymore because the Android storage gets a full message won't appear again.
Step 1. Install Eraser for Android on your computer
Download and install the Eraser for Android program on your computer. Launch it and use a USB cable to connect your Android device to the computer. You need to enable USB debugging on your phone if it prompts.
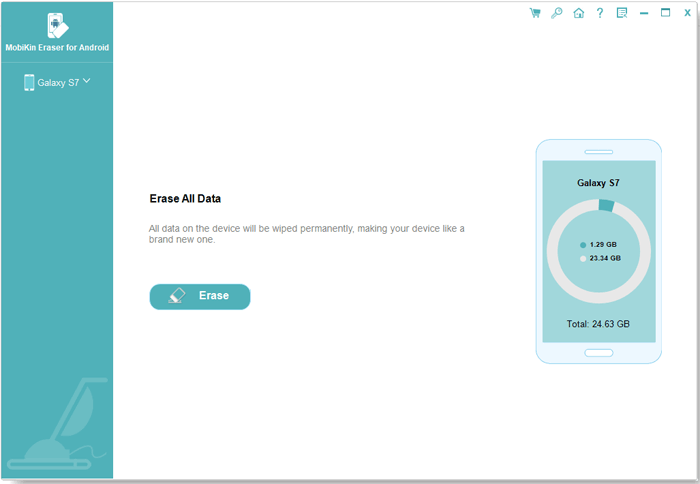
Step 2. Choose and confirm the security level
The program will detect your Android phone immediately once it is connected. Then, you can click the "Erase" button to access the next window. Here, you should choose a security level you need and type "delete" below to confirm.
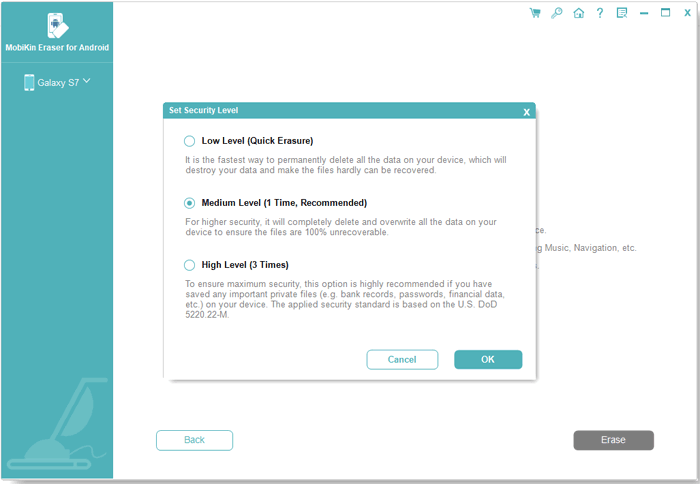
Step 3. Start to erase your Android phone
Finally, you can click on the "Erase" option to erase all data from your Android phone or tablet. You can then wait patiently until the Android erasing process to get completed within a short time.
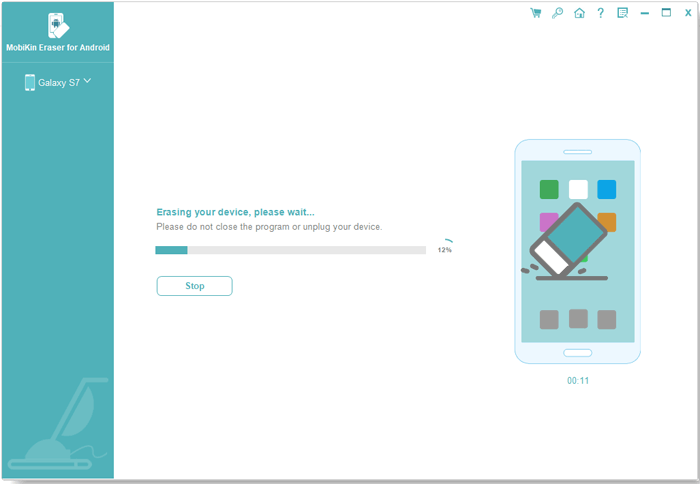
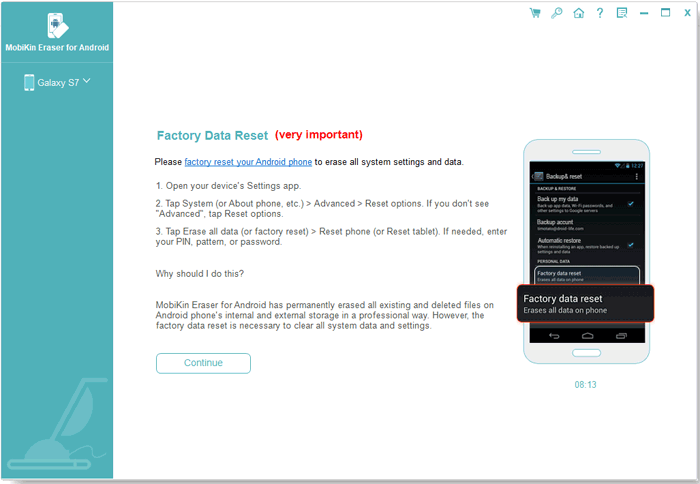
Step 4. Factory reset your Android phone
After the data erasing process, we kindly suggest that you factory reset your Android device in order to clear the system data and settings. Just follow the prompts to do that. Once done, click "Continue" and then everything has been deleted from your Android device permanently.
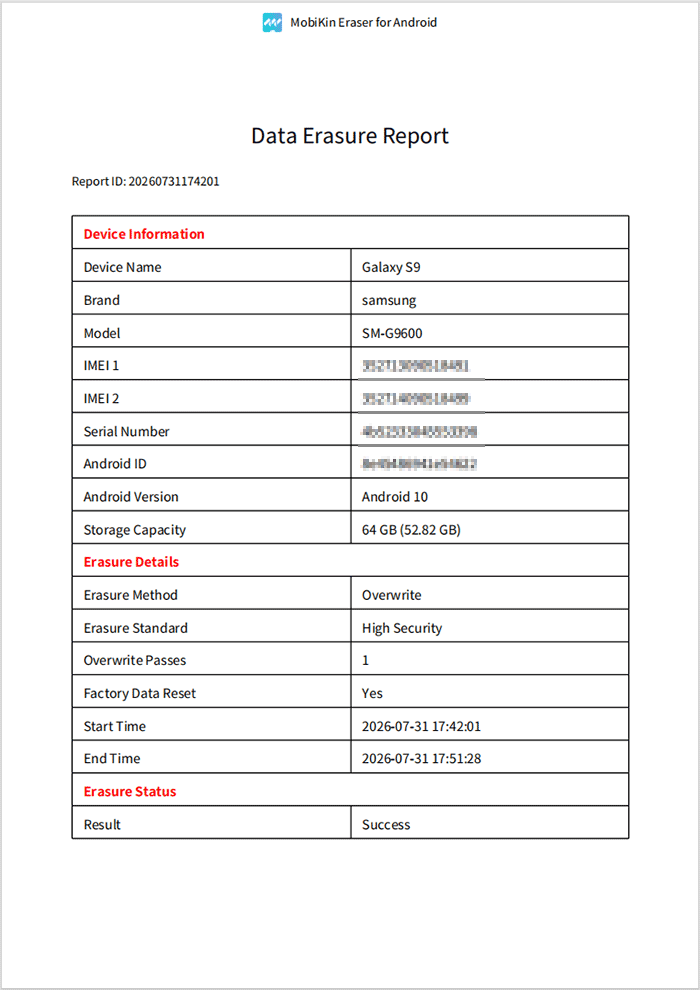
Upon completion, click "Save Report" to generate a detailed log of all erased data.
Video Guide:
Related Post:
Method 2. Transfer Apps to SD Card to Avoid Internal Storage Full Message on Android
When your Android internal storage is full, probably the fastest solution is to transfer some files to the SD card. Android SD cards range in capacity from 2GB to 512GB. You can choose to buy according to your needs. Transferring certain applications and files to the SD card will not affect the performance of the Android device.
Below is how to move some of your Apps from Android internal storage to the SD card:
Step 1: Turn on your Android device, go to the "Settings" app and then choose "Internal Storage".
Step 2: All Android internally stored apps are arranged here, in order from heavy to light.
Step 3: Tap on the app you want to move and tick the option "Move to SD card".
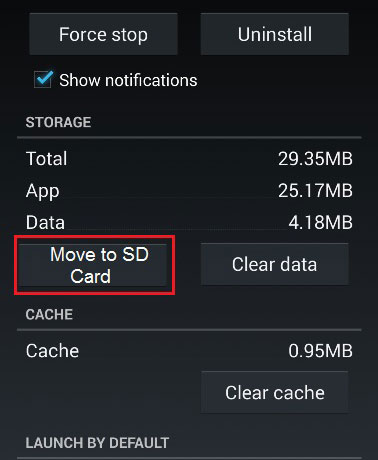
This app will be moved to SD card successfully. You can do this to all apps that you want to move to the SD card. We recommend that you set the SD card as the default storage location for Android phones by following these steps: go to "Settings" > "Storage" > Select the SD card as the default storage location. Ok, now all files such as photos and applications are saved to the SD card by default.
Method 3. Copy Files to PC or Cloud to Solve Android Internal Storage Gets Full
You can also back up some important but temporarily unneeded files to your computer or the cloud, and then you can safely delete the original files from your Android device to free up its internal storage space when Android memory is full.
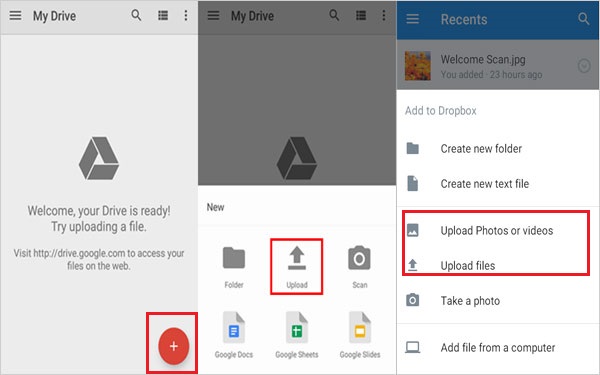
1. Upload Android Data to Google Drive
The cloud is a great place to store your phone data. For example, Google Photos allows you to upload photos from your phone or tablet to the cloud without compromising the quality of those photos. Google Drive lets you store other files and documents. Of course, you can also choose other cloud storage services. Here is a detailed guide that teaches you how to upload Android stuff to Google Drive.
2. Copy Files from Android to Computer
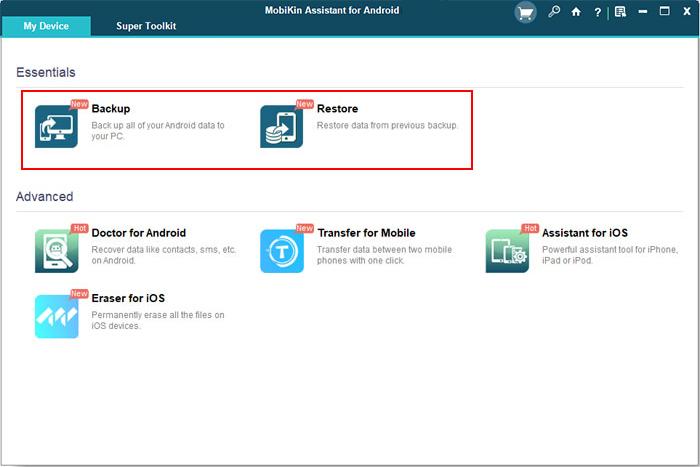
Back up infrequently used photos, videos, and music to your computer, then delete them from your device. This frees up storage while ensuring your files aren't permanently lost. You can take advantage of the powerful and easy-to-use MobiKin Assistant for Android to back up your Android device.
* Here is a detailed guide that teaches you how to sync Android data to PC, and how to back up Android to Mac. After the backup is completed, Assistant for Android can also restore the backup content to your Android device with one click.
Related Posts:
Method 4. Delete Useless Files When Android Internal Memory is Full
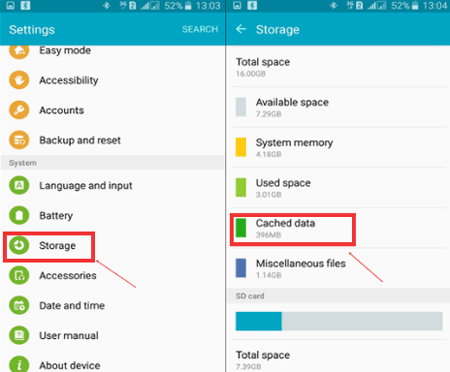
1. Delete Cache Files: Open your Android phone and go to "Settings" > "Internal Storage" (Maybe the name varies depending on your phone model), scroll down to click on "Cache data" and a prompt to clear the cached data appears, just click "OK". If you want to clear app cache, you can go to "Settings" > "Apps" > choose the apps > click "Storage" > "CLEAR CACHE".
2. Delete useless file with Root Explorer: You can delete the files that you don't need anymore on your Android device for more space by installing Root Explorer and locating the directory "/data/local" if Android phone memory gets full. Then, find and empty the folder called "rights" or "tmp". After that, the apps that failed to be installed will be erased.
3. Root your Android device to uninstall bloatware: We know that there is a lot of bloatware pre-installed on our Android device and take up a certain amount of space. And this bloatware cannot be removed directly from the device. This is very disgusting. However, if we root our Android device, we can easily remove the bloatware. If you don't know how to root Android devices, you can click this link.
Method 5. Factory Reset Android Phone to Clear Android Internal Storage
The last method to solve the problem of "Android internal storage is full" is to use the factory reset option in the settings. This will completely erase all data and settings on your Android device and restore your device to the state it was in when you purchased it.
If you only need to clear the internal memory, we recommend that you remove the SD card before restoring factory settings. (You'd better secure your Android phone before you start the factory reset.)
- Back up data - Save photos, contacts, messages, and important files to Google Drive, a computer, or other storage.
- Open Settings - Launch the Settings app (gear icon) on your phone.
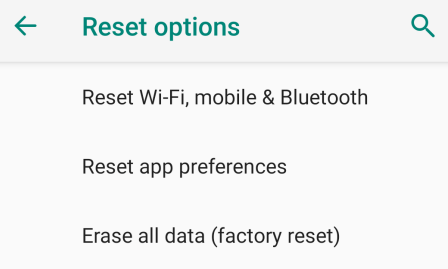
- Go to the reset menu - Navigate to System > Reset options > Erase all data (for most Androids). For Samsung, go to General management > Reset > Factory data reset.
- Review the erase list - Check the on-screen warning showing what will be deleted (apps, personal files, etc.).
- Tap the reset button - Select Erase all data or Factory data reset.
- Verify your identity - Enter your screen lock PIN, pattern, or password when prompted.
- Confirm and wait - Tap the final confirmation button and wait a few minutes for the phone to reboot and wipe everything.
- Set up fresh - After reboot, follow the initial setup screen; restore your backup if desired, or configure as a new device.
The Bottom Line
In this article, we recommend five methods to take when your Android device memory is full. Each method has its own advantages and disadvantages. Among these methods, we strongly recommend MobiKin Eraser for Android, because it can clean your Android phone's memory with one click, avoiding all the tedious steps.
However, if your phone has a lot of important data that you don't want to lose, then we recommend that you use MobiKin Assistant for Android to back up your Android device, and then use Erase for Android to clean your phone.
Related Articles:
How to Access Internal Storage on Android Phone? 6 Reliable Tactics
[2026] 5 Best SD Card Managers for Android You'd Better Know
Where Are Apps Stored on Android? [Answers & 3 Ways to Find Them]
How to Recover Data after Factory Reset Android? 5 Ingenious Ways