[Solved] How to Transfer Data from iPod to iPhone with/without iTunes?
iPod is an excellent music player. But it's not just for playing music. It's called "the iPhone without the phone". In other words, it has a lot of iPhone features. However, when discussing iOS devices, we tend to ignore the iPod. This is because there are many other iOS products that outperform them. And until May 10, 2022, Apple officially announced that the iPod was officially discontinued, and a legendary era ended!
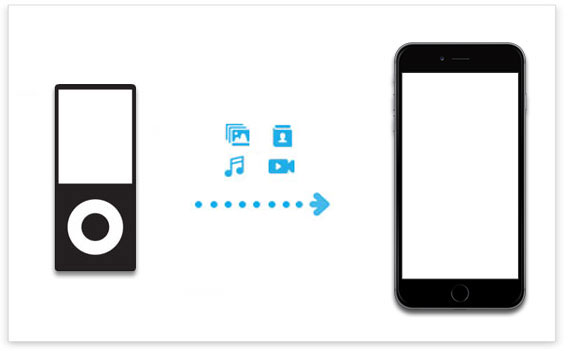
With the discontinuation of iPod, many users want to transfer data from iPod to iPhone, including contacts, photos, music and more. This article will show you 5 methods you can't miss to simplify and speed up the entire transfer process. Keep reading till the end to learn the best way to transfer iPod to iPhone.
- Method 1: How to Transfer iPod to iPhone without iTunes [Using Transfer for Mobile]
- Method 2: How to Sync iPod to iPhone with iTunes
- Method 3: How to Transfer data from iPod to iPhone with iCloud
- Method 4: How to Sync iPod touch to iPhone via AirDrop
- Method 5: How to Transfer Photos from iPod to iPhone Using Disk Mode
Method 1: How to Transfer iPod to iPhone without iTunes
Many users want to transfer data from their iPod directly to iPhone, and that's when MobiKin Transfer for Mobile comes to the fore. This is a one-stop mobile file transfer program that can be used to easily transfer contacts, notes, calendars, bookmarks and books from iPod to iPhone. It supports any version of iOS and Android and can run on Windows PCs and Macs. Here are its main features:
Transfer for Mobile – iPod to iPhone Transfer
- Allow you to directly transfer contacts, notes, calendars, bookmarks and books from iPod to iPhone.
- Perform the data transfer without erasing existing data on your iPod or iPhone.
- Transfer files between iOS and Android, iOS and iOS, Android and Android.
- Fully compatible with various iOS and Android devices, including iPod touch 7/6/5/4/3..., as well as iPhone 13/13 Pro (Max)/13 mini, iPhone 12/12 Pro (Max)/12 mini, iPhone 11/11 Pro Max, iPhone Xs Max/XR/Xs/X, 8/7/6, etc.


Now, you can follow the instructions below to transfer what you need from iPod touch to iPhone without iTunes.
Step 1: Install and launch Transfer for Mobile
Launch the iPod to iPhone transfer program after you downloaded and installed it on your computer. Connect your iPod and iPhone to your computer with two USB cables.
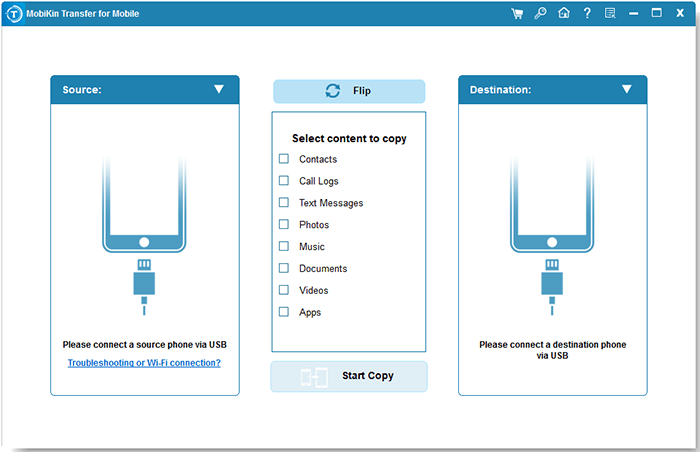
Step 2: Confirm the source and destination devices
Once connected, the two iDevices will be listed side by side randomly. For this topic, you should click the "Flip" button to place the iPod on the Source device and the iPhone on the destination device.
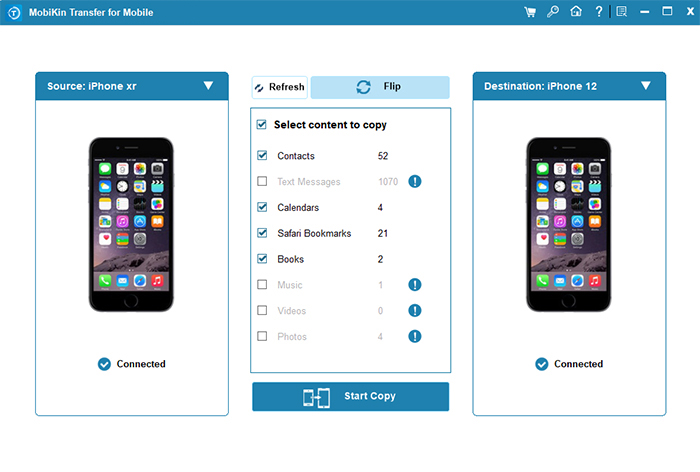
Step 3: Sync iPod touch to iPhone
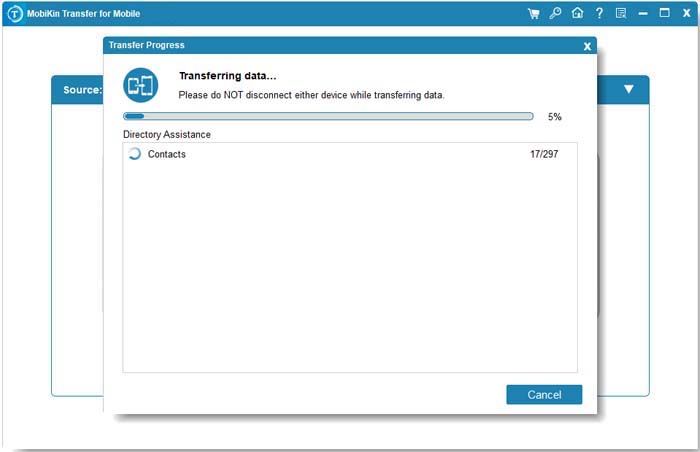
The supported files include contacts, notes, calendars, bookmarks and books. Choose your desired files, and click "Start Copy" to begin to transfer data from iPod touch to iPhone.
You May Also Want to Know:
- [Fixed] How to Transfer Music from Android to iPod with/without Computer?
- How to Transfer Music from iPhone to iPod Flexibly? Look Here!
Method 2: How to Sync iPod to iPhone with iTunes
For Apple users, the most familiar tool should still be iTunes. Although this tool is difficult to use, it can still help you transfer data such as contacts, music and videos from iPod touch to iPhone. One unavoidable downside of using iTunes to transfer data, though, is that you can't choose the types of files you want to transfer, and you'll have to transfer all the data from your iPod to your iPhone at once. Now you can follow the steps below to learn how to transfer data from iPod to iPhone using iTunes.
- First, you need to make sure you have the latest version of iTunes installed. You can then connect your iPod to this computer and run iTunes.
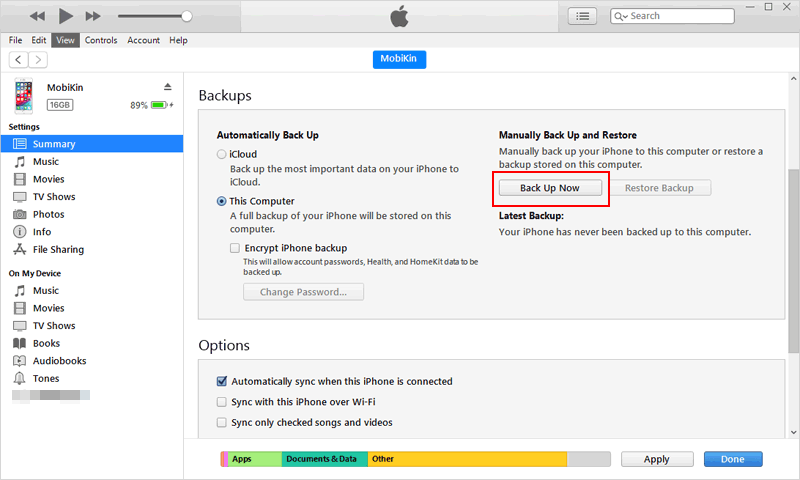
- Click the Devices tab > "Summary" > "This computer" > "Back Up Now" to back up the iPod data to this computer. If you have previously backed up your iPod touch with iTunes, you can ignore this step.
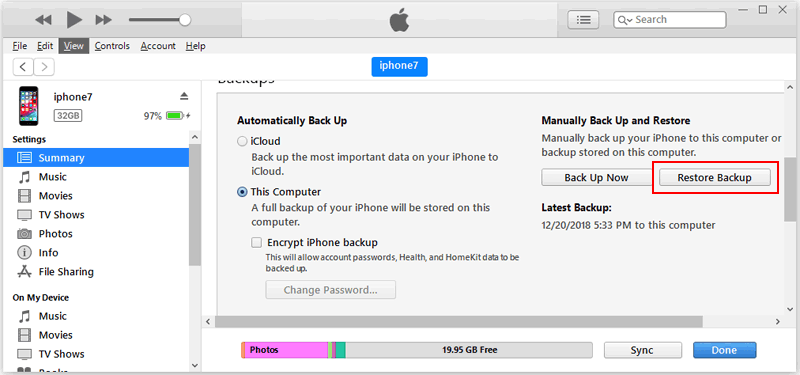
- After the backup is complete, disconnect the iPod and connect the iPhone to the computer.
- Launch iTunes, click the Device tab > "Summary" > "Restore Backup" > select the backup you created > "Restore". All of your iPod's data will now appear on your iPhone.
Method 3: How to Transfer data from iPod to iPhone with iCloud
iCloud is Apple's cloud service for all iOS devices, including the iPod touch and iPhone. You can store up to 5 GB of data in iCloud for free, after which you must pay for more storage. If the data on your iPod does not exceed 5GB, then you can use iCloud to transfer iPod touch to iPhone for free. For this method, you need a Wi-Fi connection on your iPod touch and iPhone.
Step 1. Backup iPod data to iCloud
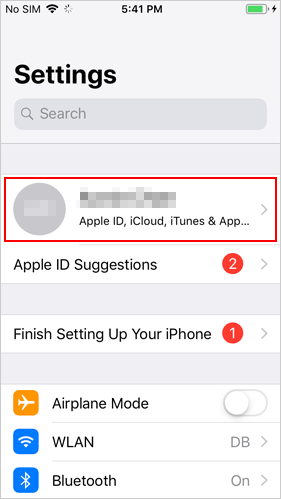
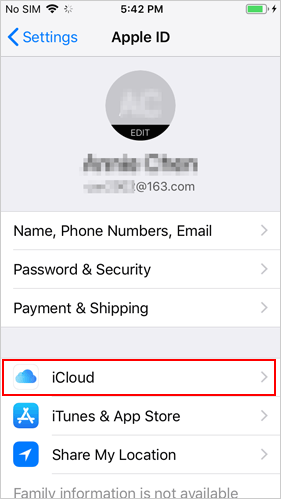
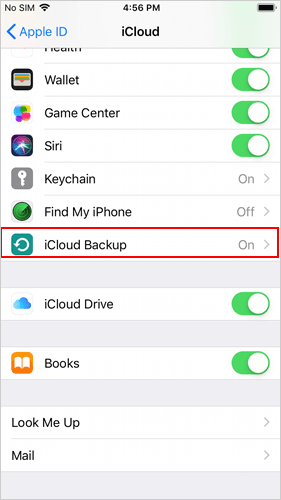
- Tap on "Settings" > your name > "iCloud" on your iPod touch.
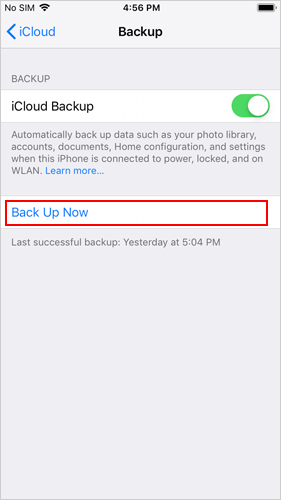
- Turn on "iCloud Backup" and tap on "Back Up Now" to start syncing iPod data to iCloud.
Step 2. Restore iPhone from iCloud backup
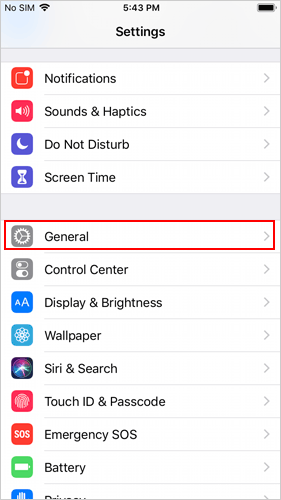
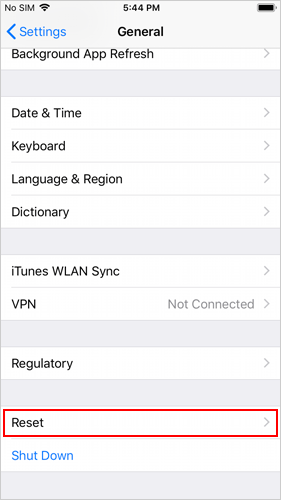
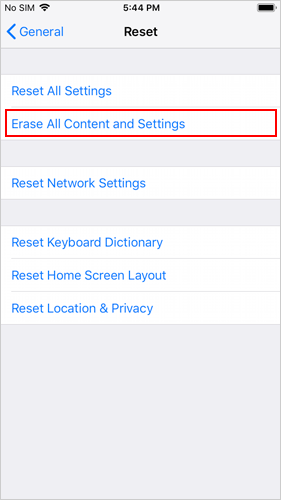
- On your iPhone, go to "Settings" > "General" > "Reset" > "Erase All Contents and Settings" to erase all data from your iPhone.
- Your iPhone will start the resetting process and restart.
- Follow the prompts on the iPhone screen to set it up.
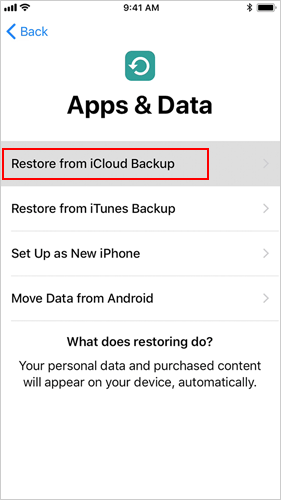
- When you reach the "App & Data" display, choose "Restore from iCloud Backup"
- Input your iCloud login credentials to get into your account then wait for your iPod content to be restored to your iPhone.
You May Also Want to Know:
Method 4: How to Sync iPod touch to iPhone via AirDrop
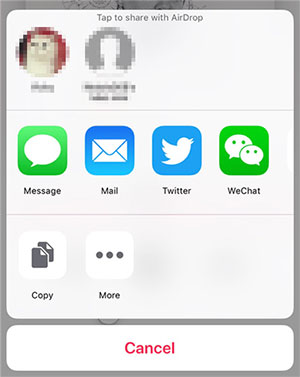
We can also use AirDrop to transfer photos, videos, contacts and other data from iPod to iPhone. It's a wireless file sharing method where you don't need to install additional apps or use a computer. Let's take music transfer as an example to see how to transfer iPod music to iPhone via AirDrop:
- Enable AirDrop, Bluetooth and Wi-Fi on your iPod and iPhone.
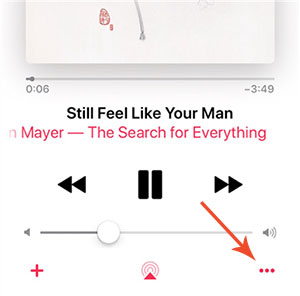
- Go to the Music app on your iPod and select the songs you want to transfer.
- Tap the ellipsis or the three-dot menu in the lower right corner of the screen.
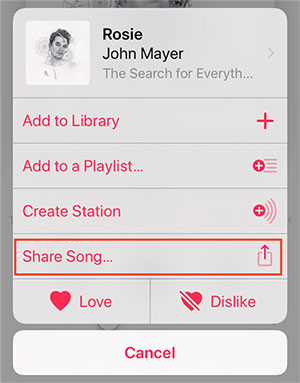
- Select the "Share Song..." option and choose AirDrop as your transfer method.
- Tap "Accept" on your iPhone. Then, the songs you have selected on the iPod will start transferring to the iPhone.
Method 5: How to Transfer Photos from iPod to iPhone Using Disk Mode
If you just want to transfer pictures and songs from iPod to iPhone, then using disk mode is also a good choice. It's important to note that Apple only provides the Disk Mode option in iPods, other iOS devices don't have this mode. Also, this method doesn't allow you to preview the files as you have no way of knowing which photos you want to transfer. Finally, while this method supports transferring songs, it cannot get the correct id3 information for the music files.
If you don't mind the above drawbacks, then you can read on to learn how to transfer photos from iPod touch to iPhone using Disk Mode.
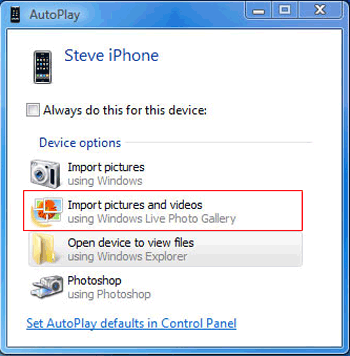
- Connect your iPod to the PC with a USB cable. After the connection is successful, click "My Computer" and find the iPod icon. If you don't see the iPod icon, then you need to open iTunes first, select "Summary" > "Enable Disk Use" > "Apply".
- An AutoPlay dialog box will pop up on the computer screen. You need to select the "Import pictures and videos" option in this popup to transfer your photos from iPod to PC.
- After the iPod photos are all transferred to the PC, you can connect your iPhone to the computer and launch iTunes.
- Add the photos to your iTunes library before syncing these new photos to your iPhone.
Note: Using iTunes to get pictures from iPod to iPhone, all the original photos on your iPhone will be replaced with new photos. Therefore, you'd better back up the photos on your iPhone in advance to prevent data loss.
Summary
The question of how to transfer data from iPod to iPhone is now answered. All you have to do now is choose your preferred method, according to your own needs. In addition to the 5 options described above, you can also use cloud services such as Dropbox to move pictures or other data from iPod to iPhone. In the end, no matter which way you end up choosing, we hope you can successfully complete your transfer mission.
Related Articles:
Easy Way to Transfer Photos from iPhone to iPad
Tips to Transfer/Backup Contacts from iPhone to Computer
How to Transfer Contacts from iPhone to iPhone
How to Transfer Music from iPad to Computer?
iPhone Music Transfer: How to Transfer Music from iPhone to iCloud?
How to Transfer Photos from iPhone to PC–8 Incredibly Easy Ways