5 Most Advisable Ways to Transfer Photos from POCO to MacBook
TL;DR:
While transferring photos from a POCO device to a MacBook can be tricky due to the lack of native support, several free and effective methods exist - such as Image Capture, Snapdrop, Telegram, and OpenMTP. Among these, MobiKin Assistant for Android offers the most flexible and feature-rich experience, allowing selective or bulk transfers without quality loss.
"How can I transfer photos and videos (my device is POCO C81) from Android to MacBook for free?" -- from Quora
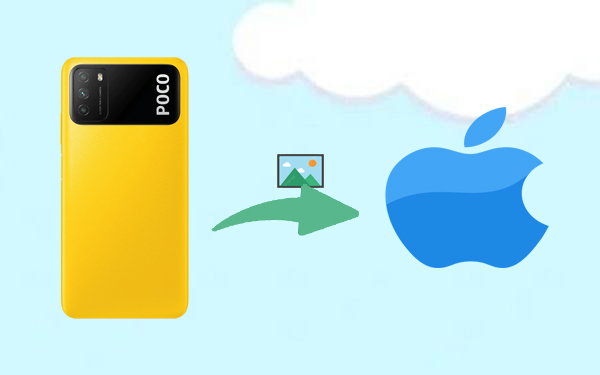
Transferring photos from a POCO phone to a Mac can be challenging because, unlike iPhones, POCO devices don't have native macOS support. This often leaves users searching for simple, effective ways to move their pictures without losing quality, while also saving time and avoiding complicated software setups.
If you've been wondering how to transfer photos from POCO to Mac, this article will guide you through 5 quick and easy methods to get the job done efficiently.
- Way 1: Transfer Photos from POCO to Mac via Assistant for Android (Flexible)
- Way 2: Transfer POCO Photos to Mac with Image Capture
- Way 3: Transfer Photos from POCO to MacBook Using Snapdrop
- Way 4: Connect POCO Phone to Mac for Photo Transfer Using Telegram
- Way 5: Transfer Photos from POCO to Mac Laptop with OpenMTP
- FAQs for Transferring Photos from POCO to MacBook
Watch the video below for a visual overview of this topic.
Way 1: Transfer Photos from POCO to Mac via Assistant for Android (Flexible)
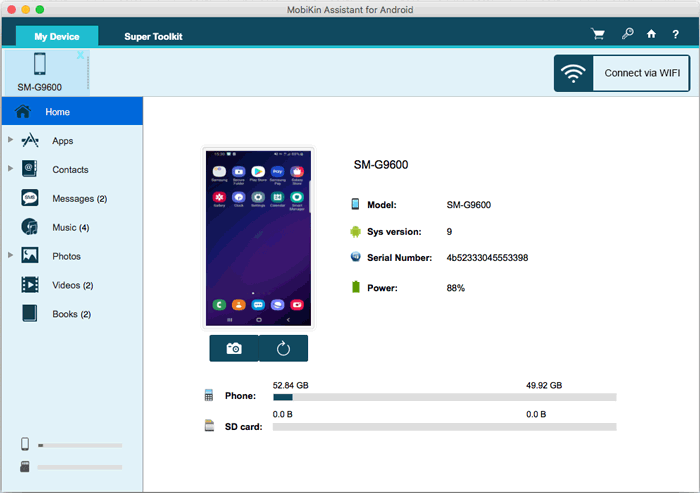
MobiKin Assistant for Android (Mac and Windows) is a powerful tool that lets you transfer photos from your POCO phone to a Mac selectively or in bulk, giving you full control over what files to move. Beyond photo transfer, it offers a range of features for data management, including backup, restore, and organizing contacts, messages, videos, and more. It's an all-in-one solution to efficiently manage and safeguard your Android data.
Main Features of MobiKin Assistant for Android:
- Transfer photos from POCO to Mac with original quality (selective).
- Easily preview and select files to migrate.
- Supports photos, messages, contacts, calls, music, videos, books, apps, and more.
- Import photos from Mac to POCO in one click.
- One-tap phone backup to Mac for easy restore (bulk).
- Organize and manage POCO data on Mac/PC.
- Compatible with over 8,000 Android devices, covering POCO C Series (C81/C75/C71/C65/C61), M Series (M8/M7 Pro/M6+/M6 Pro 5G/M5), X Series (X8/X7 Pro/X6 Neo/X5 Pro/X4 GT), F Series (F8/F7 Ultra/F7 Pro/F6 Pro/F5 Pro), etc.
- Offers reliable after-sales support.


How-to Guide:
Step 1: Get POCO Connected - Launch the software on your Mac and connect your POCO phone using a USB cable. Follow the on-screen prompts to allow the software to detect your device.
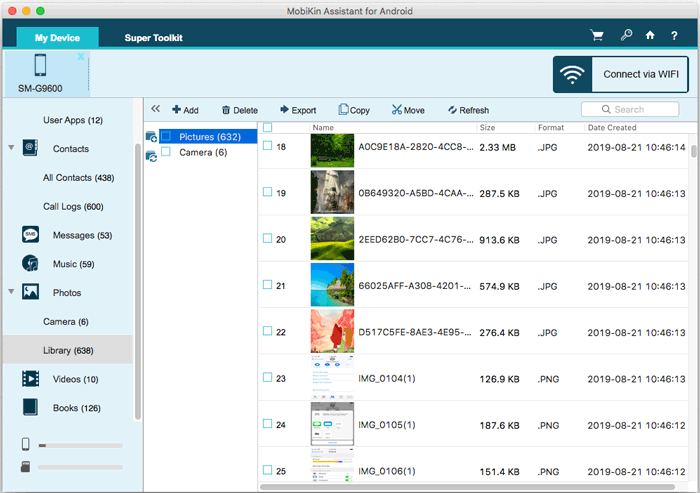
Step 2: Transfer POCO Photos to Mac - Once your POCO is recognized, click on "Photos" in the left sidebar to view all images on your device. Select the photos you want to transfer, then hit "Export" to move them to your Mac.
Tips: If you're unable to find your desired photos, try to recover them without any backup.
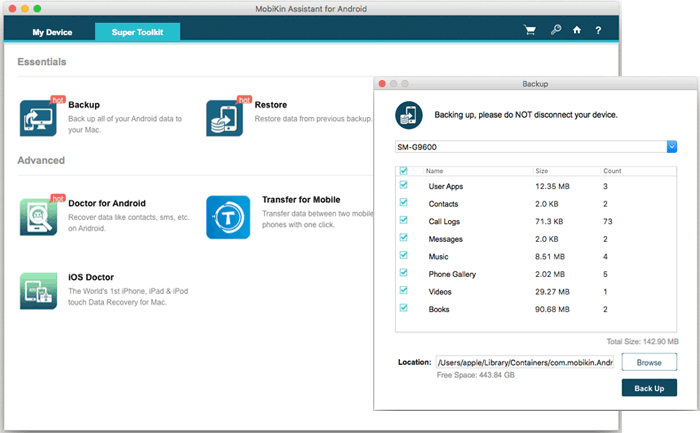
- Quick One-Click Transfer: Open the program on your Mac, connect your POCO via USB, and go to "Super Toolkit." Choose "Backup," select "Phone Gallery" as the file type, check the files you want, pick a destination folder on your Mac, and click "Back Up" to quickly copy your POCO photos.
You Might Also Enjoy: How to Transfer WhatsApp from POCO to POCO? 4 Trustworthy Ways
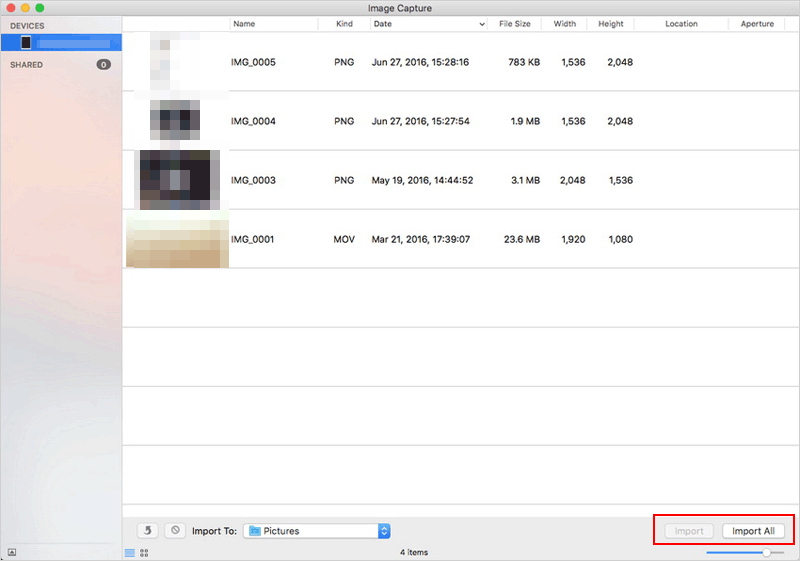
Way 2: Transfer POCO Photos to Mac with Image Capture
Image Capture is a built-in macOS tool that enables POCO sync. It allows you to preview, select, and import images directly from your POCO device to any folder without needing extra software.
How-to Guide:
- Connect your POCO device to your MacBook via a USB cable.
- Open the Image Capture application on your Mac (it's pre-installed and located in the Applications folder).
- From the sidebar, select your POCO phone under the Devices or Shared section.
- Choose the photos you'd like to transfer, or select all if you want to move everything.
- Pick a destination folder on your Mac to save the images.
- If you prefer, you can create a new folder, PDF, or webpage to keep the photos organized separately.
- To begin the transfer, click "Download" for selected images or "Download All" to copy all photos from your POCO phone to your Mac.
Click to Explore: 4 Verified Solutions to Retrieve Deleted Text Messages on POCO
Way 3: Transfer Photos from POCO to MacBook Using Snapdrop
Snapdrop is a free, browser-based tool that lets you transfer photos from a POCO phone to a MacBook over the same Wi-Fi network. It requires no app installation - just open it on both devices, select your photos, and send them directly for quick, secure sharing.
How-to Guide:
- On both your POCO phone and MacBook, open a web browser and go to snapdrop.net.
- Make sure both devices are connected to the same Wi-Fi network.
- Each device should appear on the other's screen.
- On your POCO device, tap the icon representing your Mac.
- Select the photos you want to transfer and confirm the upload.
- On your MacBook, accept the incoming transfer when prompted.
- Once completed, the photos will be saved to your Mac's default Downloads folder.

Snapdrop requires both your POCO and MacBook to be connected to the same local Wi-Fi for the transfer to work. Snapdrop uses peer-to-peer (P2P) connections, meaning your photos aren't uploaded to any cloud or external server.
Way 4: Connect POCO Phone to Mac for Photo Transfer Using Telegram
Telegram is a cloud-based messaging app that allows easy file sharing across devices. You can use it to transfer photos from a POCO phone to a Mac by sending images to your own "Saved Messages" chat. The photos can then be accessed and downloaded on your Mac using the desktop or web version of Telegram.
How-to Guide:
- Install Telegram on both your POCO phone and your Mac (or open the Telegram web app on your Mac).
- Log in to the same Telegram account on both devices.
- On your POCO phone, open a chat with "Saved Messages" (your personal cloud space).
- Tap the attachment icon and choose the photos you want to send.
- Send the images - Telegram will upload them to the cloud.
- On your Mac, open Telegram and go to Saved Messages.
- Download the photos to your Mac from there.
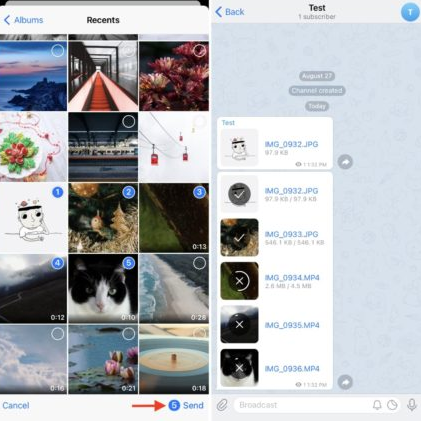
Note: Telegram supports multiple photo uploads, but large batches may take longer. For best results, send in smaller groups or zip them first. Plus, Telegram compresses images by default. To avoid this, choose "Send as File" when uploading your photos from POCO.
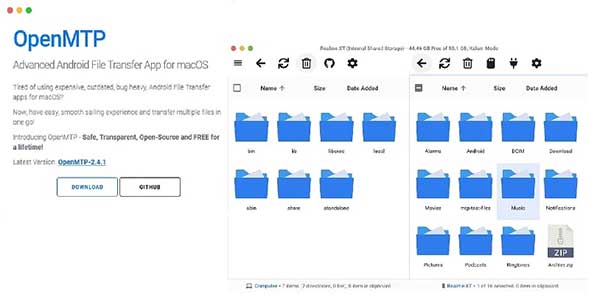
Way 5: Transfer Photos from POCO to Mac Laptop with OpenMTP
OpenMTP is a free, open-source app that makes transferring files between Android devices and Mac easy and fast. It allows you to transfer photos from your POCO phone to a Mac using a simple drag-and-drop interface. With OpenMTP, you can manage large photo libraries smoothly without size limits or complicated setups.
How-to Guide:
- Download and install OpenMTP on your Mac from the official website.
- Connect your POCO C81/C75/M8/M7/X8/X7/F8 to your Mac using a USB cable.
- On your POCO, enable File Transfer mode (usually via the USB options in the notification panel).
- Launch OpenMTP on your Mac; it will detect your POCO device automatically.
- In OpenMTP's interface, browse to the DCIM or Photos folder on your POCO.
- Select the photos you want to transfer, then drag and drop them to a folder on your Mac.
- Wait for the transfer to complete, then safely eject your POCO phone.
FAQs for Transferring Photos from POCO to MacBook
Q1: How do I transfer photos using Bluetooth?
You can, but it's very slow. On your POCO, share each photo via Bluetooth. On your Mac, go to System Settings > Bluetooth and pair your phone. Accept the incoming files. Only good for a few small photos.
Q2: Can I use iCloud to transfer photos from POCO to Mac?
Yes, but indirectly. Install the Google Drive or OneDrive app on your POCO, upload photos there, then access them on your Mac via a web browser. iCloud itself doesn't work well with Android.
Q3: Does AirDrop work between POCO and Mac?
No. AirDrop is Apple-only. Use alternatives like Nearby Share (for Windows/Mac via third-party tools) or LocalSend (free, open-source, works on both).
Q4: Why doesn't my Mac show my POCO when I connect via USB?
You probably didn't change the USB mode. Swipe down on your POCO, tap the USB notification, and select "File Transfer" (not "Charging" or "Photo Transfer").
Q5: Can I use a flash drive to transfer photos from POCO to Mac?
Yes. Use a USB-C flash drive (or an adapter). Copy photos from your POCO to the flash drive, then plug it into your Mac.
Q6: Is there a way to automatically sync my POCO photos to my Mac?
Yes. Use Google Drive or Dropbox auto-backup on your POCO, and install the same app on your Mac. Photos will sync automatically when both are online.
Q7: Can I transfer HEIC photos (iPhone format) from POCO to Mac normally?
Yes. POCO often saves photos as JPG, but if you have HEIC files, your Mac can open them natively (macOS High Sierra or newer). To convert them to JPG on your POCO, go to Settings > Additional Settings > Privacy > System App Settings > Camera and choose "JPG" format.
Summary
After exploring these five straightforward methods, whether you prefer wireless convenience or a quick wired connection, each approach offers a way to preserve your memories without hassle or quality loss. Yet, among all the options, one solution quietly stands out - MobiKin Assistant for Android.
Like a trusted guide, it simplifies the process, letting you transfer and manage your POCO photos effortlessly, no technical expertise required. So, as you close this chapter on photo transfers, you can confidently choose the tool that makes the journey smooth, efficient, and worry-free.
Related Articles:
4 Optimal Ways to Transfer Photos from POCO to POCO [Expert's Advice]
POCO Phone Frozen? Let's Fix It with 12 Clever Methods [2026]
4 Effective Strategies to Unlock POCO Phone without Effort
5 Most Reliable Methods to Hard/Factory Reset POCO Phone [2026]