4 Methods: Transfer Photos from realme Phone to USB Flash Drive
Many people assume cloud storage is the only solution. For bulk photo transfers (e.g., 10GB+ of videos), a USB drive is often faster than uploading and downloading from the cloud. It also works without internet access or monthly fees. This article provides 4 error-free ways on how to transfer photos from realme phone to USB flash drive. No technical background is needed. Follow the steps as written, and the job gets done.
- Part 1: Transfer Photos from realme Phone to USB Flash Drive via MobiKin Program
- Part 2: Transfer Photos from realme to USB Pen Drive with OTG & File Manager
- Part 3: Move Photos from realme Phone to USB Stick with Files by Google
- Part 4: Share Photos from realme Phone to USB Flash Drive via SHAREit
- Part 5: Q&A for Transferring Photos from realme to USB Flash Drive
Part 1: Transfer Photos from realme Phone to USB Flash Drive via MobiKin Program
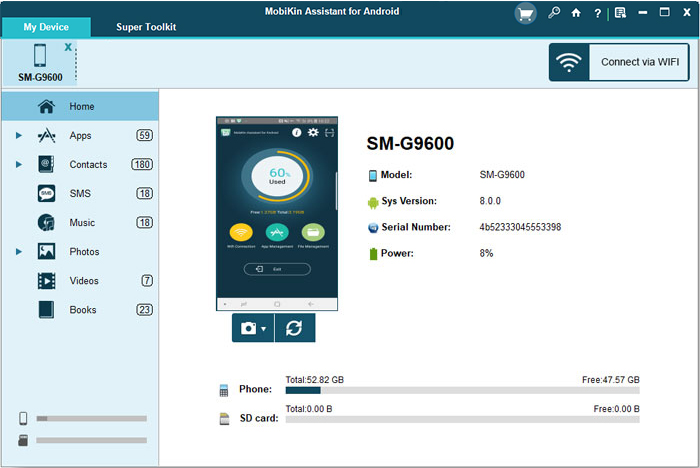
A computer-based solution can handle photo transfer from a realme phone to a USB flash drive in a highly organized way. MobiKin Assistant for Android (Windows/Mac) allows users to connect their phone to a PC, preview photos, and export them in bulk with precision.
Once the connection is established, you can quickly copy your images into a USB flash drive directly for offline storage. This method is especially useful when managing large photo collections or performing structured backups.
|
MobiKin Assistant for Android - Feature Category
|
Key Functions
|
|
Data Transfer |
Transfer files (photos, videos, contacts, etc.) between Android and PC |
|
Backup & Restore |
One-click backup and restore of Android data to PC |
|
Contact Management |
Add, edit, delete, and export contacts (CSV, VCF, HTML, etc.) |
|
Message Management |
Send, reply, export SMS to HTML, CSV, or TEXT |
|
App Management |
Install, uninstall, and export APK files |
|
Media Management |
Add, delete, export photos/videos; export by album |
|
Compatibility |
Supports 8,000+ devices (realme GT 8/7, 16T/15T, Neo 7 Turbo/Neo6, Narzo 70 Pro/C65/C55, etc) |
|
Connection |
USB cable or Wi-Fi |
Getting Started Guide:
- Install and launch - Install the downloaded program on your computer, then open it.
- Connect your phone - Connect your realme phone to the computer. The software will detect it automatically. (realme doesn't connect to PC?)
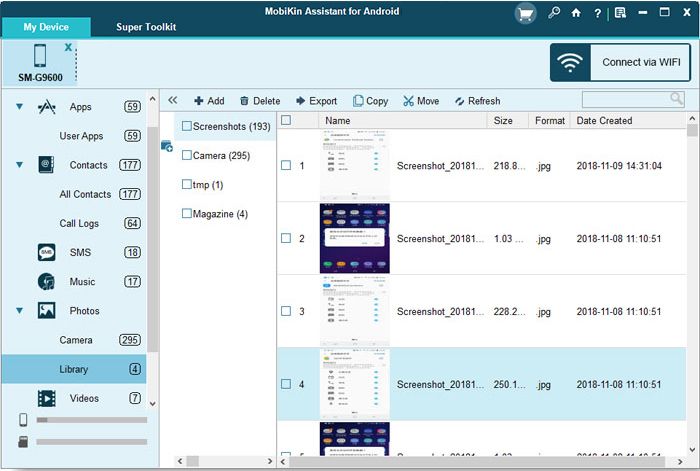
- Select data type - From the left sidebar, choose Photos (or the data type you want). You can preview and select specific photos to transfer.
- Insert USB drive - Plug your USB flash drive into the computer. Once it's recognized, click the Export button at the top of the screen.
- Save to flash drive - Save the selected photos directly to your USB flash drive.


The Good:
- Very stable and reliable transfer via USB connection.
- Allows selective photo backup and batch transfer.
- High security with no ads or interruptions.
- Can manage, organize, and export photos easily from PC.
- Suitable for large photo libraries.
The Bad:
- Requires installation on PC and license for full features.
- Not a direct phone-to-USB method and needs a computer as a bridge.
Part 2: Transfer Photos from realme to USB Pen Drive with OTG & File Manager
Direct hardware connection offers a much faster route without relying on internet or additional software. OTG (along with File Manager) enables the realme phone to recognize a USB flash drive instantly through an adapter. Photos can be selected inside the built-in file manager and transferred directly into the external drive with simple copy or move actions. This approach is efficient for quick backups and works well when portability is needed.
Getting Started Guide:
- First, enable OTG on your realme phone by going to Settings > Additional Settings > OTG connection.
- Connect a USB flash drive to your phone using a USB OTG adapter.
- Wait for the system to detect the USB drive and show a notification.
- Open the built-in File Manager on your realme device.
- Go to Internal Storage > DCIM > Camera or Pictures folder where photos are saved.
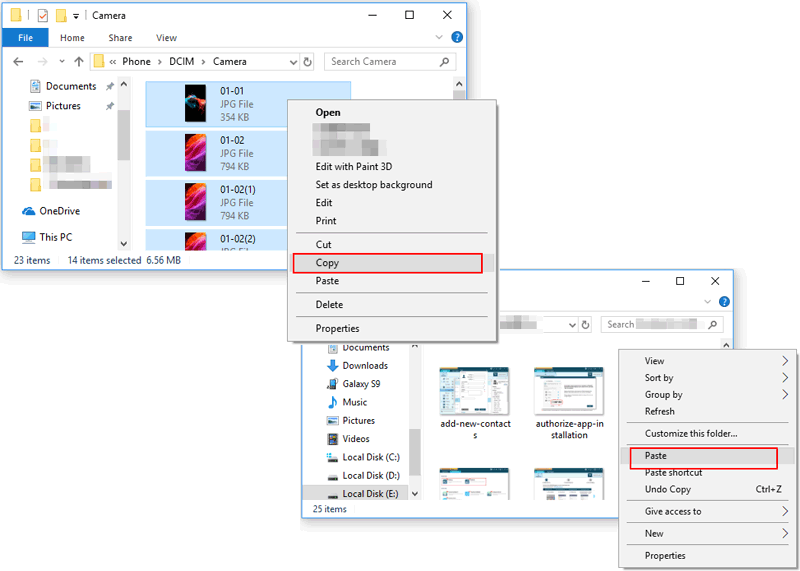
- Long-press and select the photos you want to transfer.
- Tap "Copy" or "Cut" from the menu options.
- Choose the USB drive as the destination storage.
- Paste the selected photos into the USB folder and wait for completion.
- Safely eject the USB drive from the notification panel before unplugging it.
The Good:
- Direct transfer from phone to USB.
- No internet, no PC, and no extra app required.
- Works with built-in realme File Manager.
- Simple copy, cut, and paste operation.
The Bad:
- Requires an OTG adapter and compatible USB drive.
- Some USB drives may not be detected.
- No advanced file organization tools.
- Risk of accidental file deletion if handled incorrectly.
Part 3: Move Photos from realme Phone to USB Stick with Files by Google
A lightweight mobile application can simplify file handling while still supporting external storage transfer. Files by Google provides an easy interface to browse internal storage and locate image folders like DCIM or Pictures. When a USB drive is connected via OTG, photos can be moved or copied directly to it within the same app. The process feels smooth and is suitable for users who prefer a clean and guided experience.
Getting Started Guide:
- Connect your USB flash drive to your realme phone using an OTG adapter.
- Open the Files by Google app on your phone.
- Tap "Browse" and go to Internal storage.
- Open DCIM > Camera or the folder containing your photos.
- Long-press and select the photos you want to move.
- Tap the menu and choose "Move to" or "Copy to".
- Select your USB drive as the destination.
- Tap "Move here" or "Copy here" and wait for the transfer to finish.
- Safely eject the USB drive from the notification panel before unplugging.
The Good:
- Clean and easy-to-use interface.
- Supports fast file browsing and local transfer.
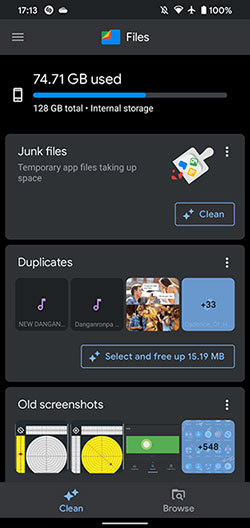
- Helps manage storage and clean junk files.
- Lightweight and secure application.
The Bad:
- Still requires OTG for USB flash drive transfer.
- Limited advanced file management features.
- Not ideal for complex bulk operations.
Part 4: Share Photos from realme Phone to USB Flash Drive via SHAREit
Wireless sharing tools introduce a different workflow that depends on an intermediate device. SHAREit sends photos from a realme phone to a PC or another Android device instead of directly to a USB flash drive. After receiving the files, the computer or secondary device is used to transfer them into the USB storage.
Meanwhile, a USB flash drive itself serves as the final destination that stores photos safely for long-term offline use once the transfer is completed.
Getting Started Guide:
- Install SHAREit on your realme phone and PC.
- Connect both devices to the same Wi-Fi network.
- Open SHAREit on phone > tap Send.
- Select Photos from your realme phone.
- Tap Next/Send > choose your PC as receiver.
- On PC, accept the transfer in SHAREit.
- Photos will be saved in the SHAREit folder on your PC.
- Plug in your USB flash drive to the PC.
- Copy or drag the photos from the SHAREit folder > paste into USB drive.

The Good:
- Fast wireless transfer without cables.
- Works across phone, PC, and other devices.
- Useful for quick photo sharing before USB transfer.
The Bad:
- Cannot transfer directly to USB flash drive.
- Requires another device as a bridge.
- Contains ads and cluttered interface.
- May raise privacy and security concerns.
Part 5: Q&A for Transferring Photos from realme to USB Flash Drive
Q1: Does every realme phone support OTG for USB transfer?
Most realme phones support OTG, but you may need to enable it in Settings > Additional Settings > OTG Connection.
Q2: Why is my transfer slow when moving photos to USB?
Slow transfer may happen due to a low-quality USB drive, weak OTG adapter, or transferring many large files at once.
Q3: Will my photos get compressed during transfer to USB?
No, transferring photos to a USB flash drive keeps the original quality unchanged.
Q4: Which folder contains most realme photos?
Most photos are stored in DCIM > Camera or the Pictures folder.
Q5: Is SHAREit able to transfer photos directly to USB?
No, SHAREit requires a PC or another device as a bridge before copying files to USB.
Q6: Is it better to copy or move photos?
Copy keeps the original photos on your phone, while move deletes them after transferring.
Q7: What is the safest way to remove the USB drive?
Always use the "Eject" or "Safely remove hardware" option before unplugging to avoid data loss.
Q8: Is transferring via PC safer than OTG?
Yes, using a PC with tools like MobiKin Assistant for Android provides more control and stability for large transfers.
Ending Words
This is not about choosing the most advanced tool. It is about finishing the task with what you have. A USB drive sits in a drawer, costs little, and asks for no password. Your realme phone holds memories. Moving them to that small stick of plastic gives you something rare: control. Four methods exist. Pick one. Keep your photos where they belong - with you, not on someone else's server.
Related Articles:
How to Completely Remove Contacts from realme SIM Card? 4 Tactics
4 Handy Ways to Transfer Data/Files from realme to realme [Latest]
4 Practical Ways to Recover Deleted Photos on realme Internal Storage
How to Unlock realme Phone with/without Losing Data? 6 Methods Included