3 Ingenious Ways to Import Photos from SD Card to Mac/MacBook [Must-read]
Whether it's a picturesque landscape or a cherished family moment, our smartphones and cameras help us encapsulate these memories in the form of images. But what happens when these moments are stored on an SD card, and you need to transfer them to your Mac? This scenario often arises when you're looking to erase your camera or device or simply want to have your photos accessible on your computer before you free up Android space.
Well, this page dwells on how to import photos from an SD card to Mac, unraveling this seemingly complex task in three remarkably simple methods. Yet before that, let's explore how to attach your SD card to Mac and confirm its detectability.
- Part 1: How to Connect SD Card to Mac and Ensure Its Visibility
- Part 2: How to Download Pictures on Mac from SD Card via Photos App
- Part 3: How to Upload Files from SD Card onto MacBook with Finder
- Part 4: How to Import Photos from iPhone to Mac with Assistant for iOS [Versatile]
- Part 5: People Also Ask about SD Card Photos
Part 1: How to Connect SD Card to Mac and Ensure Its Visibility
Firstly, inspect the SD card slot on either side to ensure that the lock switch is turned off. This step is crucial as having the lock switch on could result in your SD card being identified as a read-only file system on Mac. This, in turn, would impede your ability to make any modifications to the card.
Secondly, ascertain whether your Mac is equipped with an SD card slot that facilitates the direct insertion of the SD card for establishing a connection. The Mac models feature an SD card slot, covering MacBook Pro introduced in 2021 and from 2011 to 2015, Mac mini, 13-inch MacBook Air, 27-inch iMac, and 21.5-inch iMac.
Lastly, for Mac devices that lack the SD card slot, it is necessary to procure a USB-C to SD card reader in advance to establish a connection.
Other Pages You Might Like:
- How to Transfer Photos from Mac to iPhone? (6 Easy Ways Included)
- How to Transfer Pictures from Android to Mac Wirelessly [4 Tested Ways]
Part 2: How to Download Pictures on Mac from SD Card via Photos App
Before checking out the user guide, get a card reader that fits your SD card, and then check that your Mac is compatible with your card. Then how do I transfer files from SD card to Mac/MacBook Air/Mac mini/iMac with the Photos app? Now, let's take photo transfer as an example to show you how to import photos/videos from SD card to Mac using the Photos app:
- Place your SD card into the SD card reader on your Mac.
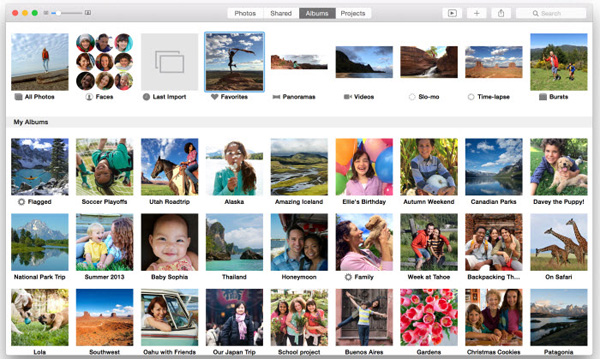
- Launch the Photos app on your Mac.
- Direct your attention to the left-hand side of the screen where the sidebar is located.
- Locate the "Import" section at the top of the sidebar. Below this label, you'll find the name of your SD card—click on it.
- All the photos from your SD card will now be presented in the center of the Photos window.
- Cast your eyes towards the upper right-hand corner of the screen, where three buttons are situated: "Import All New Items", "Import Selected", and "Delete After Import".
- Tick the checkbox nearby the "Delete After Import" setting.
- Enabling this option will result in your photos being removed from the SD card once they are imported to your Mac.
In case your SD card isn't visible in the sidebar, shift your gaze to the upper left-hand corner of your Mac's screen. Click on "File" in the toolbar and select "Import" from the drop-down menu. This action will prompt a Finder pop-up window to appear. Finally, find your SD card and mark the desired images for import by clicking on them.
Part 3: How to Upload Files from SD Card onto MacBook with Finder
Copying photos from SD card to Mac turns out to be quite straightforward if you find your MacBook actually has an SD card port. You could easily insert the SD card into the machine and follow the drill below to know how to transfer photos from SD card to Mac using Finder:
- Open any Finder window by selecting a folder or clicking "File" and "New Finder Window".
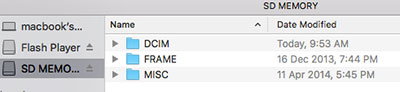
- You will notice a list of folders. And under "Devices", your SD card should be visible.
- If you can't see a side pane on the left, navigate to "View" and choose "Show Sidebar".
- In this instance, the SD card is labeled "SD MEMORY".
- Click on your card to access its content. Typically, the pictures are within the "DCIM" folder.
- Locate the photos within that folder before dragging and dropping these photos onto your Mac.
If you possess an additional SD card and are uncertain about its location, navigate to "View", then select "Show View Options". Next, check the box labeled "calculate all sizes". This will display folder sizes, and the largest folder should contain the photos.
Further Picks:
- How to Recover Deleted Files from SD Card in Android Phone?
- How to Transfer Photos to New iPhone without iCloud or Computer? 5 Ways in 2025
Part 4: How to Import Photos from iPhone to Mac with Assistant for iOS
Folks always prefer data transfers that are flexible, swift, and secure. If the photos you intend to move aren't on an SD card but rather reside on an iPhone, transferring them to a Mac becomes a straightforward task – especially when you opt for a dependable mobile manager like MobiKin Assistant for iOS (Mac and Win). This tool offers a seamless, all-in-one solution that not only simplifies content transfer between iDevices and Macs but also enhances the management of various iOS items.
Core features of Assistant for iOS:
- Preview and import photos from iPhone to Mac selectively.
- Seamlessly move data between iPhone/iPad/iPod touch and Mac/PC.
- Effortlessly back up and restore iPhone with a single click for various categories.
- Extensive compatibility with diverse file types, including photos, contacts, messages, music, videos, notes, bookmarks, books, calendars, and more.
- Let you manage iOS data directly from your computer.
- Work well with a whole range of Apple devices, including iPhone 17/Air/17 Pro/17 Pro Max/16/15/14/13/12/11/X/8/7, iPod touch, iPad, etc.
- It won't disclose your privacy.


Free download this tool and follow the quick guide to know how to import iPhone photos to your Mac with great ease:
Step 1. When this software is downloaded and installed on your Mac, link your iPhone to the system using a USB cable. (iPhone won't connect to Mac?) Launch the installed program and tap "Trust" on your iPhone to establish trust between the devices. This will lead you to the interface displayed below.

Step 2. All file types will appear in the left-side menu. Simply click the "Photos" tab to initiate the scanning of all pictures on your iPhone. After that, preview the images and select the ones you wish to transfer to your Mac.
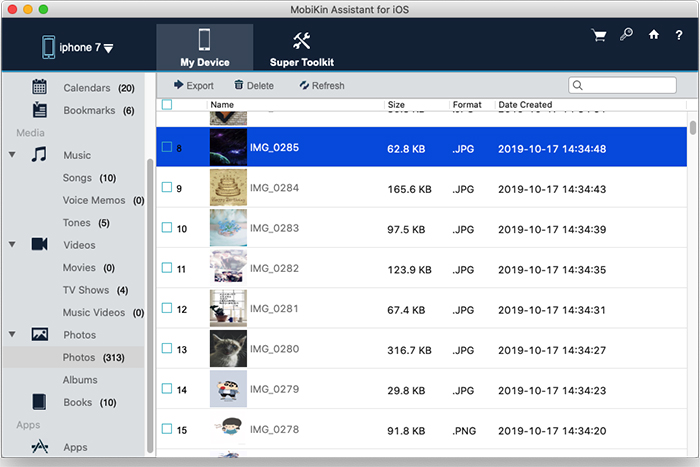
Step 3. Upon selecting your desired items, click the "Export" button in the top menu. This action will prompt the path selection dialog. Finally, choose a destination on your Mac, and the transfer of iPhone photos to your Mac will commence immediately.
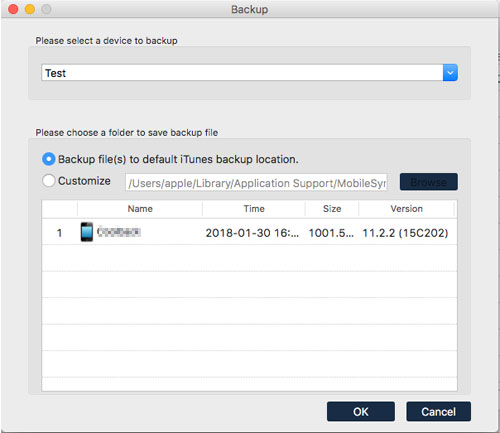
Note: With this tool, you can also bulk import photos from iPhone to Mac. To do this, access the program, click "Super Toolkit" > "iTunes Backup & Restore" > "Backup"; choose the device and output folder by following the prompts; click "OK".
Part 5: People Also Ask about SD Card Photos
Q1: Which devices use SD card?
- Mobile phones are running Android.
- Electronic cameras.
- Camcorders and DVD recorders.
- Printing devices.
- Portable gaming devices.
- Televisions.
Q2: What if the SD card won't show up on Mac?
- Show "External Hard Disk" in the disk utility by launching Finder, going to "Preferences", and checking "External disks" under the "General" tab.
- Repair the corrupted SD card with first aid by opening "System Preferences", selecting "Disk Utility", choosing the external hard drive, and clicking "First Aid" > "Run" to proceed.
Q3: Why photos aren't being imported from the SD card
- Defective ports or connectors.
- Files get corrupted after moving to SD card.
- Incorrect image format.
- Modifications in image format.
- Data corruption.
- Physical damage.
Q4: What if I can't import photos from sd card to Mac?
It's possible that the file format settings have been altered. Consult the user manual for your camera or device to understand the process of resetting the default file type for saving photos, such as JPEG or another format compatible with your needs.
Q5: How to transfer photos from Mac to SD card?
- Begin by restarting your Mac computer.
- Insert your SD card into the appropriate slot.
- Open a fresh Finder window.
- Find and highlight the specific photos you intend to save onto the SD card. (To select consecutive photos, hold down the "Shift" key, or for non-consecutive photos, hold down the "Command" key.)
- Drag and drop the highlighted photos into the icon of your SD card on the left side of the Finder window.
In Closing
To recap, we just covered three easy ways to import photos from SD card to Mac; you can now pick any of them at your disposal. Additionally, we also provided some valuable tips to ensure a trouble-free transfer. So, whether you're a photography enthusiast or a traveler capturing new horizons, this guide empowers you with the knowledge to effortlessly transfer SD card photos to your Mac computer. Finally, any queries? Please let us know below.
Related Articles:
5 Best Methods to Open/View HEIC Files on Mac [Easy As Pie]
How to Move Pictures/Photos to SD Card on Android [A Comprehensive Guide]
4 Straightforward Ways to Move WhatsApp to SD Card [Most People Don't Know]
[Easy Guide] How to Transfer SIM Card to New iPhone 17/16/15/14/13/12/11
3 Easy Ways to Recover Deleted Photos from iPhone without Backup
4 Ways to Move Photos from iPhone to iCloud [with Additional Tips]
