How to Transfer Photos from Phone to Laptop without USB? (Android/iOS)
Android phones and tablets are ideal for viewing photos, because these mobile devices allow you to take them with you, so you can view files on the devices anytime, anywhere. However, the storage space of mobile devices is extremely limited, and they can easily be lost or damaged. Therefore, it is a very wise decision to transfer important photos from Android to computer for backup.
However, if there is no data cable available, can the transmission be completed? of course can. This article mainly explains five different methods of how to transfer photos from phone to laptop without USB.
- Way 1. One Click Way on How to Transfer Photos from Phone to Laptop without USB [HOT!]
- Way 2. How to Transfer Photos from Phone to Laptop without USB Cable - Using Bluetooth
- Way 3. How to Transfer Photos from Android to PC via WiFi - Using Google Drive
- Way 4. How to Transfer Data from Mobile to Laptop without Cable - Using Email
- Way 5. How to Transfer Files from Phone to Laptop without USB - Using SHAREit
Way 1. One Click Way on How to Transfer Photos from Phone to Laptop without USB [HOT!]
MobiKin Assistant for Android (Mac version is also available) is a versatile tool for you to transfer photos from phone to laptop without USB cable. It allows you to connect Android phone to PC without USB, but using WiFi (But if you want to use a USB connection, the software is also supported), then, you can transfer files between Android phone and PC/Mac freely. It has released versions for both Windows and Mac.
Main Features of Assistant for Android
- Connect an Android phone to a computer via USB or WiFi.
- Transfer contacts, SMS, photos, videos, music, apps, call logs, documents, and more between phone and computer.
- Edit, add, or delete contacts, manage media files, and send text messages from a computer.
- Works with most Android brands, including Samsung, Huawei, Motorola, Sony, OnePlus, Google, and Xiaomi.
- Easy to use, powerful, and secure.
- Compatible with Windows, macOS, and all Android versions.
- Provides two ways to connect an Android phone to a computer: use a USB cable or WiFi.
Download either the Windows or Mac version of the program according to your computer system and begin to use it to transfer photos from phone to laptop without USB.


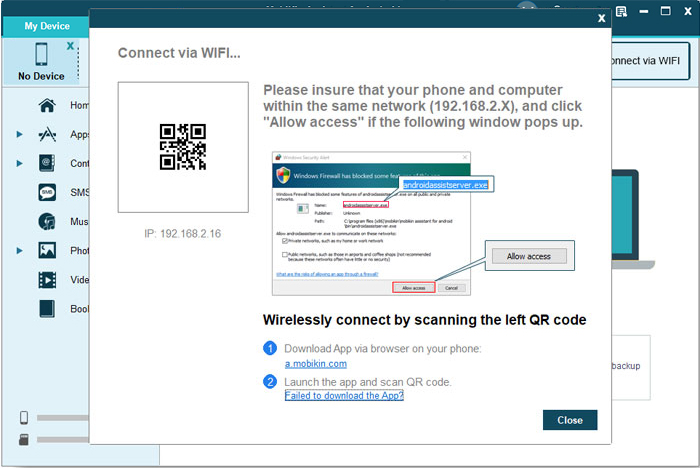
Step 1. Connect phone to computer via WiFi
Launch the Assistant for Android on your computer. Turn on WiFi on your Android phone and connect it to a stable WiFi network. Choose "Connect via WiFi" from the upper right corner of the program interface to connect your Android phone to the computer via WiFi.
For more details about WiFi connection, you can go to the page: How Can I Connect My Phone via WiFi.
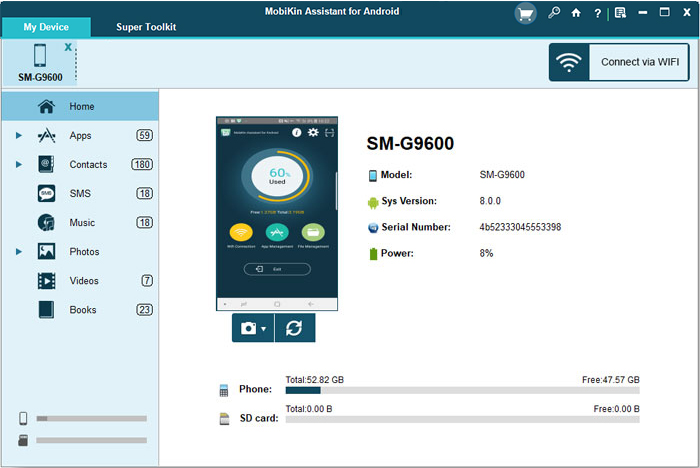
Step 2. Choose the photos you want
Once your phone is connected successfully, the program will display all your Android data by category. If you only need to transfer photos from your phone to computer, you should choose "Photos" from the left sidebar and all photos on your phone will be scanned out and displayed on the right side window.
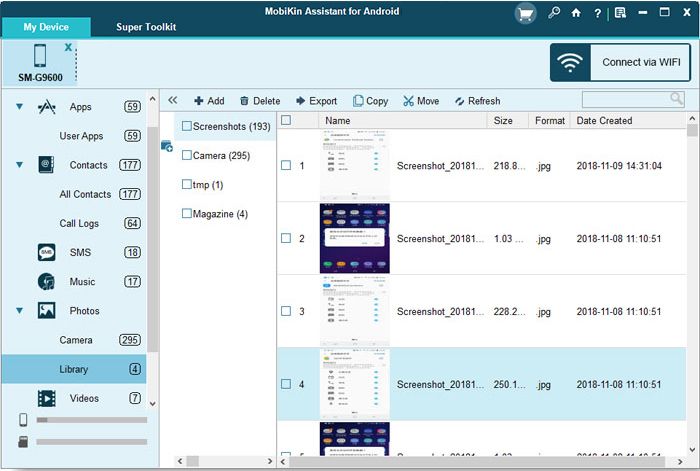
Step 3. Transfer photos from phone to laptop without USB
Preview and tick all the photos that you want to transfer to PC and click "Export" from the top menu. Select a folder on your computer to save the exported photos and click OK. Then, all selected photos will be transferred from your phone to computer in no time.
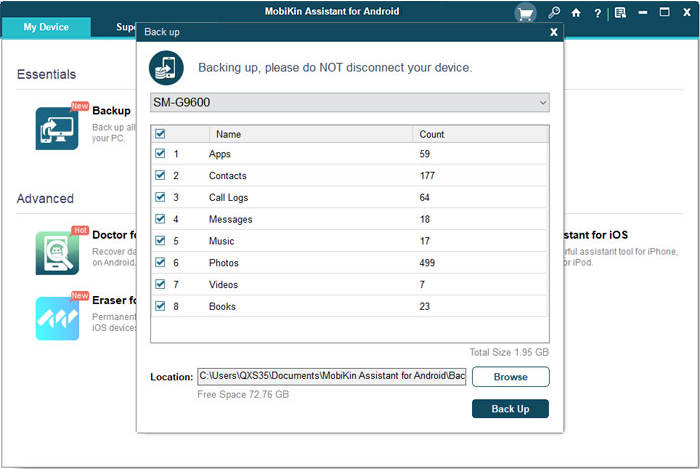
You can also apply the one-click backup & restore ability of the program to transfer files from phone to PC without USB in just one click. To do this, you can tap on "Super Toolkit" > "Backup" > check "Photos" and then click "Back Up".
Can't Miss:
Way 2. How to Transfer Photos from Phone to Laptop without USB Cable - Using Bluetooth
Technology is changing rapidly, but traditional technologies still exist and are used. Bluetooth is one of the earliest data-sharing technologies. Now let's take a look at how to transfer files from Android to PC without USB, but using bluetooth. If you are using a Mac, you can see how to transfer files from Android to Mac via Bluetooth.
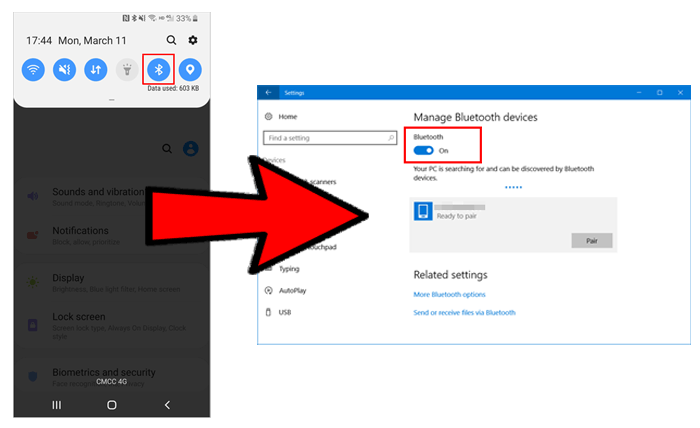
Step 1. First of all, go to Settings on your computer to turn on Bluetooth, or you can start it by clicking the Windows logo in the lower left corner of the computer desktop and typing in "Bluetooth" to the search bar.
Step 2. Turn to your Android phone, open the Bluetooth and search for other devices connected via Bluetooth. Just choose the name of your computer and pair them together via a verification code.
Step 3. Wait for a while when your Android phone and PC are paired by Bluetooth successfully, you can go to your Android phone, open the "Gallery" folder and select the photos you need.
Step 4. After all the selected photos you want to transfer, you can tap on the "Share" icon and choose "Bluetooth" > the name of your computer.
Step 5. Now, all your selected photos will be transferred from your phone to your computer via Bluetooth. Please DO NOT disconnect the Bluetooth connection between the two devices before the photo transfer is finished.
Way 3. How to Transfer Photos from Android to PC via WiFi - Using Google Drive
With the birth and growing popularity of cloud services, sharing photos and videos is more comfortable than ever. There are many excellent cloud storage services on the market for users to choose, such as Google Drive, Dropbox and so on. Now, let's take the easy-to-use Google Drive as an example and tell you how to transfer files from Android to PC without USB, but using Google Drive.
Step 1. Download and install the Google Drive app on your Android phone, open it, and log in with your Google account. If you don't have a Google account yet, you need to register one now.
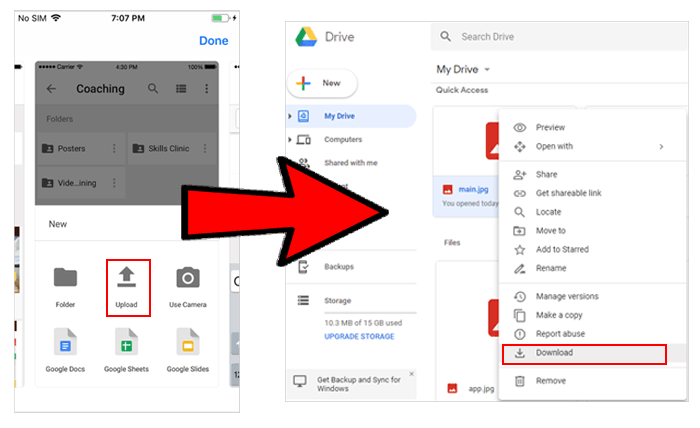
Step 2. After successful login, click the "+" or "Upload" button on the main interface of Google Drive to upload all the photos you want to transfer to Google Drive.
Step 3. After all the photos have been successfully uploaded to Google Drive, you can go to your computer, open the Gmail account, and log in using the same Google account you just used to back up the photos. Then go to the folder where the photos are stored, select the photos you need, and download them to your computer.
You'd better connect your mobile phone to a stable WiFi network so that the photo transfer can be completed smoothly and quickly. (If needed, you can click to learn more details about how to backup Android data to Google Drive>>)
Way 4. How to Transfer Data from Mobile to Laptop without Cable - Using Email
In fact, we can also transfer files from Android to PC without USB by email. However, the same as the way 3 above, here we also need to connect the Android device to a stable WiFi network to ensure the smooth transmission of photos. Because the transmission speed is determined by the speed of the WiFi network.
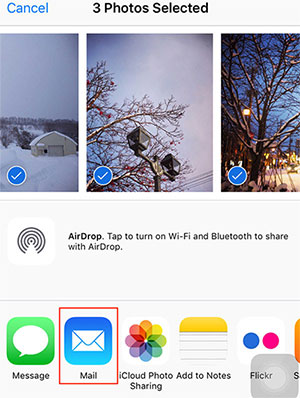
Step 1. Turn on your Android phone and go to the "Gallery" app. Preview and choose the photos that you want to transfer to computer.
Step 2. Once you have selected all the pictures you need, you can tap on the "Share" icon and choose the option of "Mail".
Step 3. Next, you will be popped up with a "Recipient" section. Just type your own email address and tap on "Send" to transfer the photos to your mailbox as an attachment.
Step 4. Now, turn to your laptop, open your mail box and log in to your email account.
Step 5. Open the mail you send from your Android phone and download the attached photos on your computer.
Don't Miss:
Way 5. How to Transfer Files from Phone to Laptop without USB - Using SHAREit
A fast and modern way to transfer photos from phone to laptop without USB is to use a specially designed application, which allows people to share data on different devices without too much trouble. In the Google Play store, you can find many similar data transmission apps. SHAREit is one of the better ones. Its transmission speed is 40 times that of Bluetooth.
Step 1. First, you need to download SHAREit on both your Android phone and PC. Connect them to the same local wireless WiFi.
Step 2. Run SHAREit software on your laptop and click to display the QR code on the computer.
Step 3. Turn to your Android phone, open the SHAREit app and choose "Scan to connect" from the main menu. Then, scan the QR code on the PC.
Step 4. Once the two devices are paired successfully, you can click "Send" on the SHAREit screen from your Android phone and select the photos you need to transfer to PC.
Step 5. On your computer, tap on "Receive" on the interface of SHAREit software and all the selected photos will be transferred to your computer instantly.

Words in the End
The above are the five powerful methods we listed for you to connect Android phone to laptop without a cable so that you can complete the photo transfer from Android to PC without USB.
Bluetooth is the oldest method but very slow and requires the devices to stay close. Google Drive and email depend on a stable Wi-Fi connection, while Google Drive offers only 15GB free storage and email limits attachment size. These methods are suitable only for small transfers. SHAREit works well but is inconvenient because it must be installed on both devices.
In the end, we recommend MobiKin Assistant for Android, which has a fast transfer speed, no restrictions on the size of the file to be transferred, and is easy to use. It is the ideal tool for transferring photos from phone to laptop without USB.
Related Articles
9 Best Photo Manager for iPhone to Organize Photos on iPhone
Top 13 Photo Managers for Android to Manage Android Pics with Ease
How to Recover Permanently Deleted Photos on iPhone without Backup?